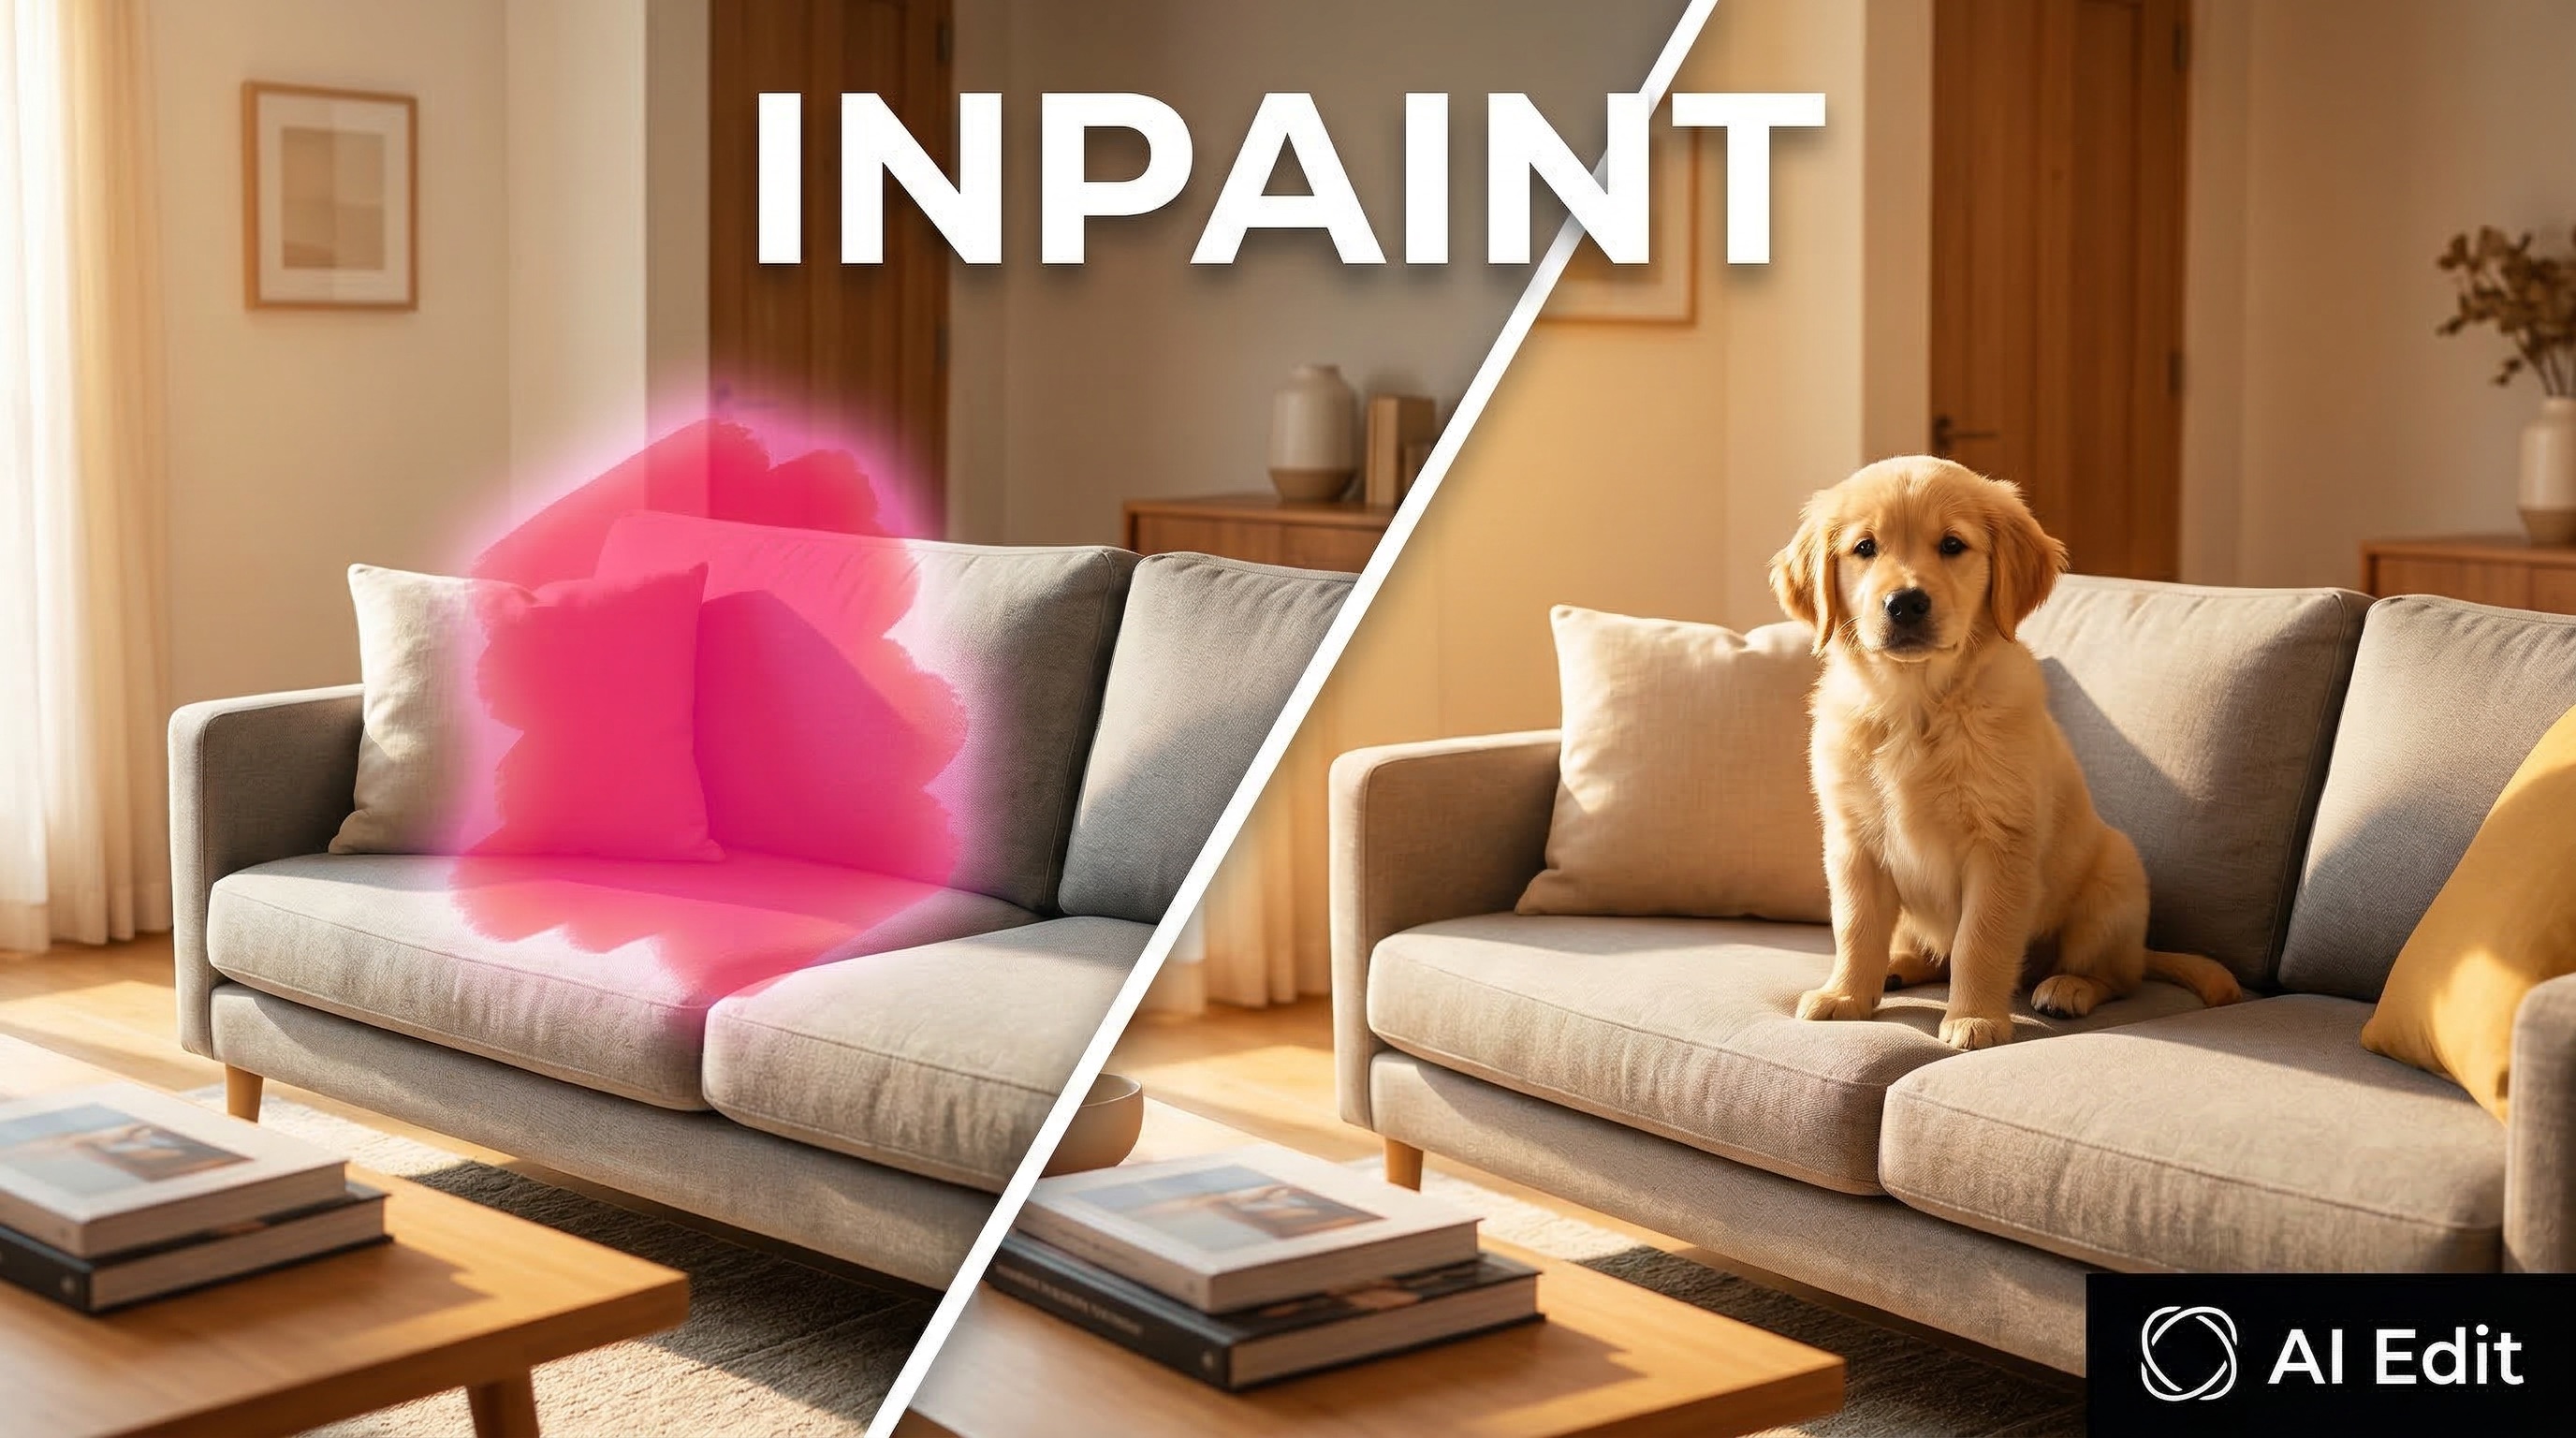
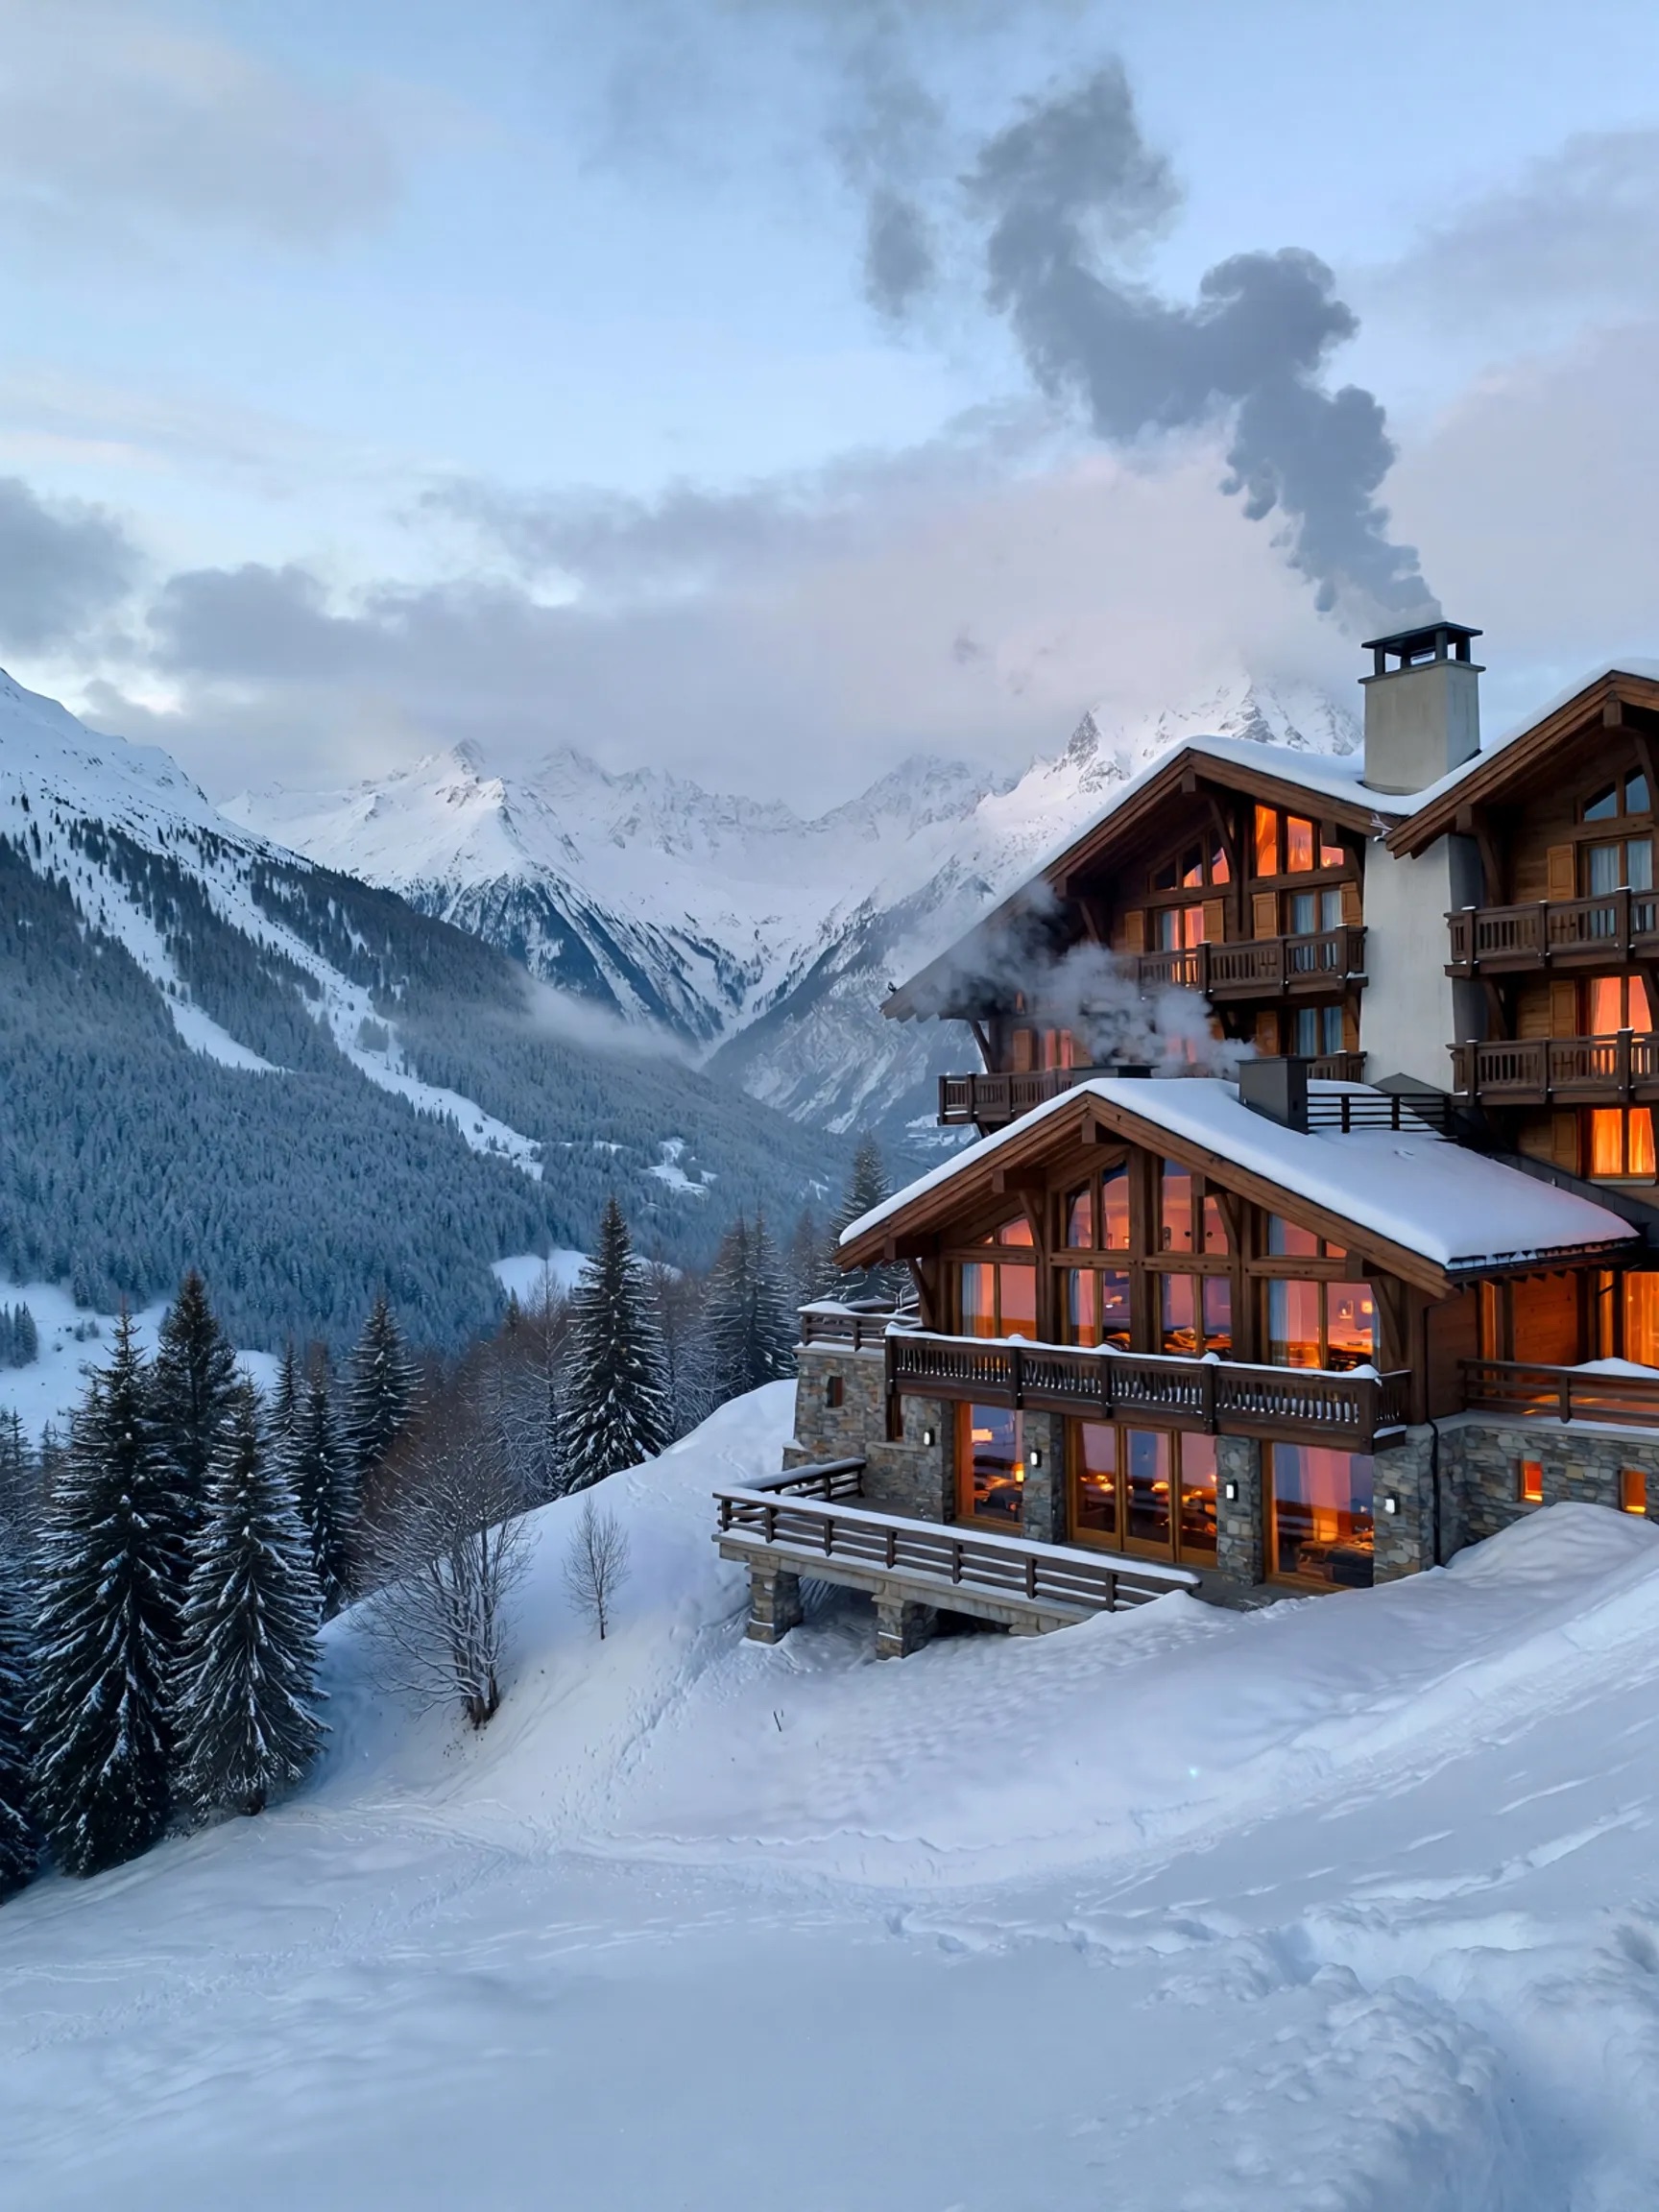
You’ve got the perfect shot — but there’s a watermark across it, an ex in the background, or a logo on a shirt that ruins the whole thing. You don’t want to re-edit the entire photo. You just want to fix that one spot.
That’s exactly what inpainting is for.
Instead of editing the entire image, you paint over the specific area you want to change, tell the AI what to do with it, and leave everything else untouched. It works as an object remover, a photo stamp remover, a way to remove text from image files — really, anything where you need to change one part of a photo without touching the rest.
This guide covers what inpainting actually is, how inpainting AI works under the hood, and a step-by-step walkthrough of using the inpaint online tool in AI Edit — with real examples from our gallery. You can inpaint anything from product photos to family pictures. No local install needed — it’s an inpaint web tool that runs entirely in your browser. You can also remove object from photo files with precision by masking exactly what you want gone.
What Is Image Inpainting?
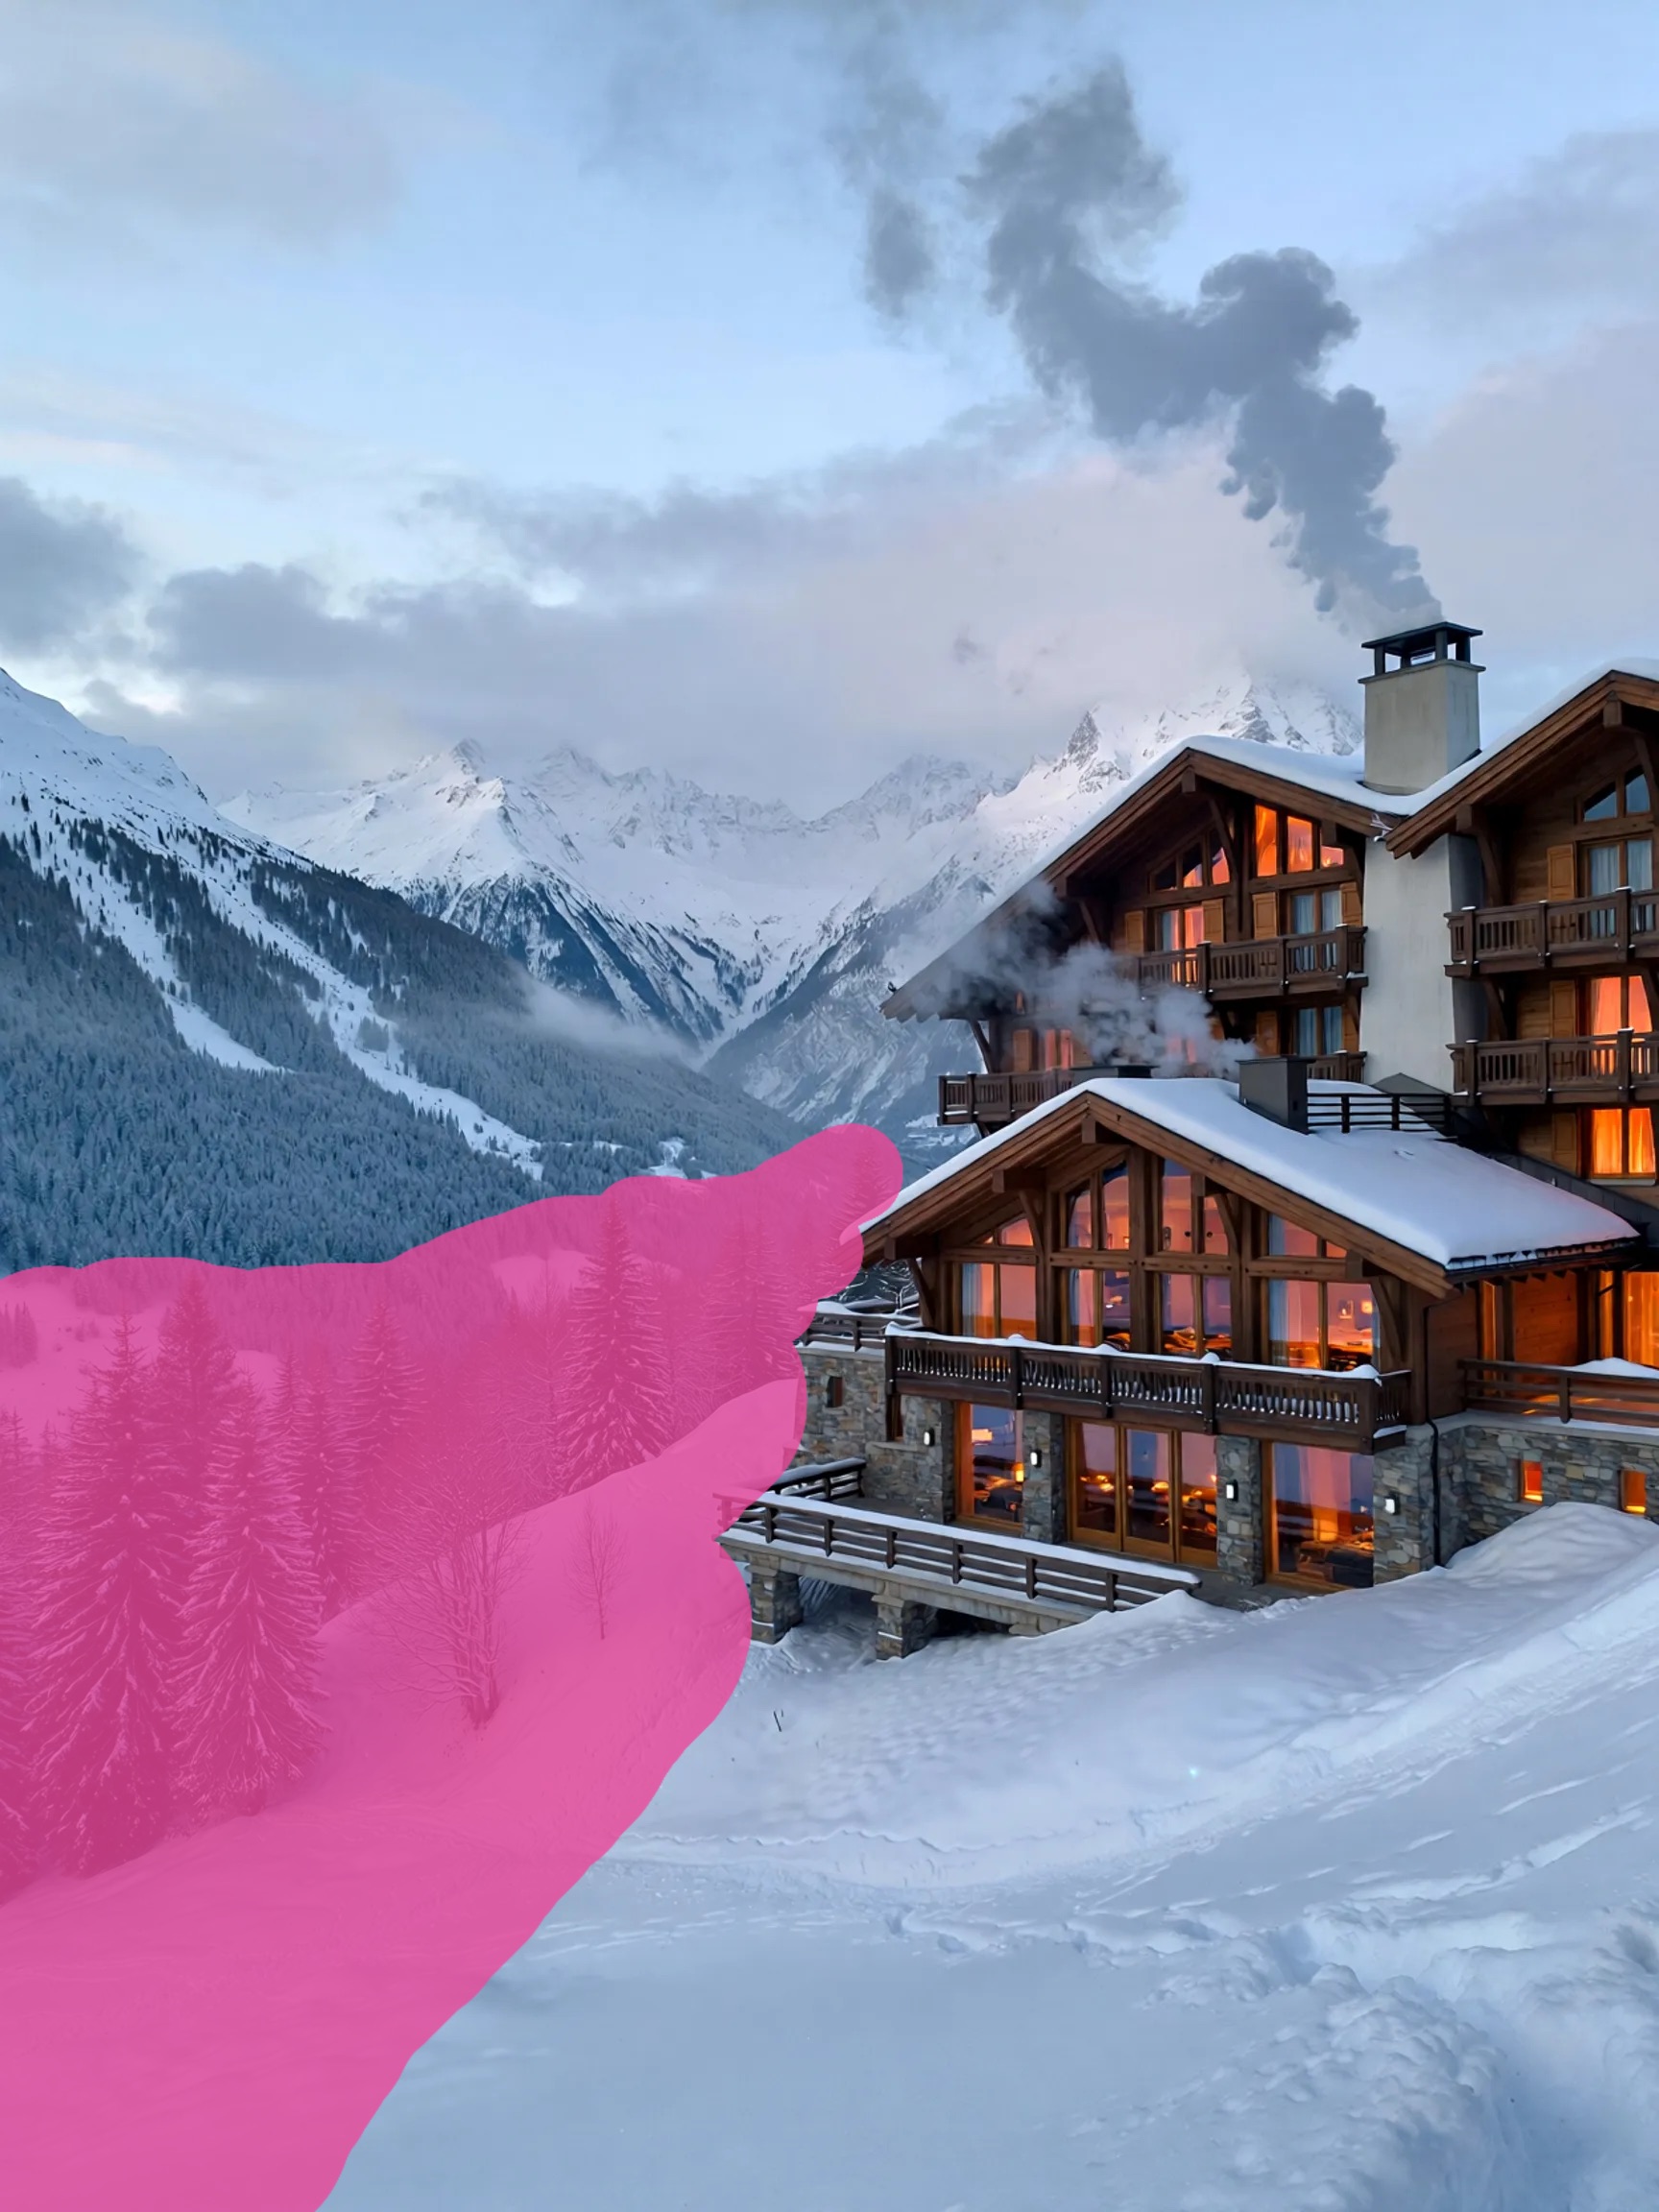
Inpainting is a technique where you selectively edit a region of an image while keeping the rest intact. You define a mask — the area you want to change — and the AI generates new content that blends seamlessly with the surrounding pixels.
The concept isn’t new. Photographers and digital artists have been doing manual inpainting in Photoshop for decades — clone stamp, content-aware fill, healing brush. If you’ve used Stable Diffusion Forge UI, you’ve probably seen an inpaint tab there too (if you’re wondering “forge ui inpaint what is it” — it’s the same concept, just running locally instead of in the cloud). But AI inpainting is fundamentally different from the old manual approach. Instead of copying nearby pixels, a diffusion model generates entirely new content that matches the context, lighting, perspective, and style of the original image.
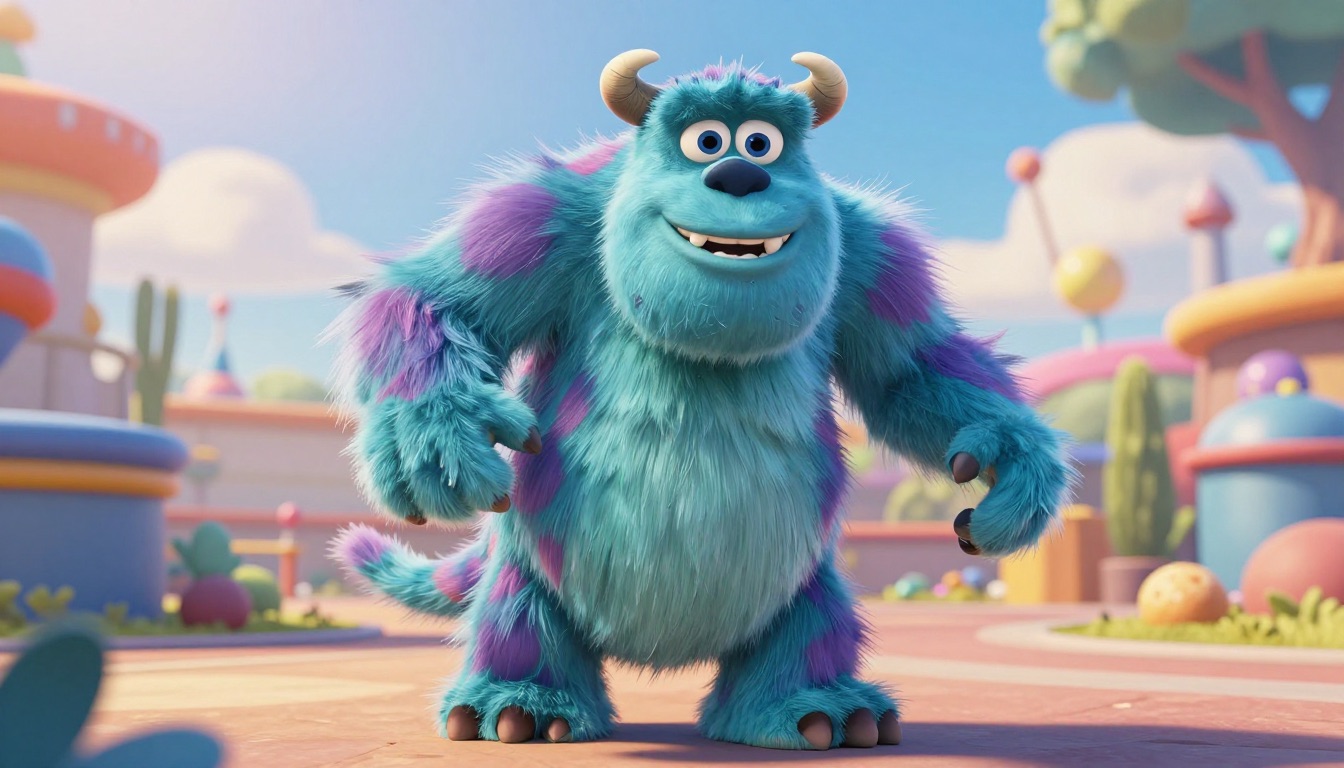
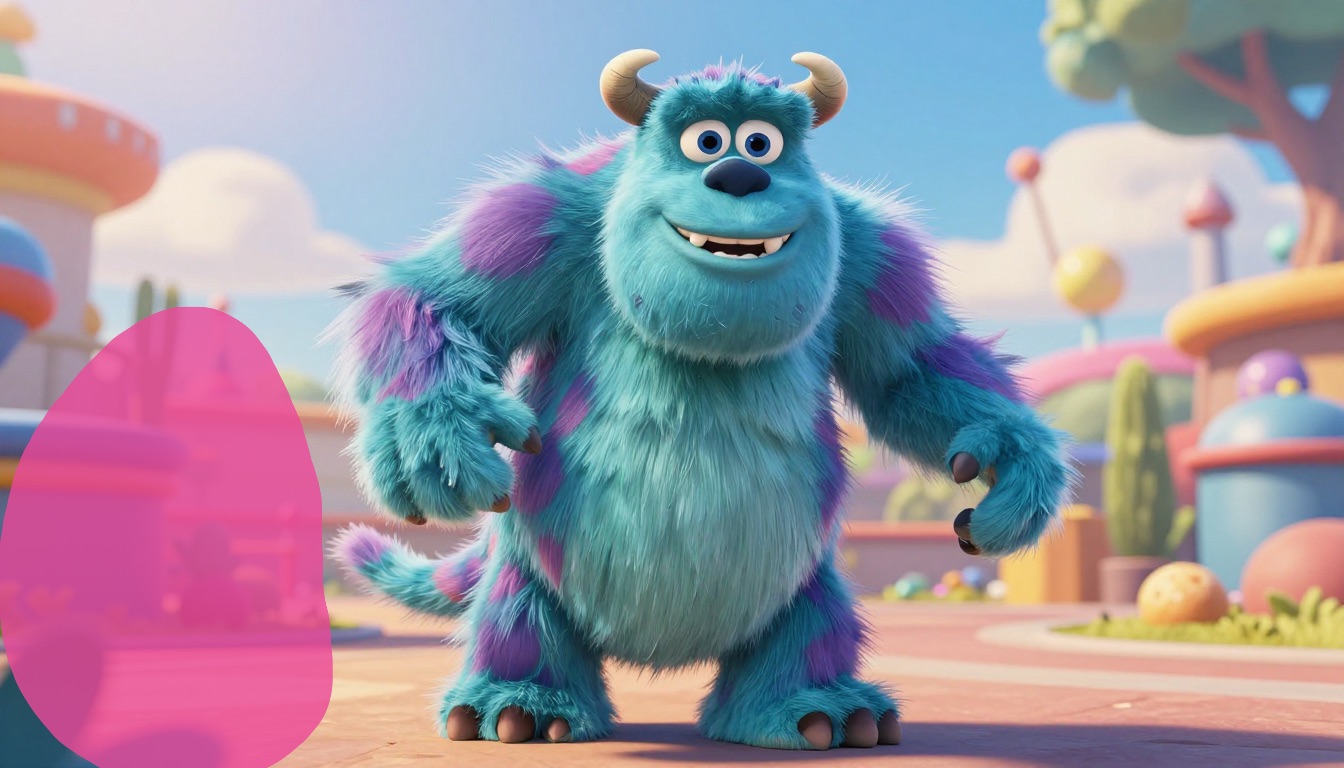
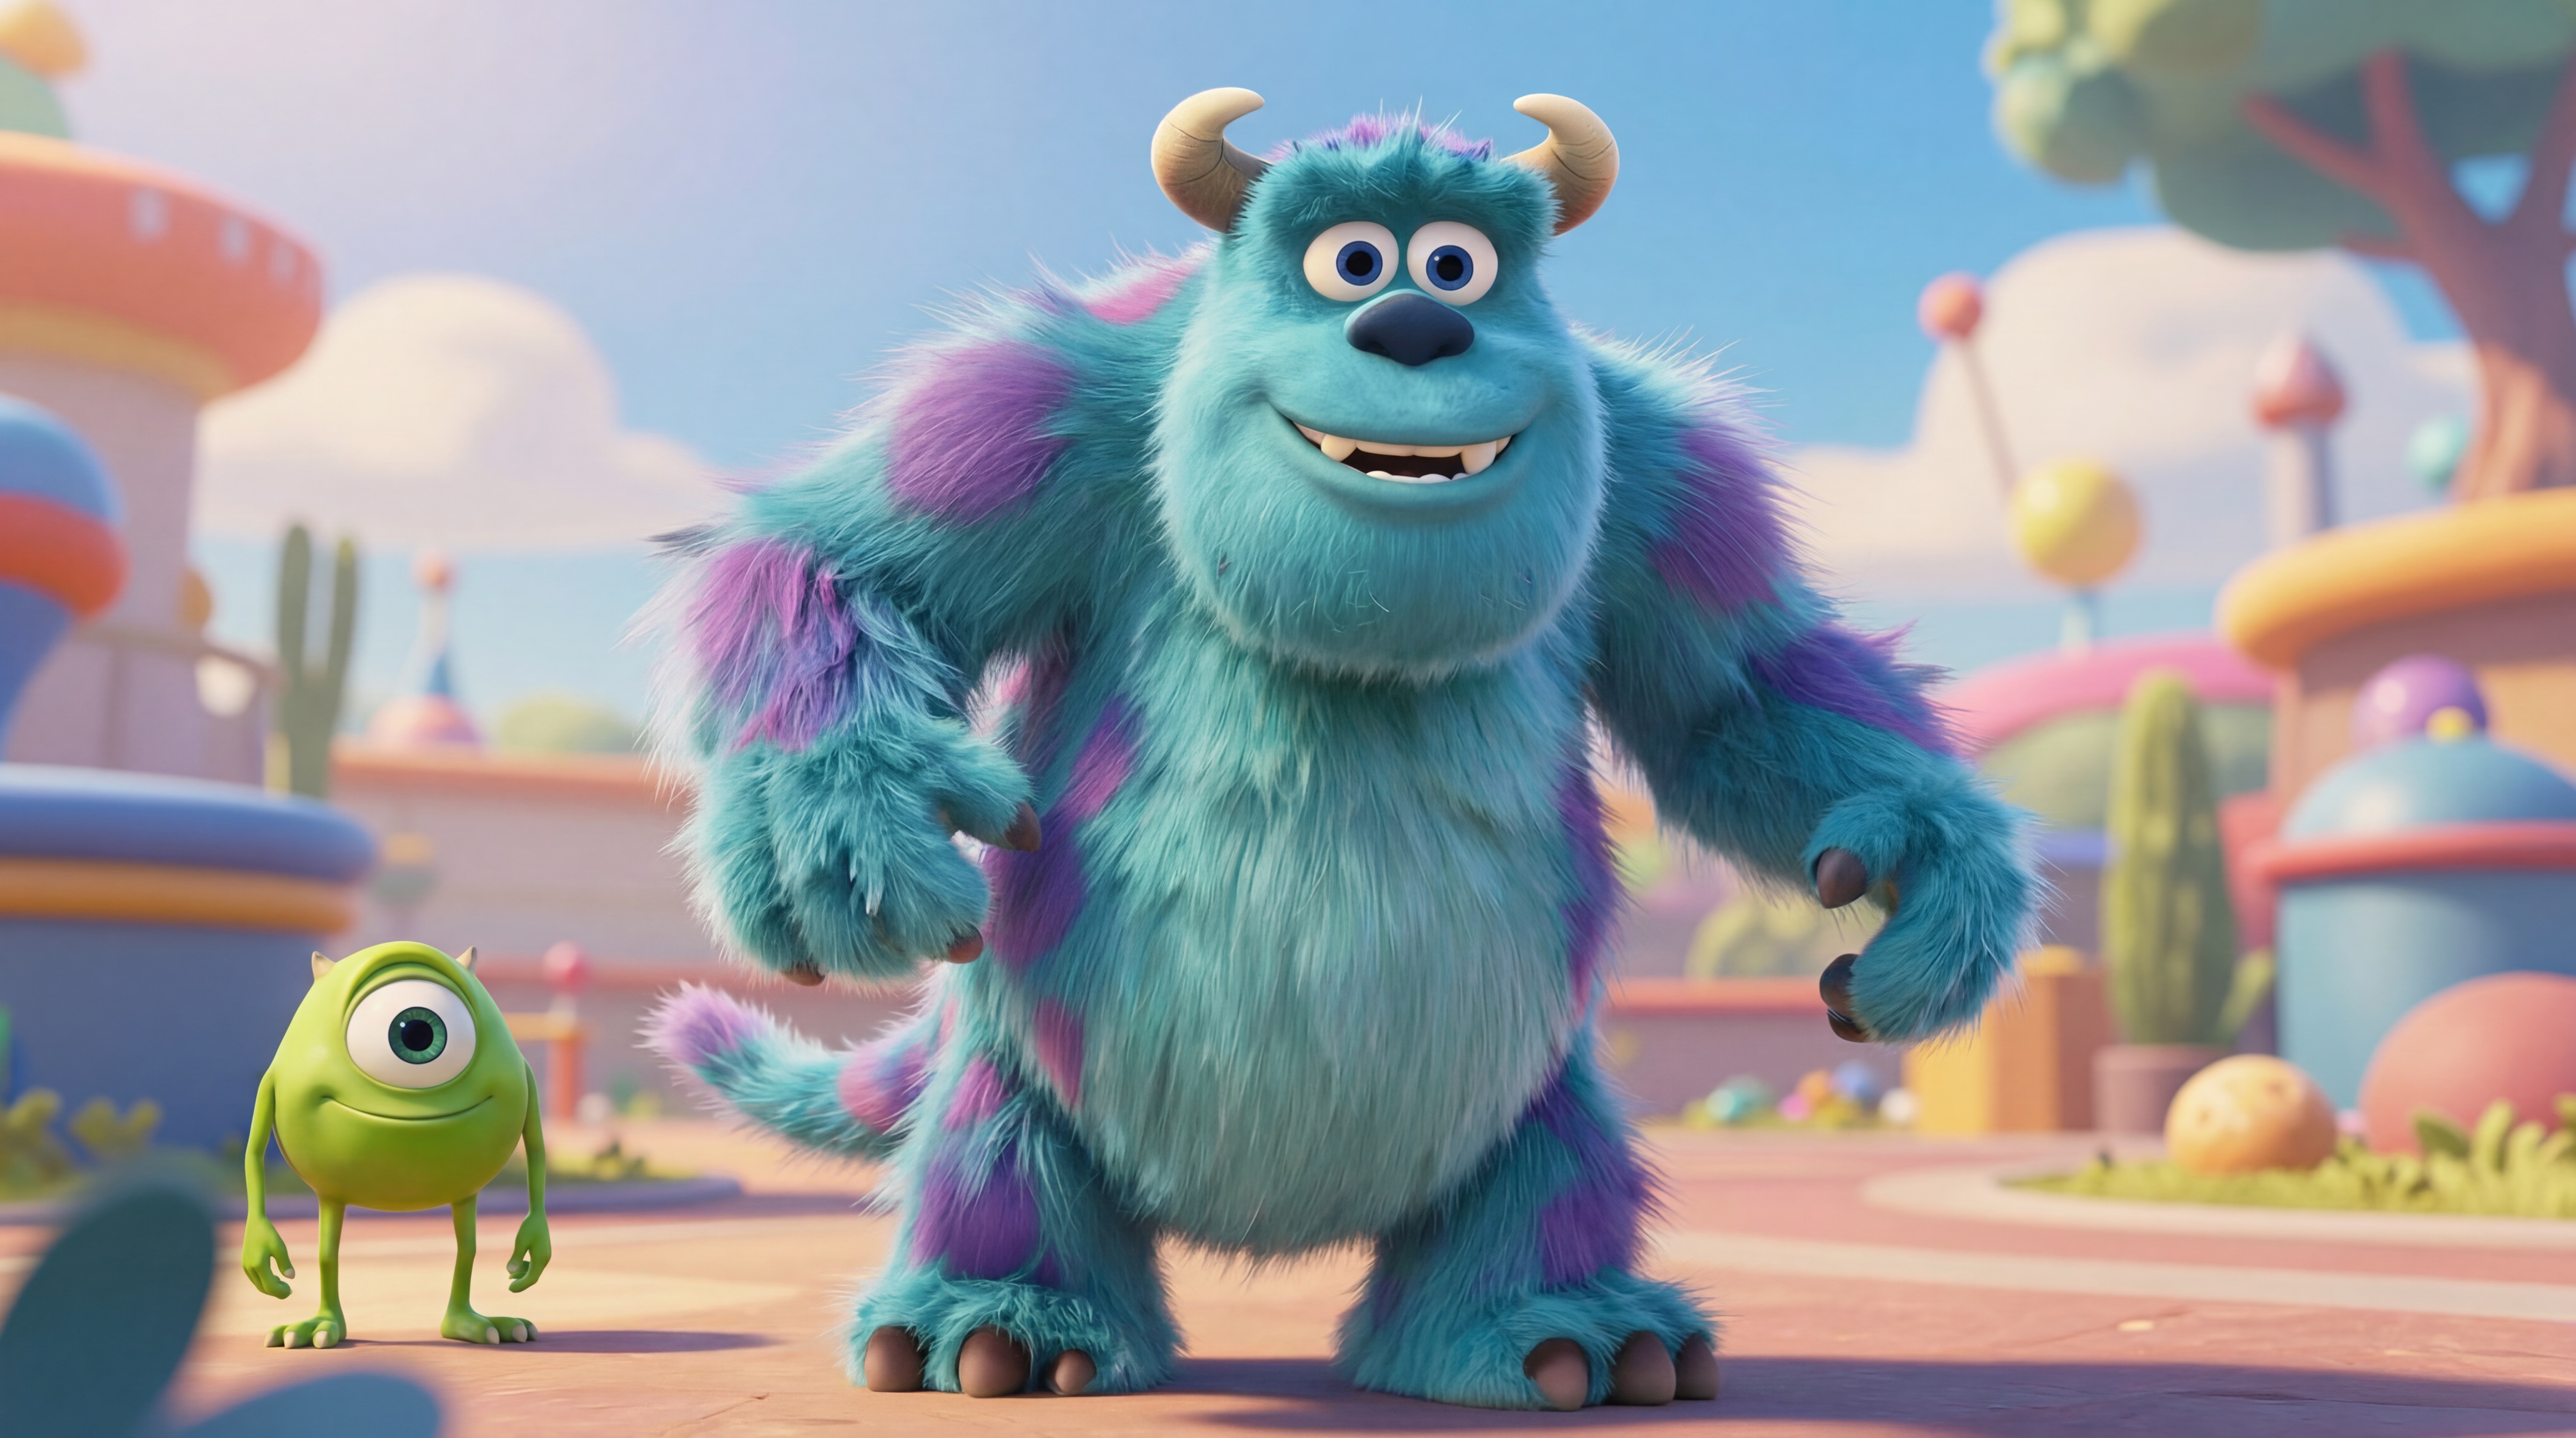
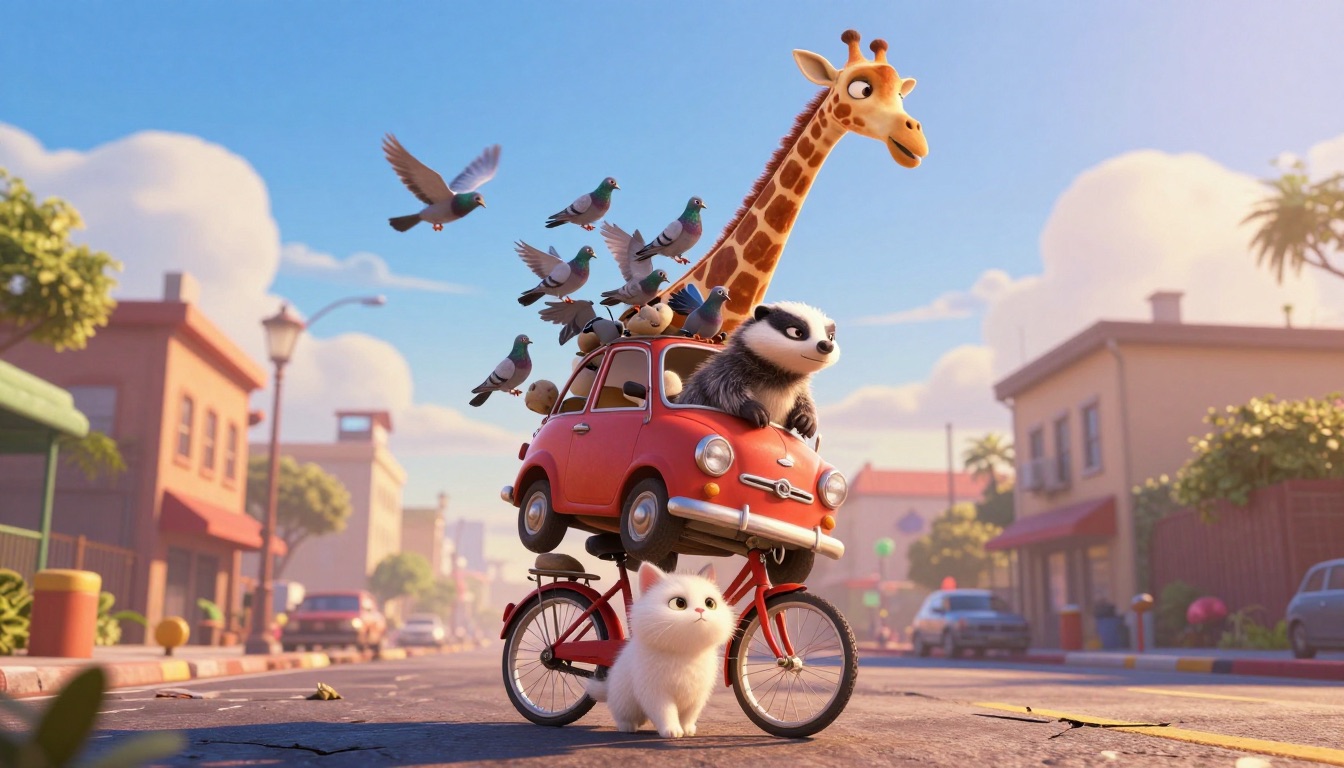
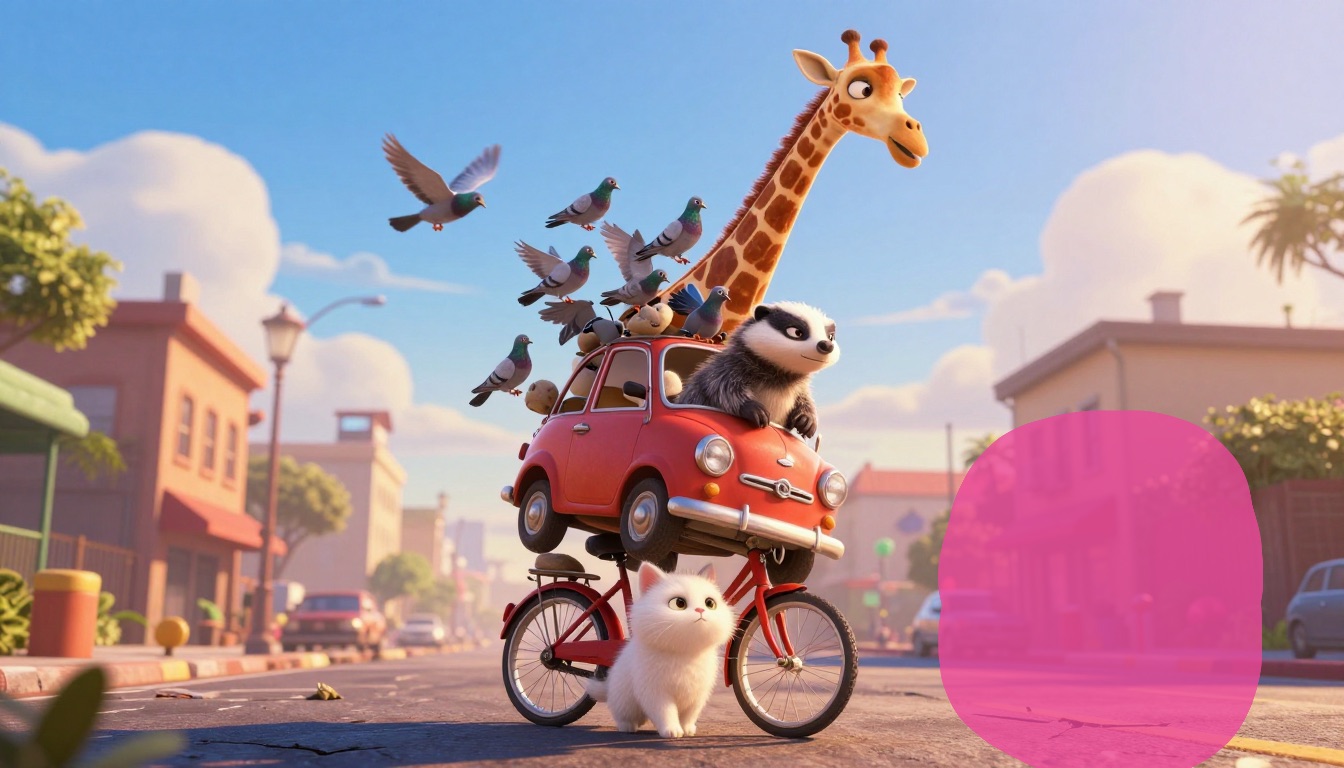
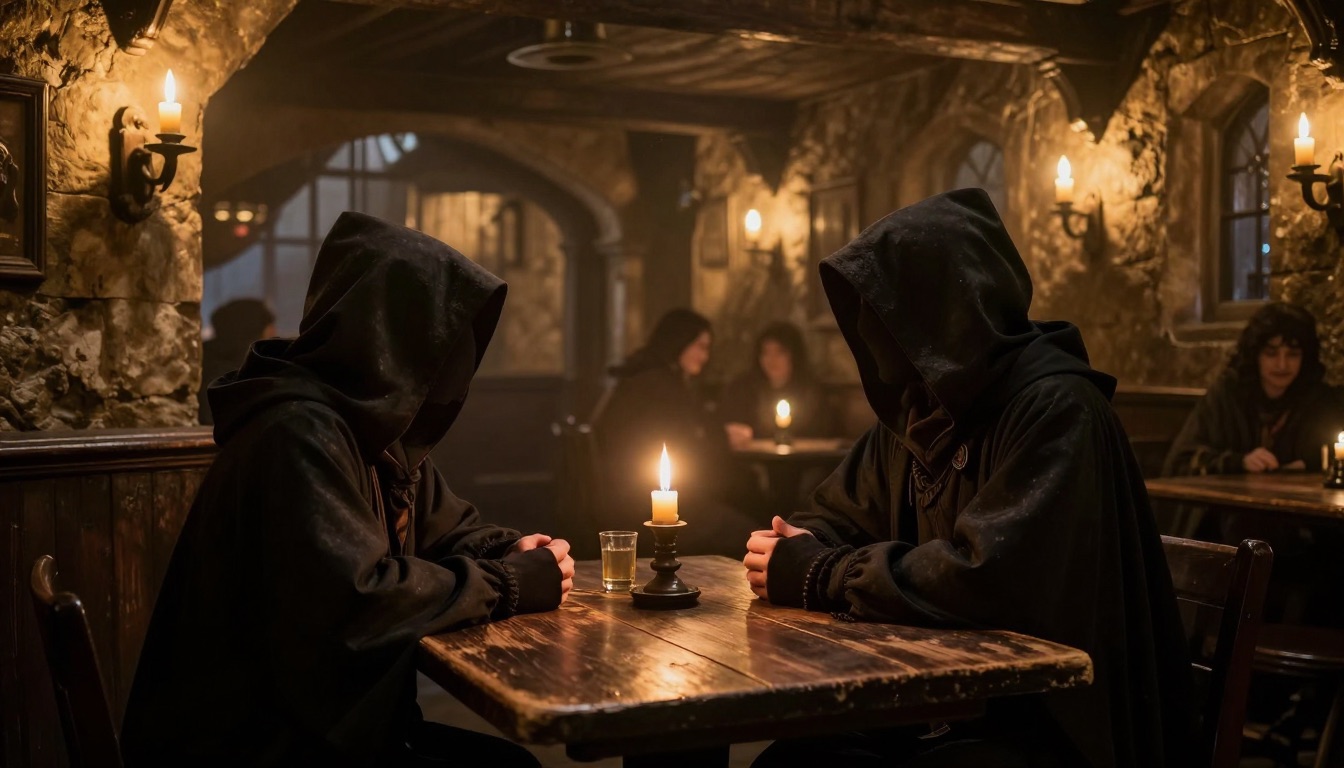
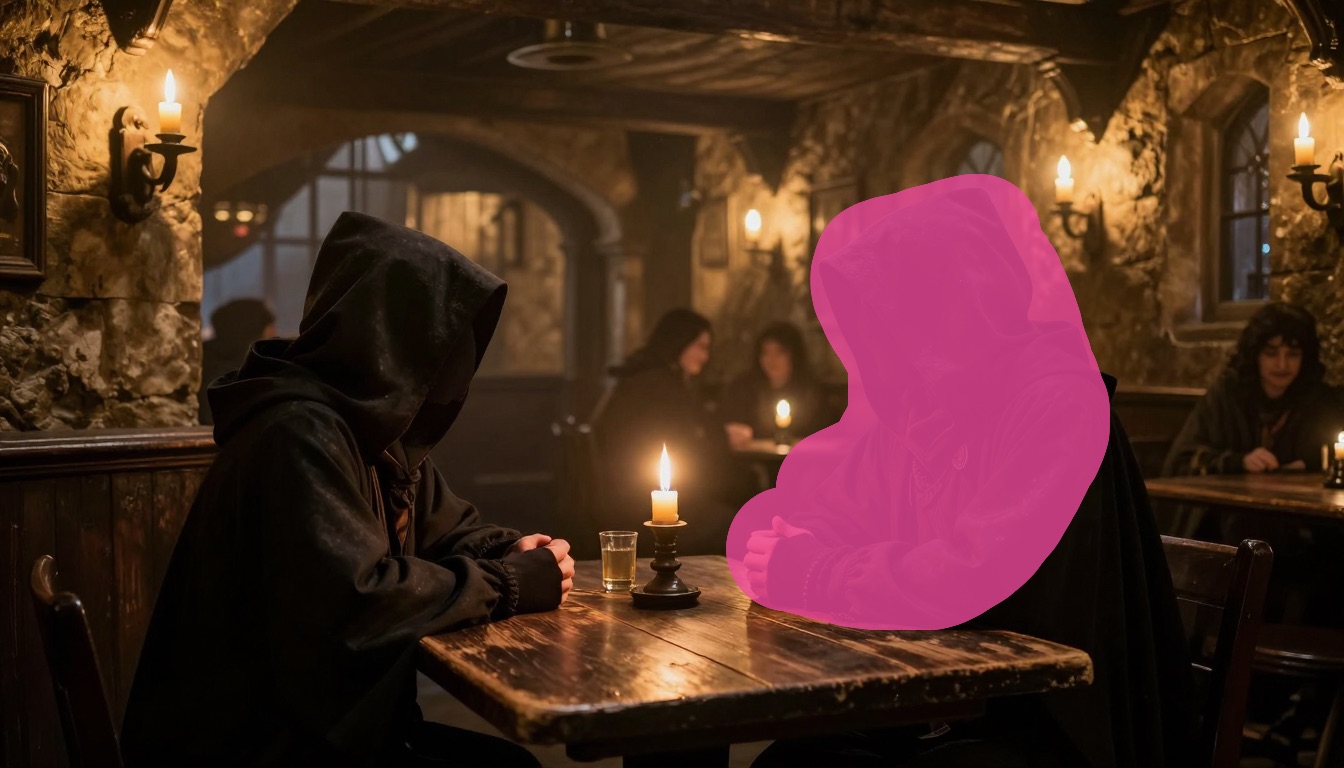
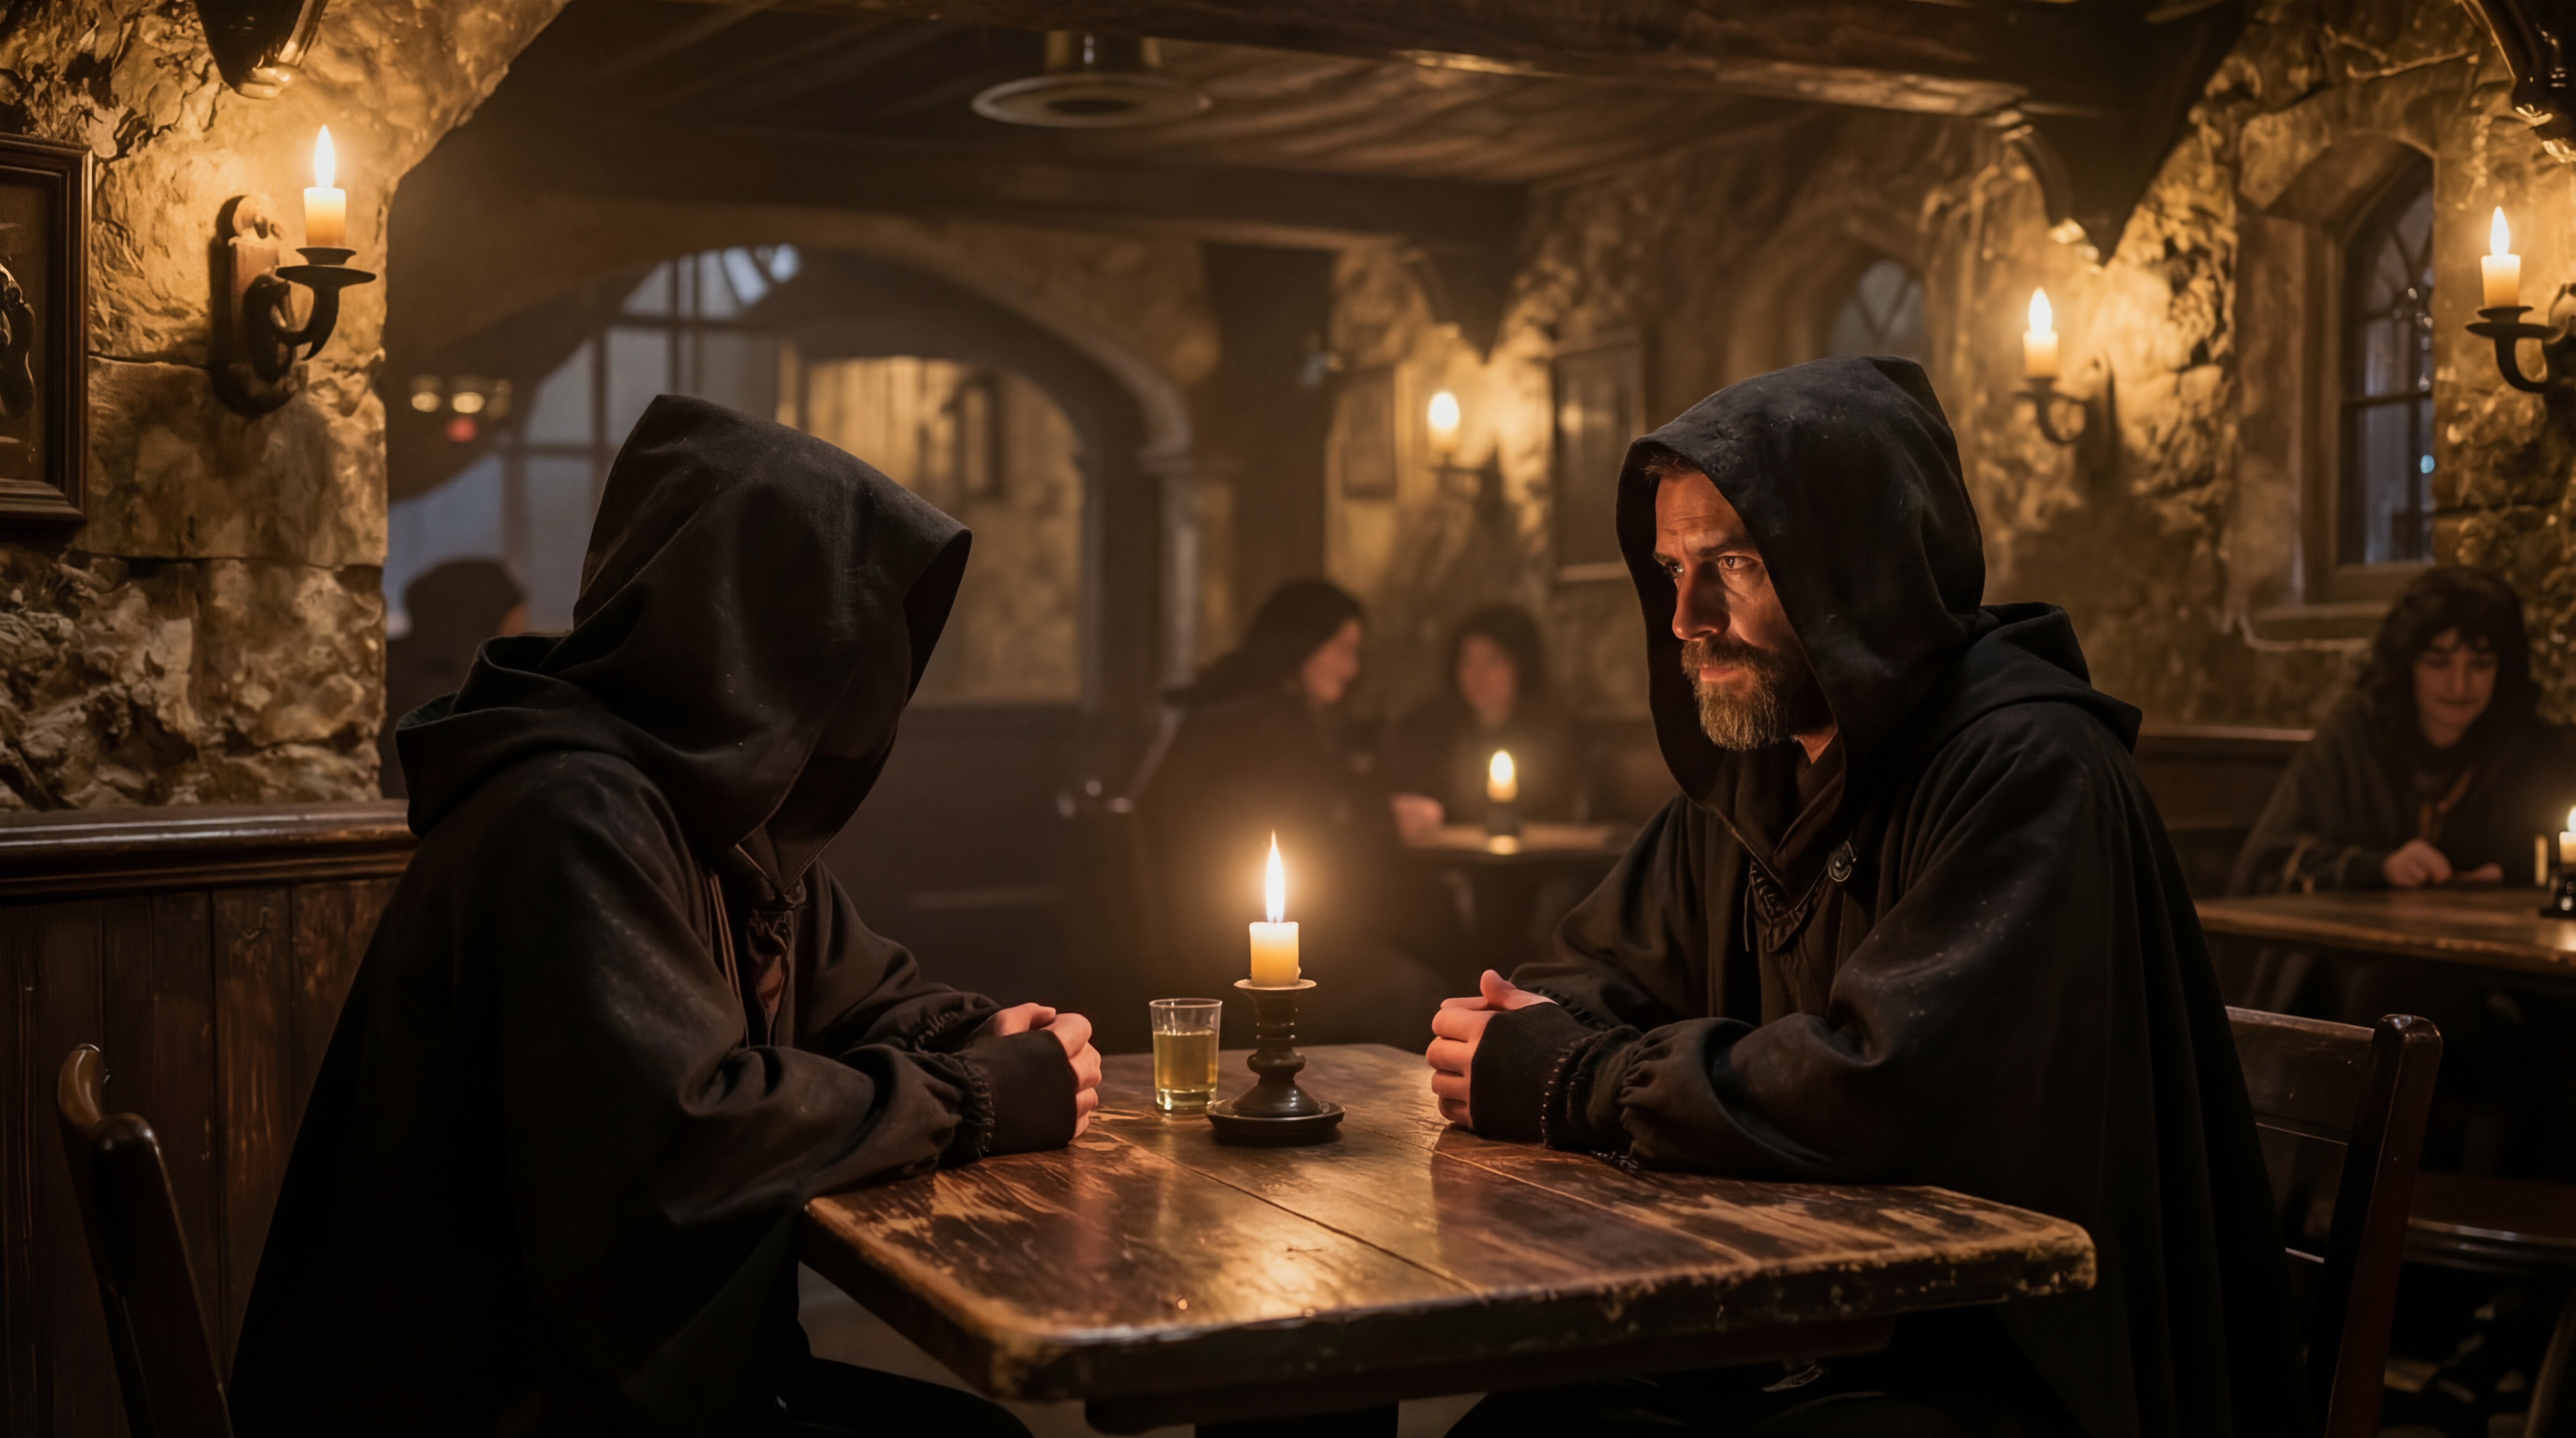
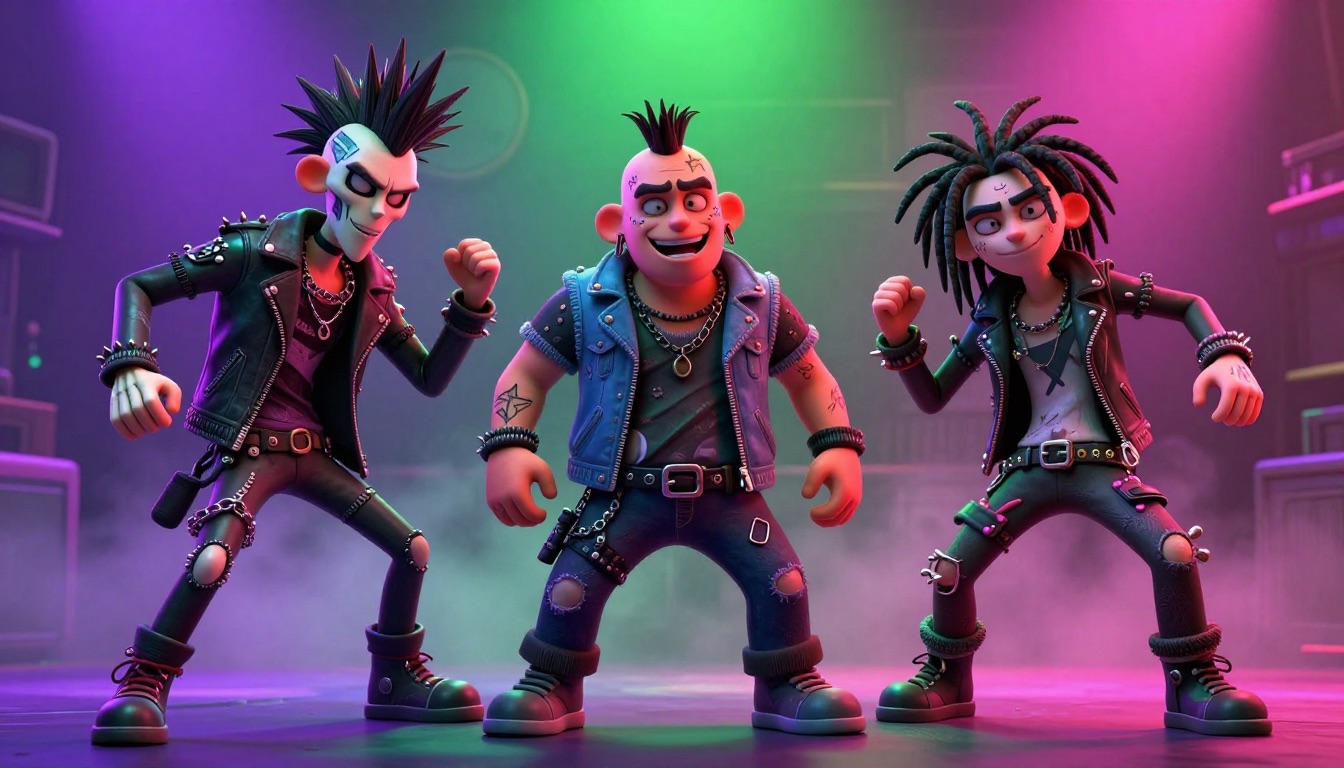
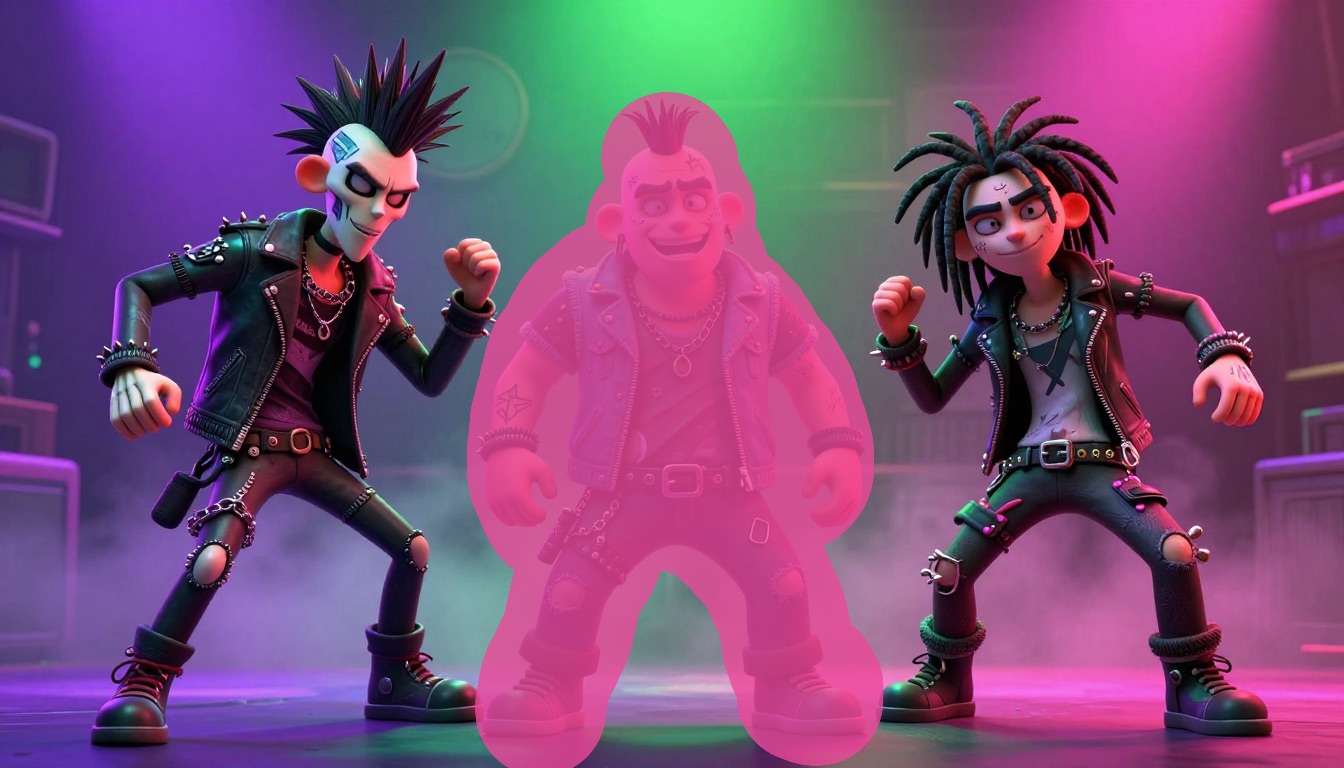
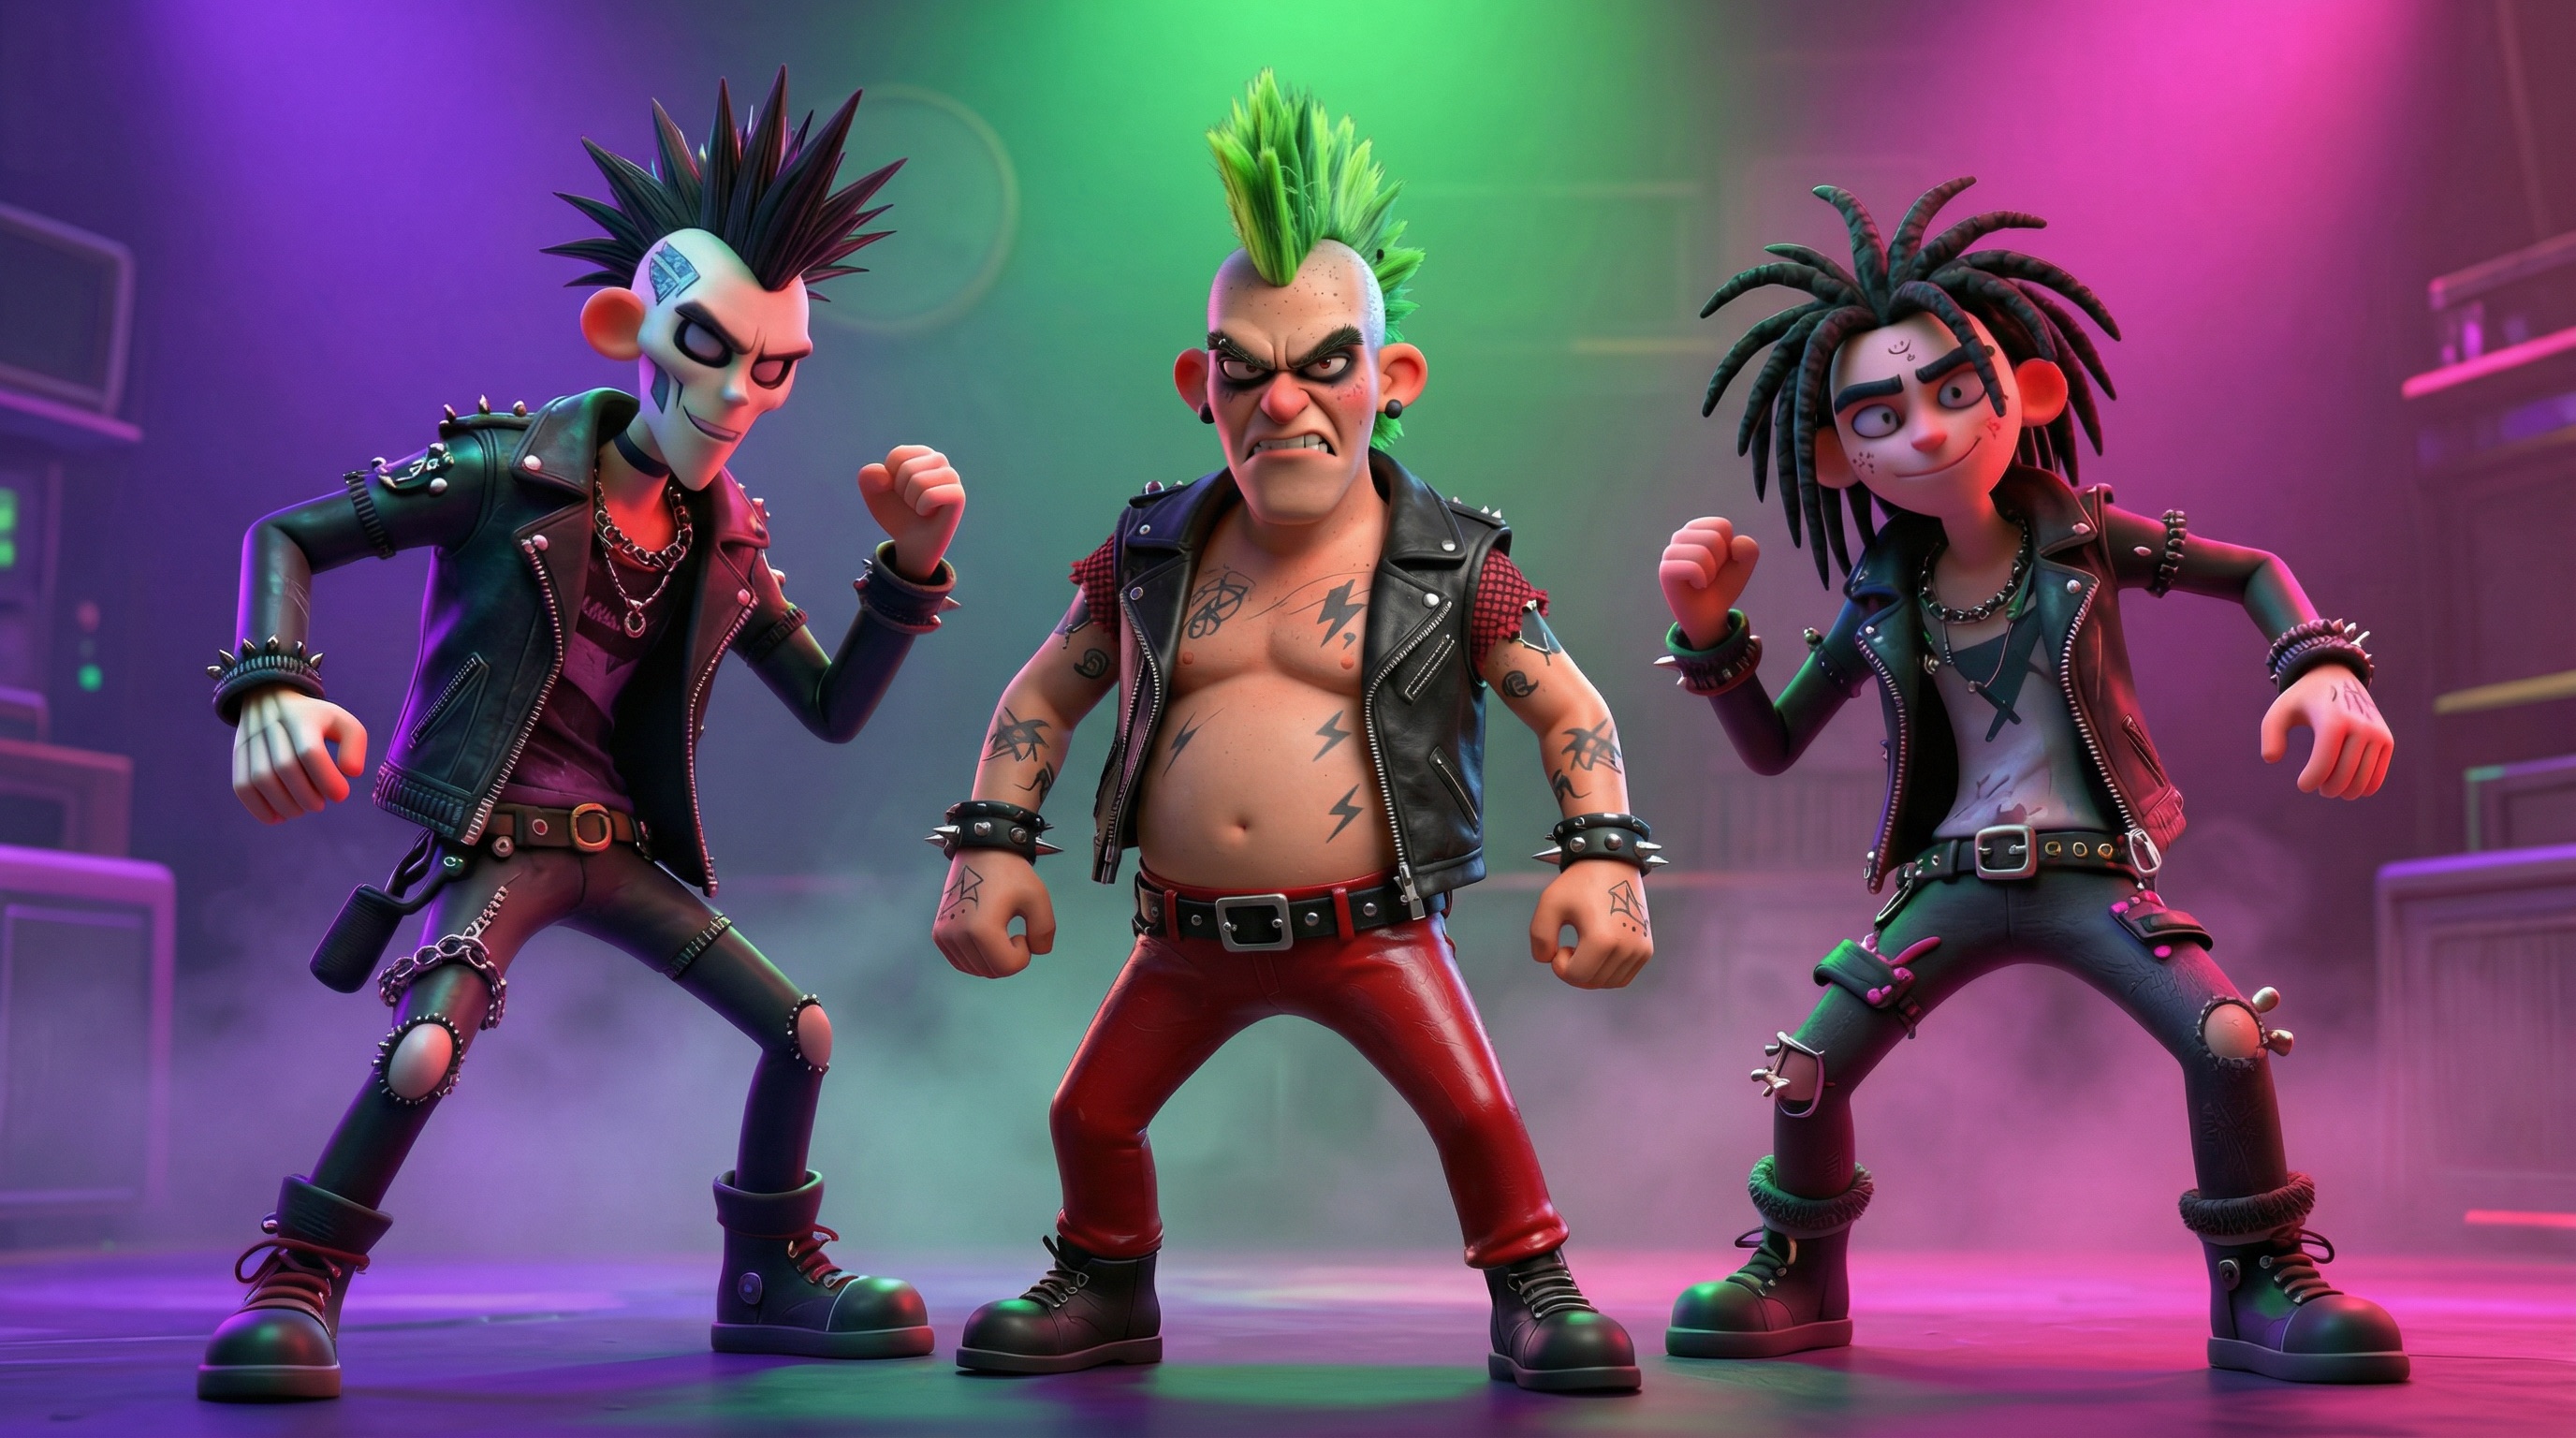
Here’s an example — adding a Pixar-style 3D monster to a scene. The mask defines where the monster should appear, and the prompt describes what to generate:
You can use inpainting to:
- Add new objects to a scene — describe what you want in a text prompt, or attach a reference image to place a specific object exactly where you mask it
- Replace specific elements — swap a blue sky for a sunset, change clothing, put a different product on a table
- Fix and clean up areas — repair damaged regions, smooth out distractions, fill in missing parts of an image
- Remove unwanted object from any photo — erase anything you don’t want in the frame and let the AI reconstruct what’s behind it
- Remove text from image online — watermarks, captions, overlaid text, date stamps. Works as a photo stamp remover too
The key difference from full-image editing is precision. With inpainting, you’re not re-generating the whole photo. You’re surgically modifying a piece of it.
Real Examples: What Inpainting Can Do
Before we get into the technical details, let’s look at what’s actually possible. Every example below was created with the AI Edit inpaint tool using Nano Banana Pro or Nano Banana 2.
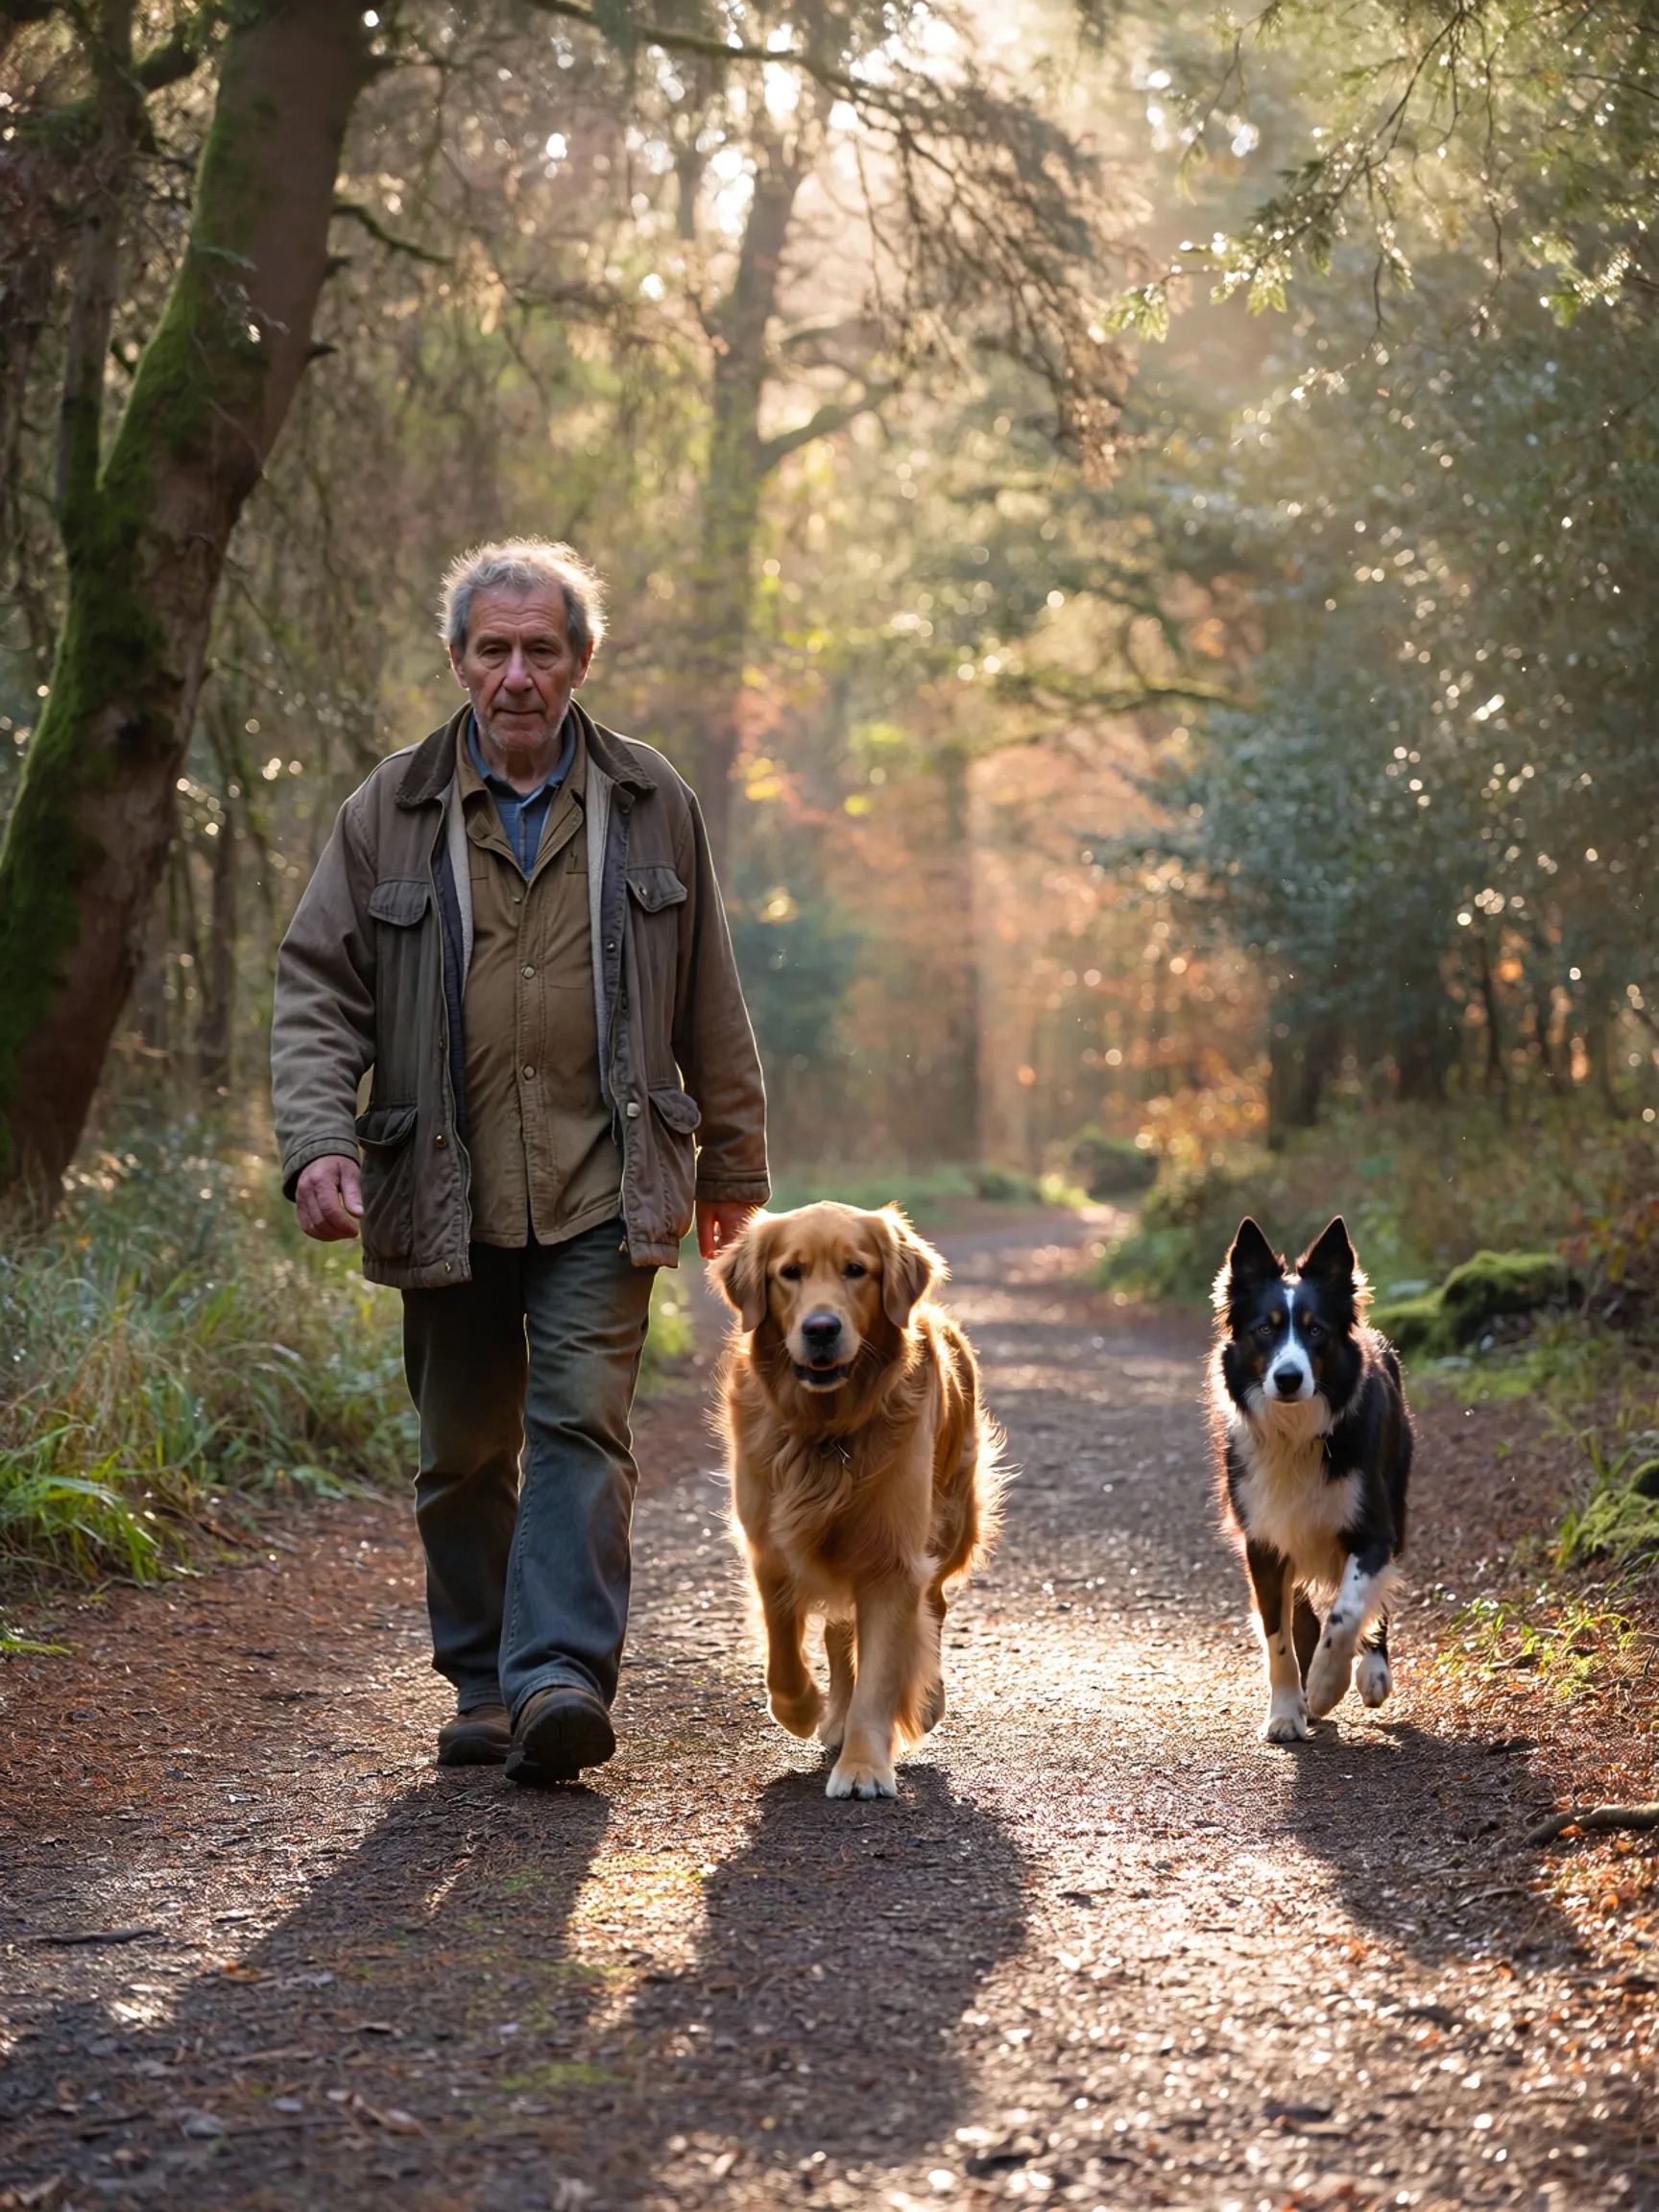
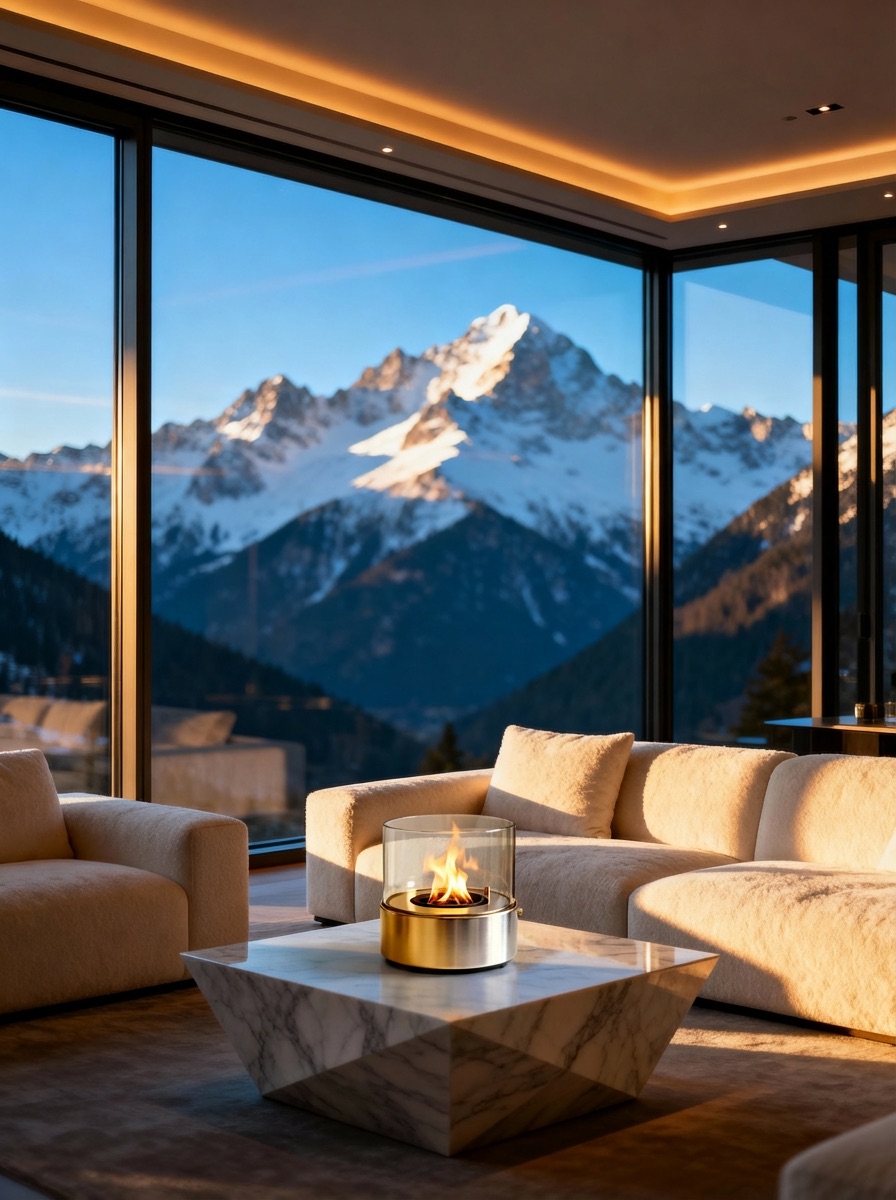
Adding Objects to a Scene
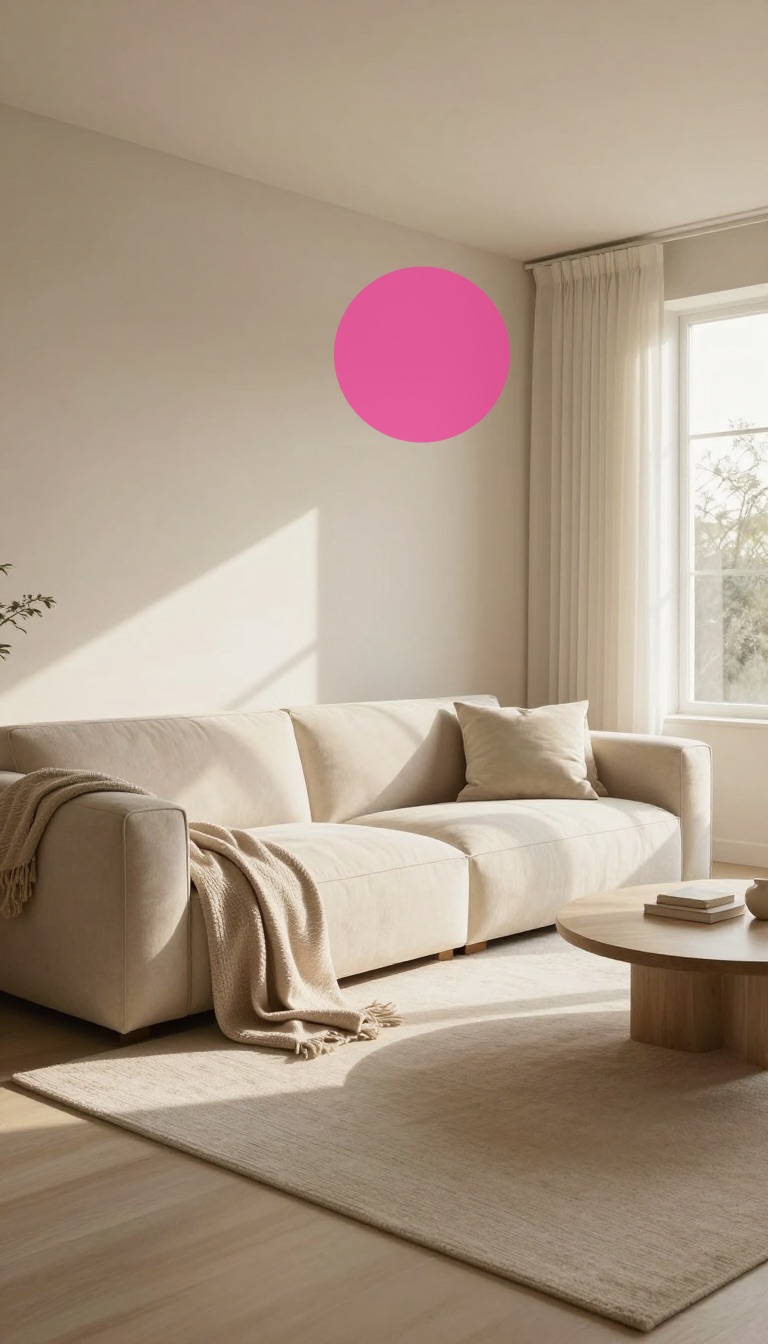
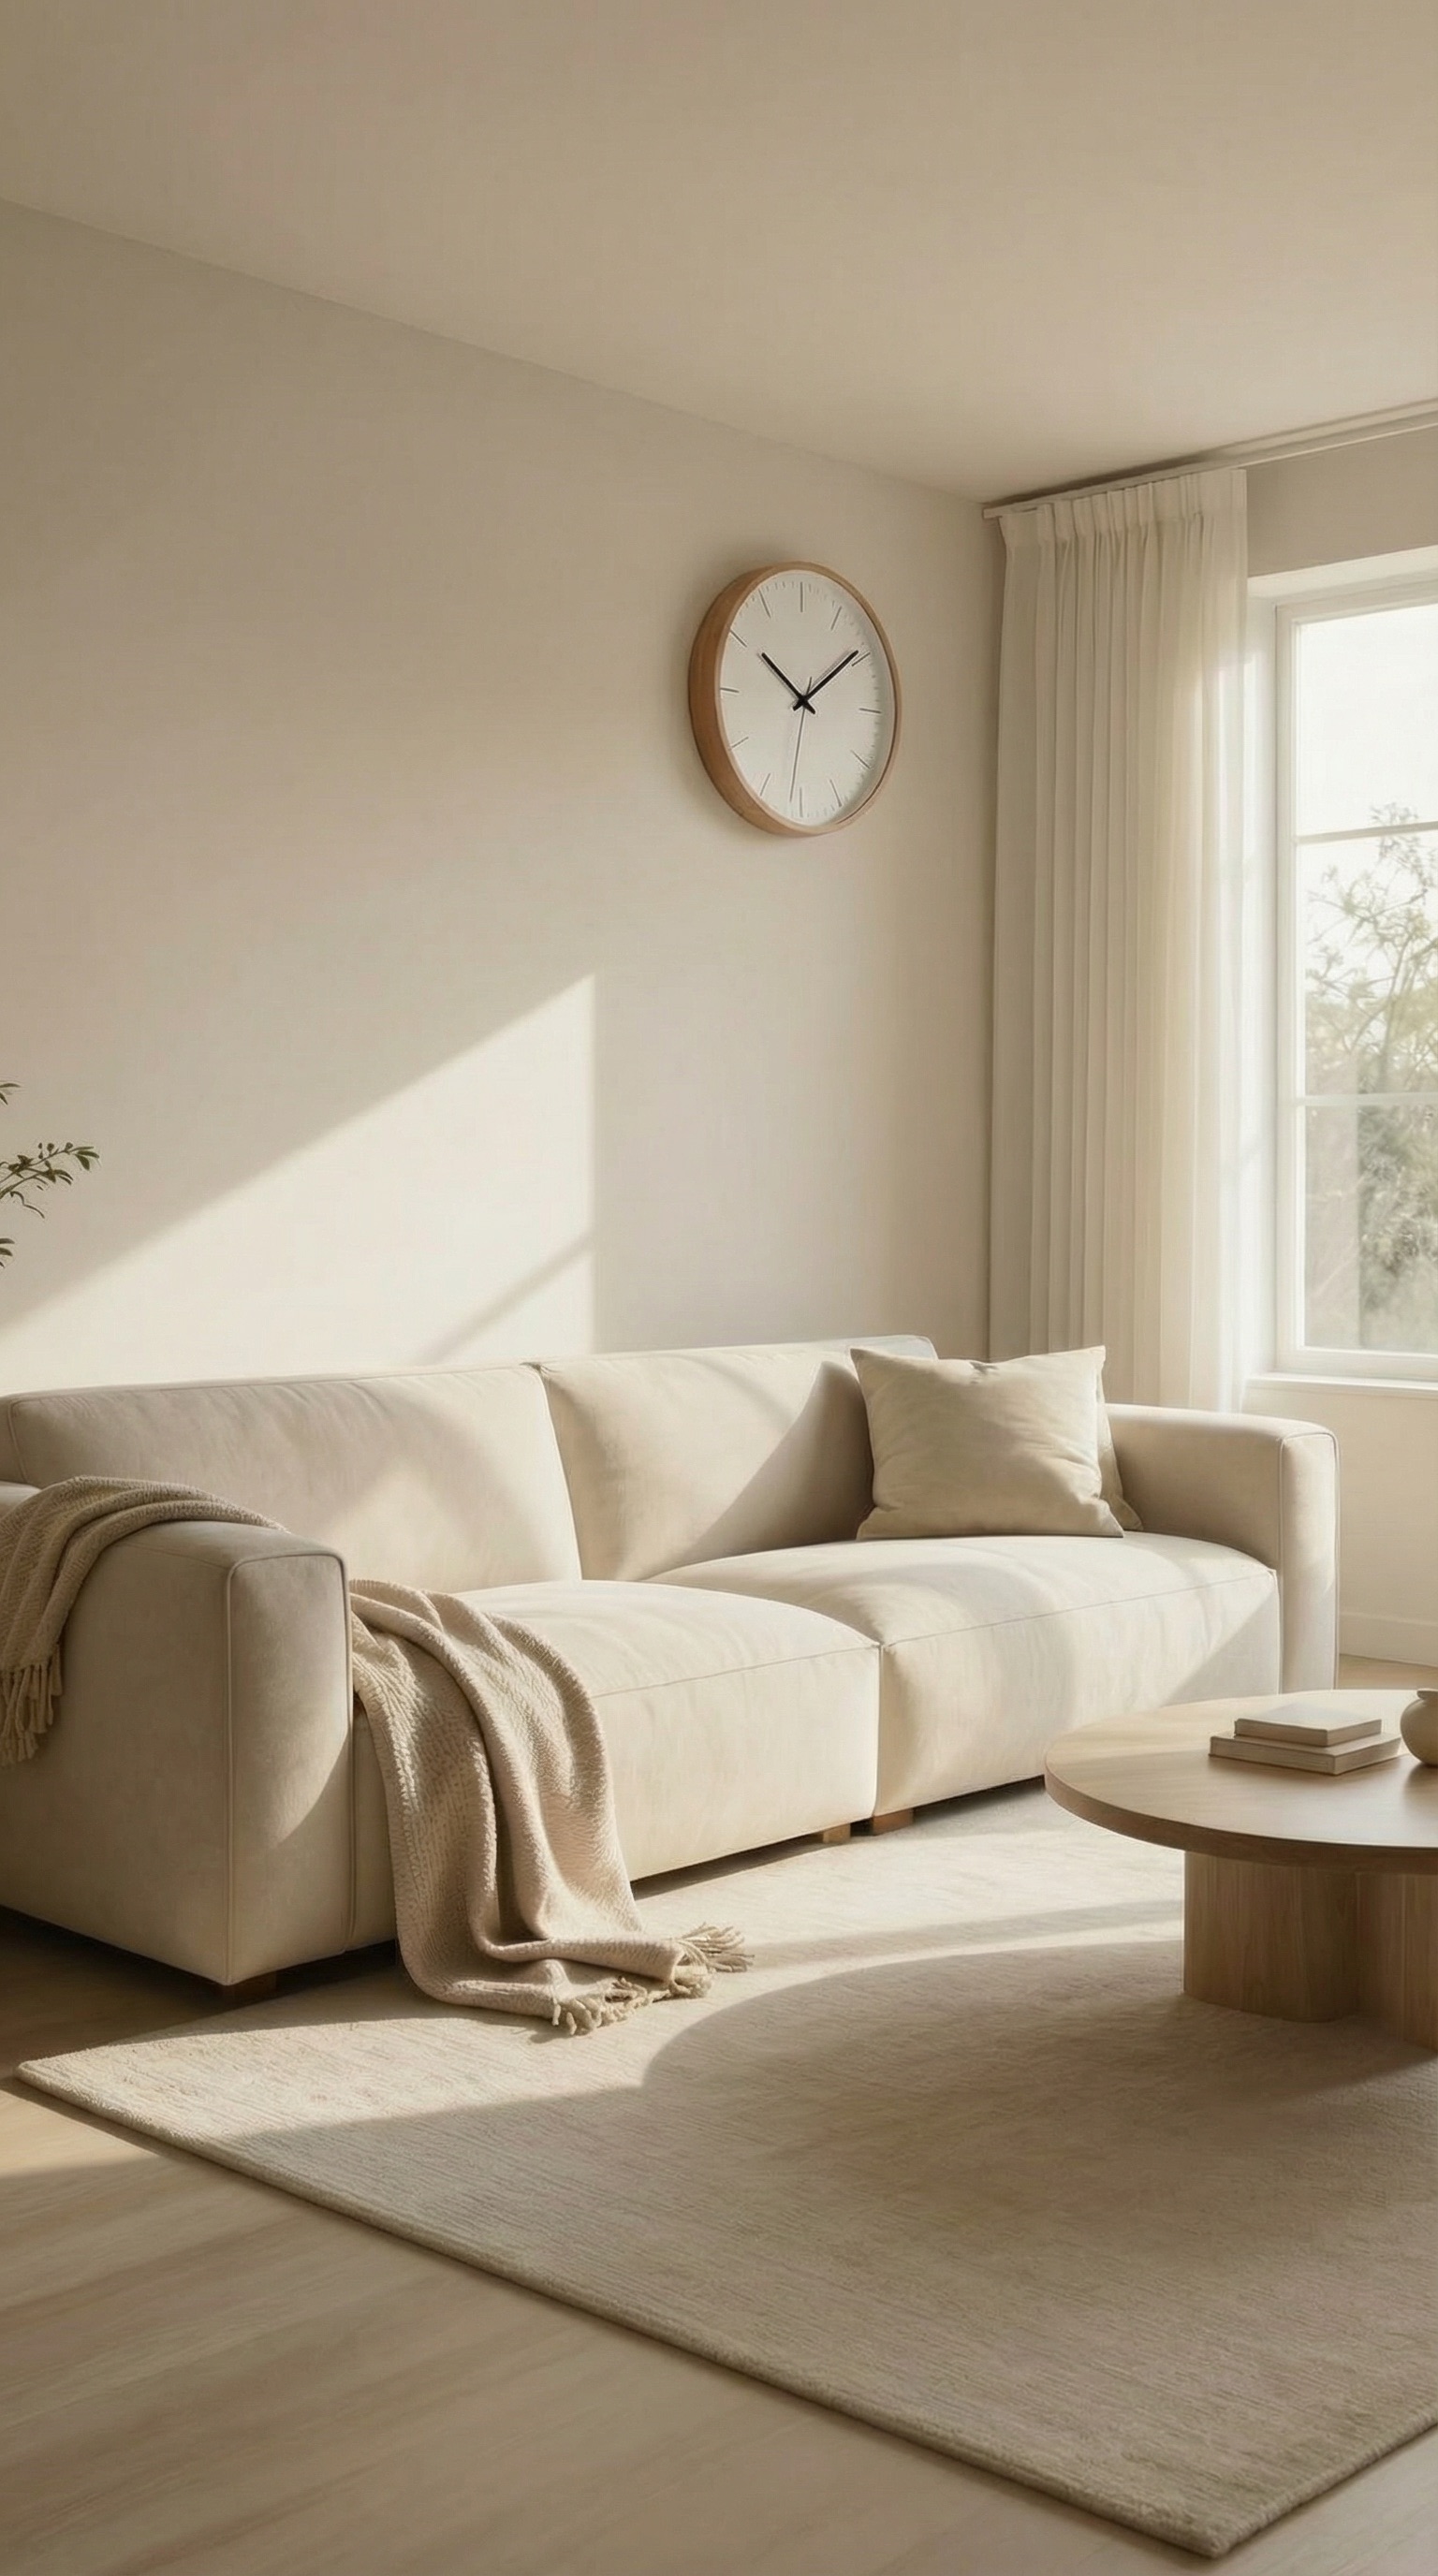
Paint a mask on an empty area, describe what should appear — the AI generates it with matching lighting and perspective.


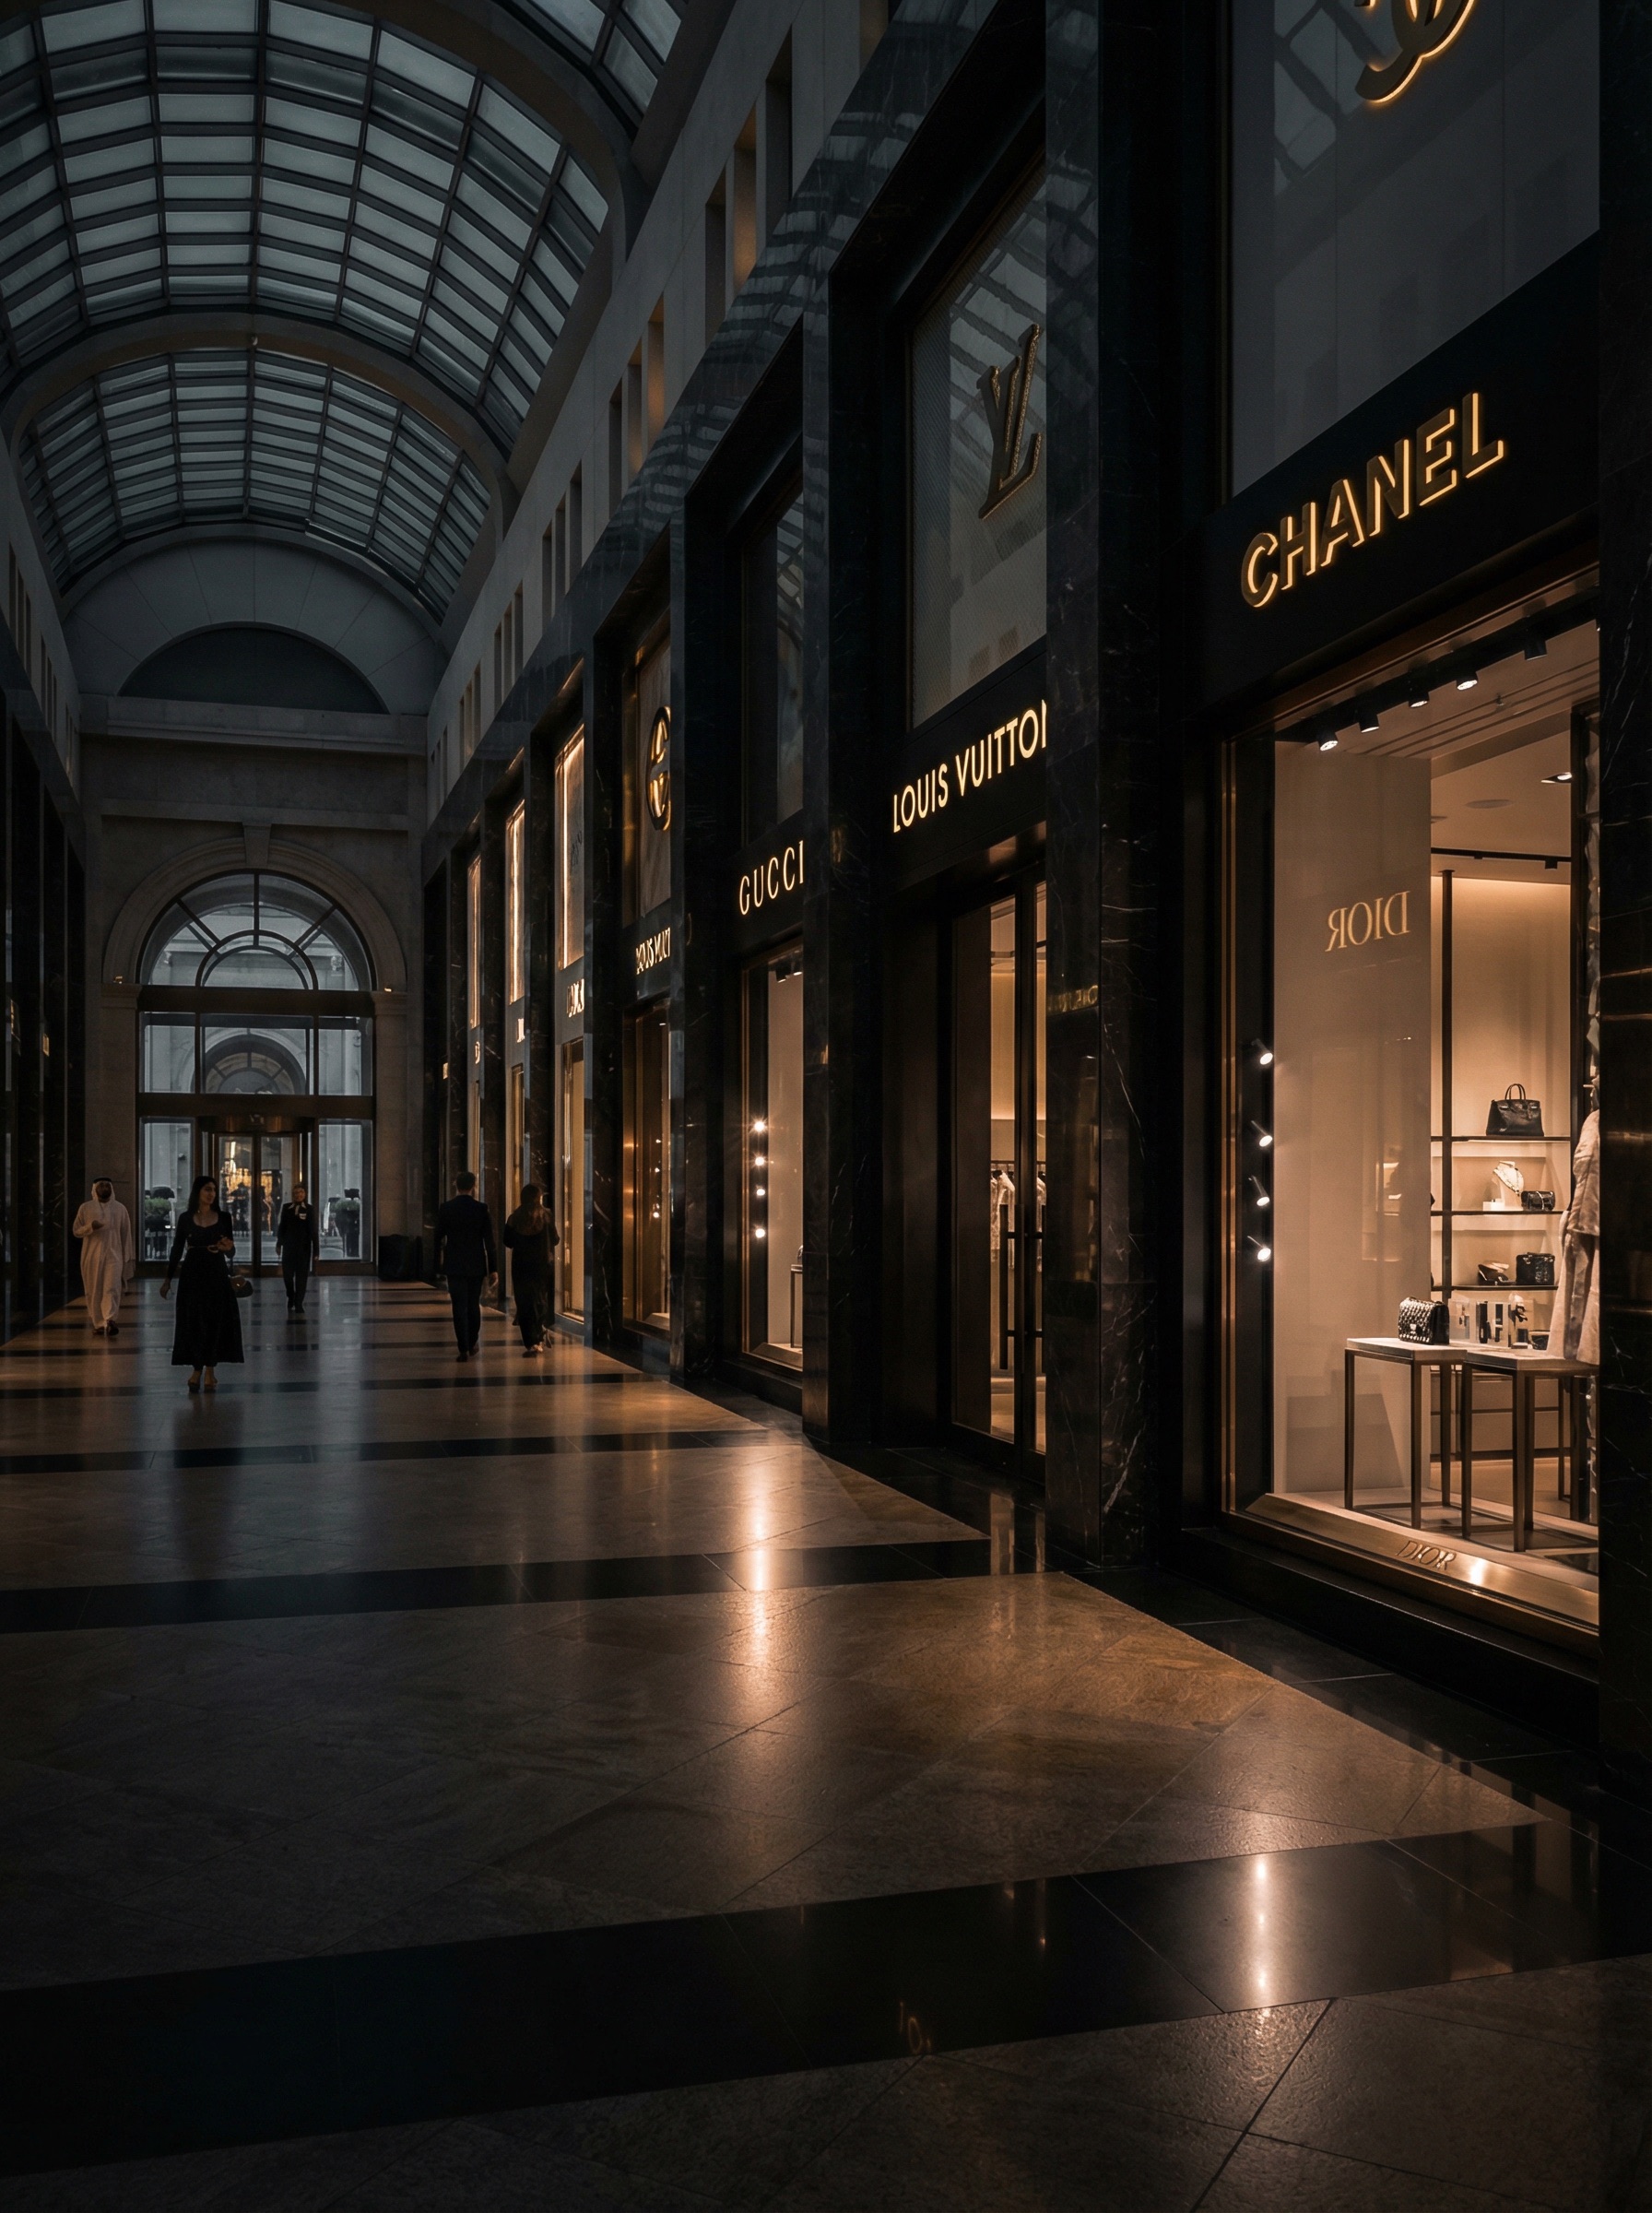
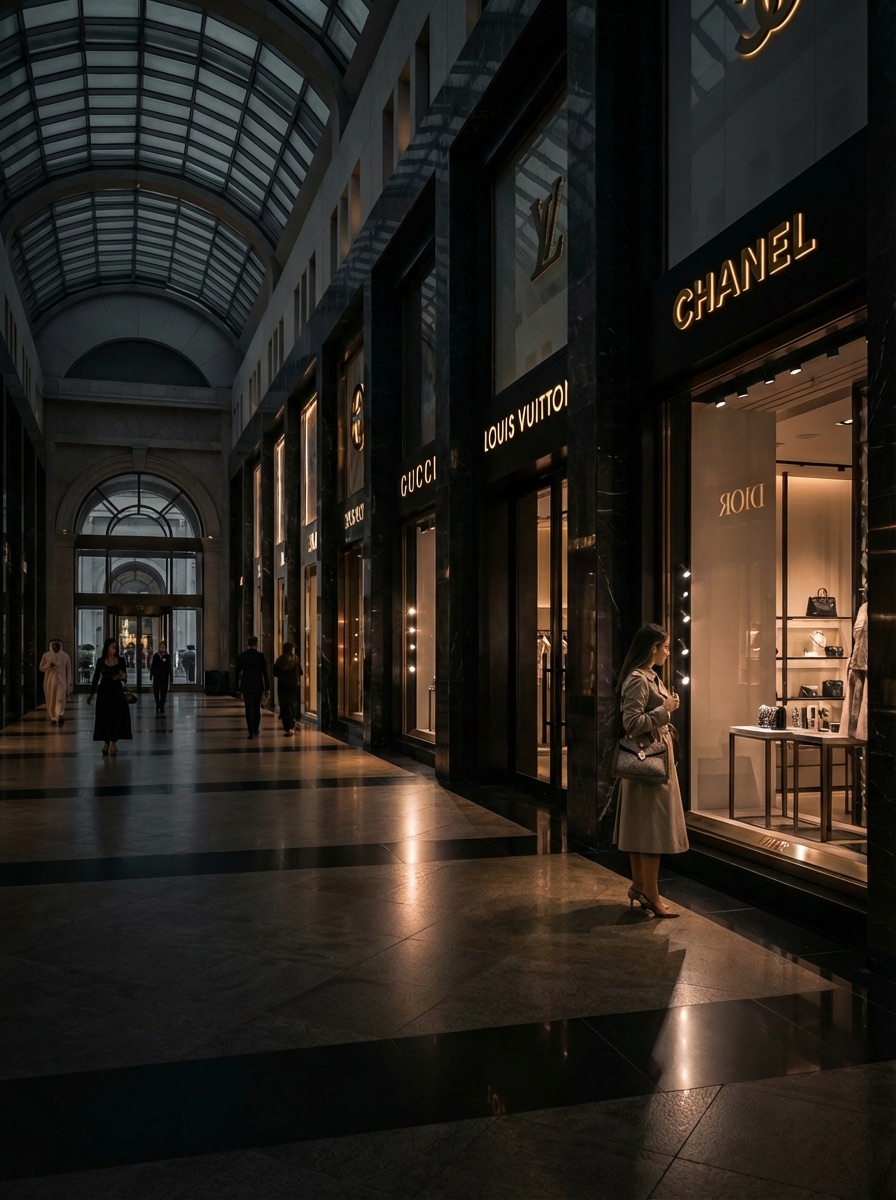
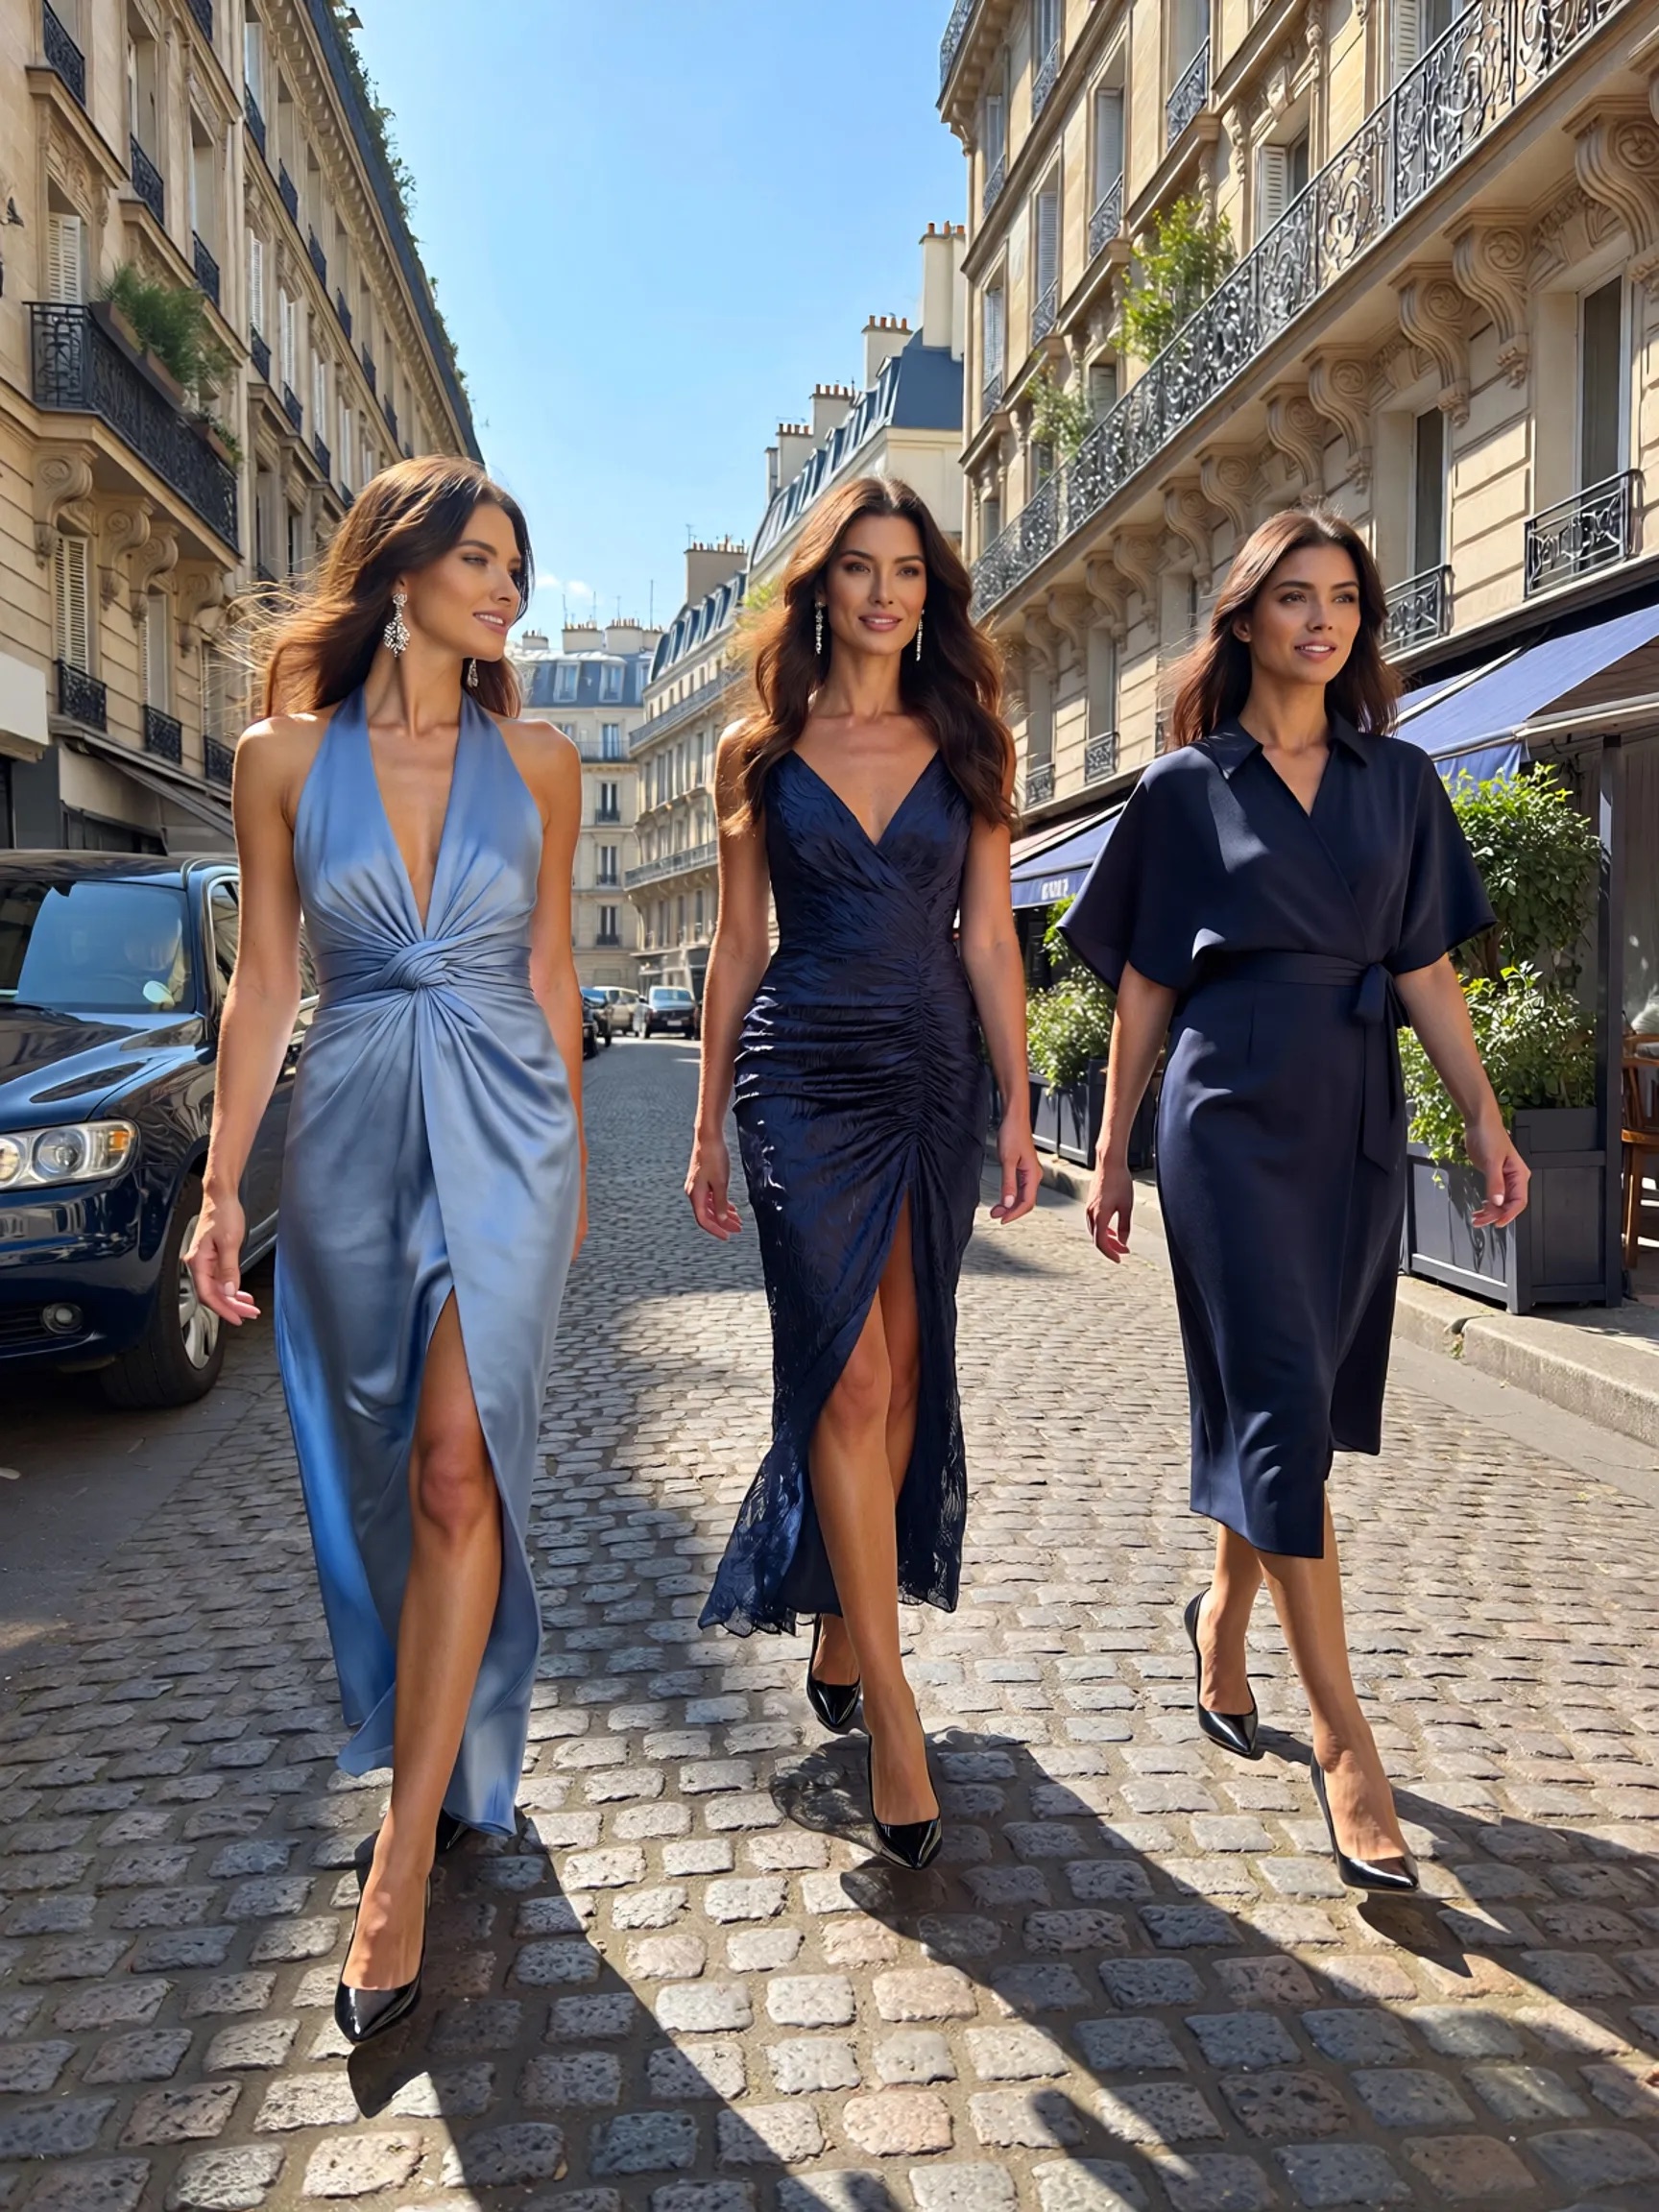
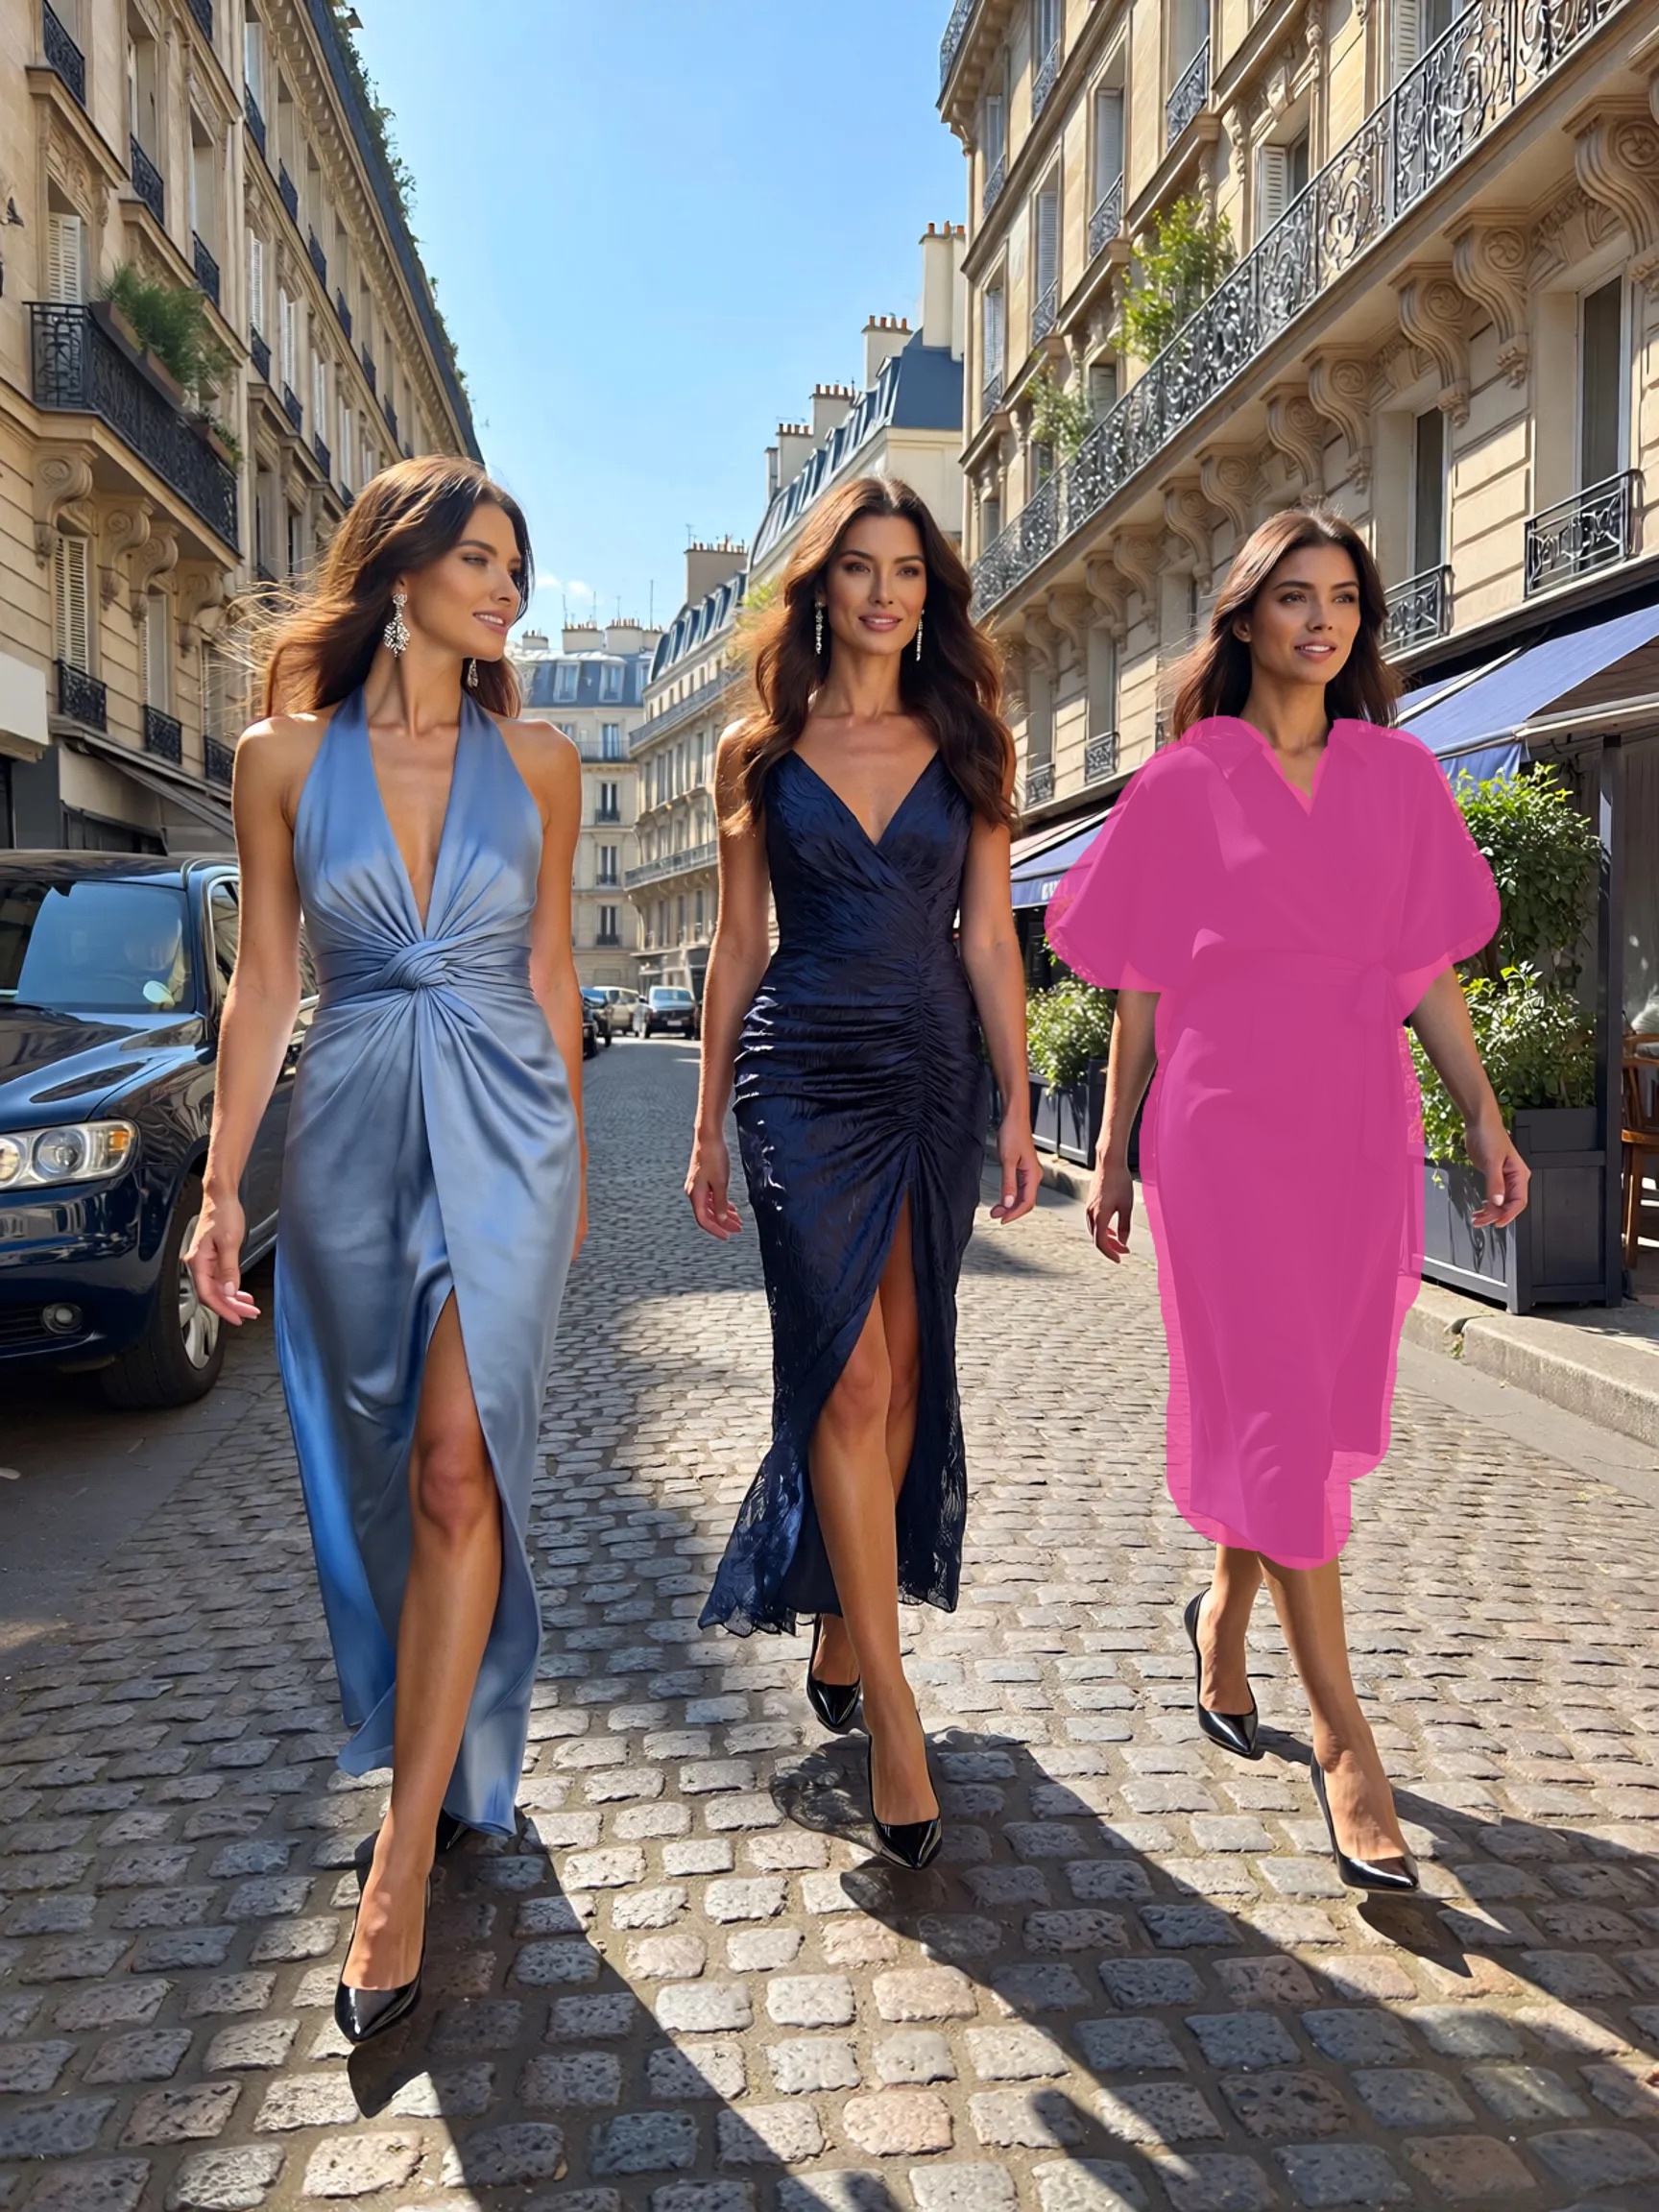
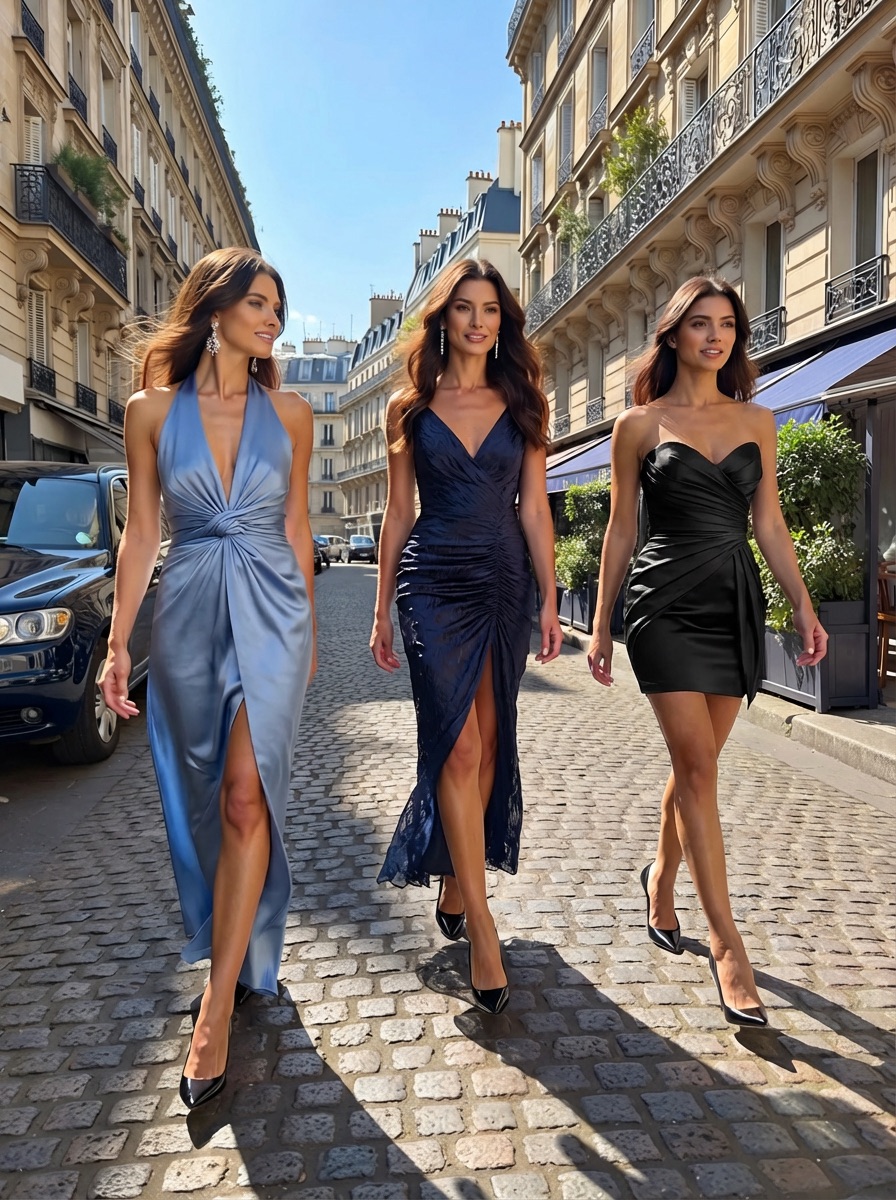
Replacing Objects
Mask an existing object, describe the replacement — the AI swaps it while keeping everything else intact.
Creative Edits and Scene Building
Inpainting isn’t just for cleanup — you can build entire scenes by adding elements one at a time.

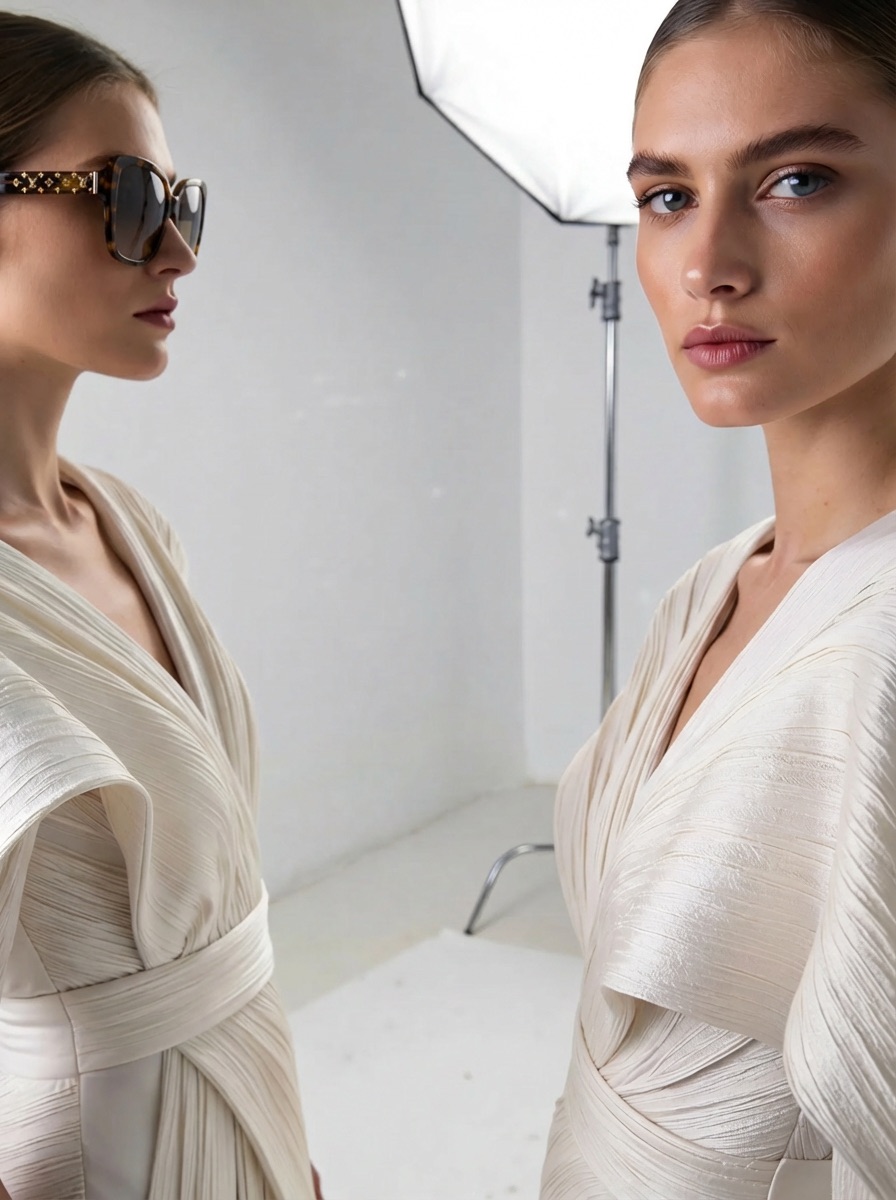
Face and Expression Editing
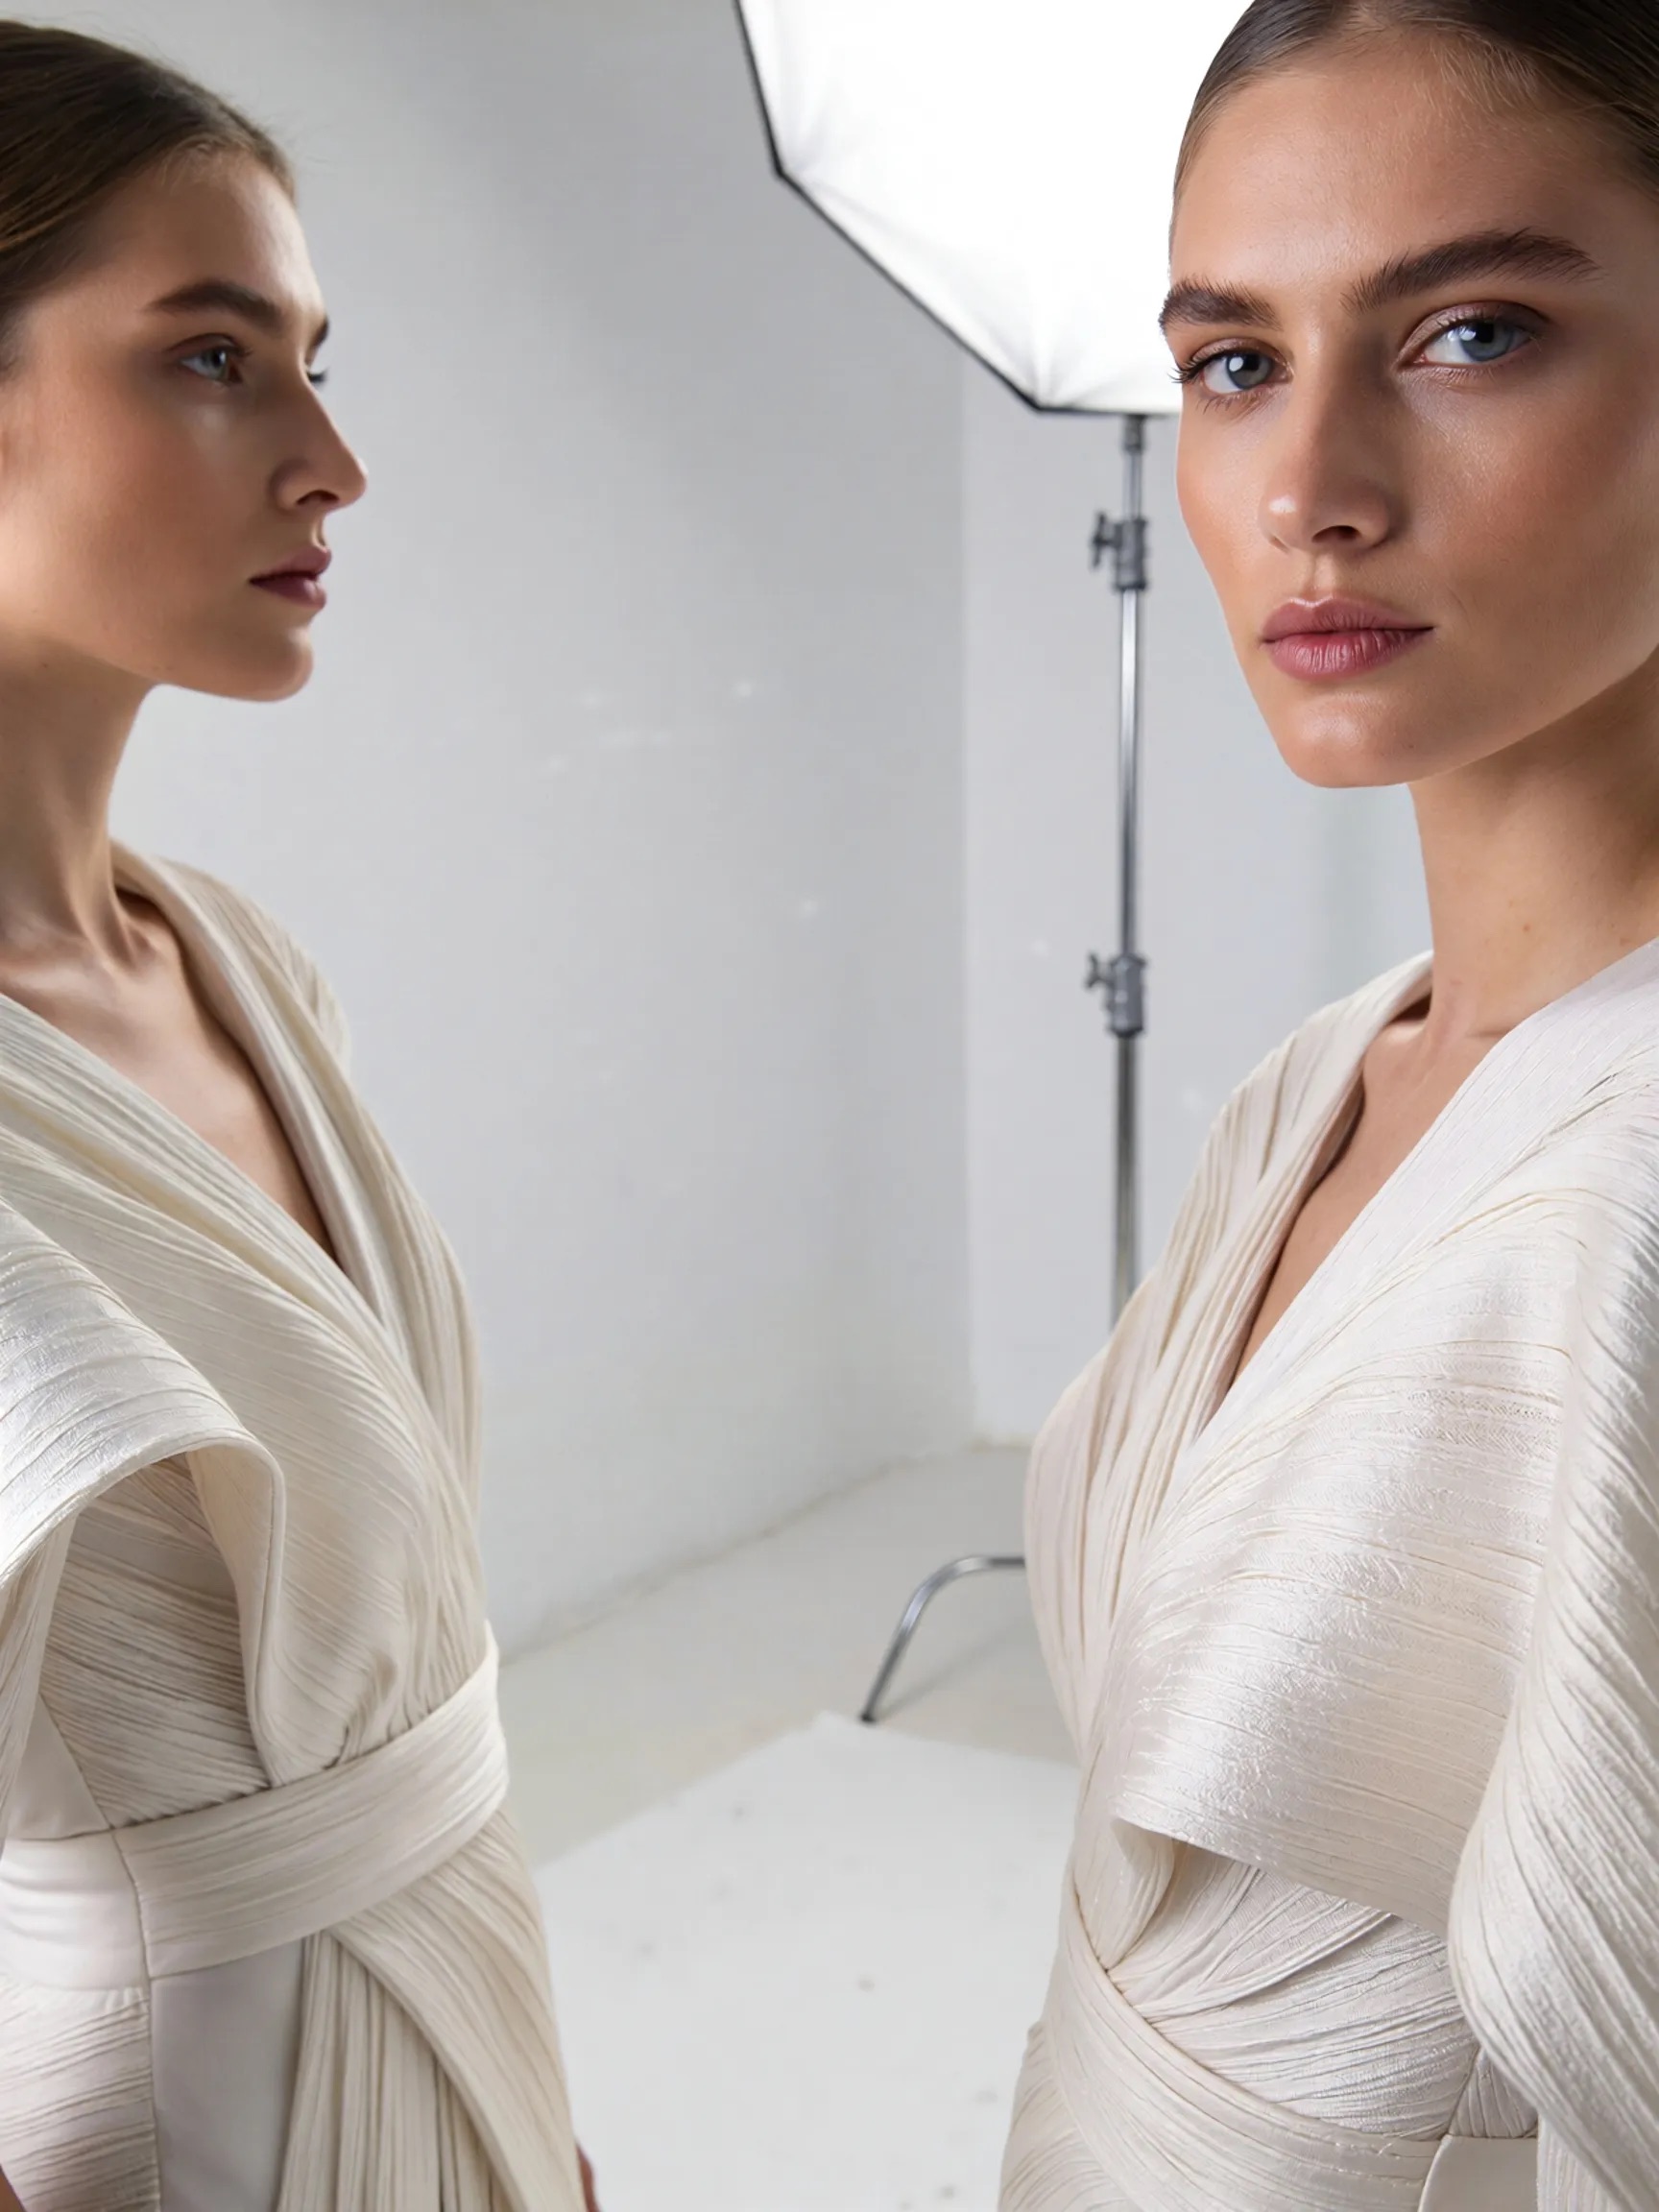
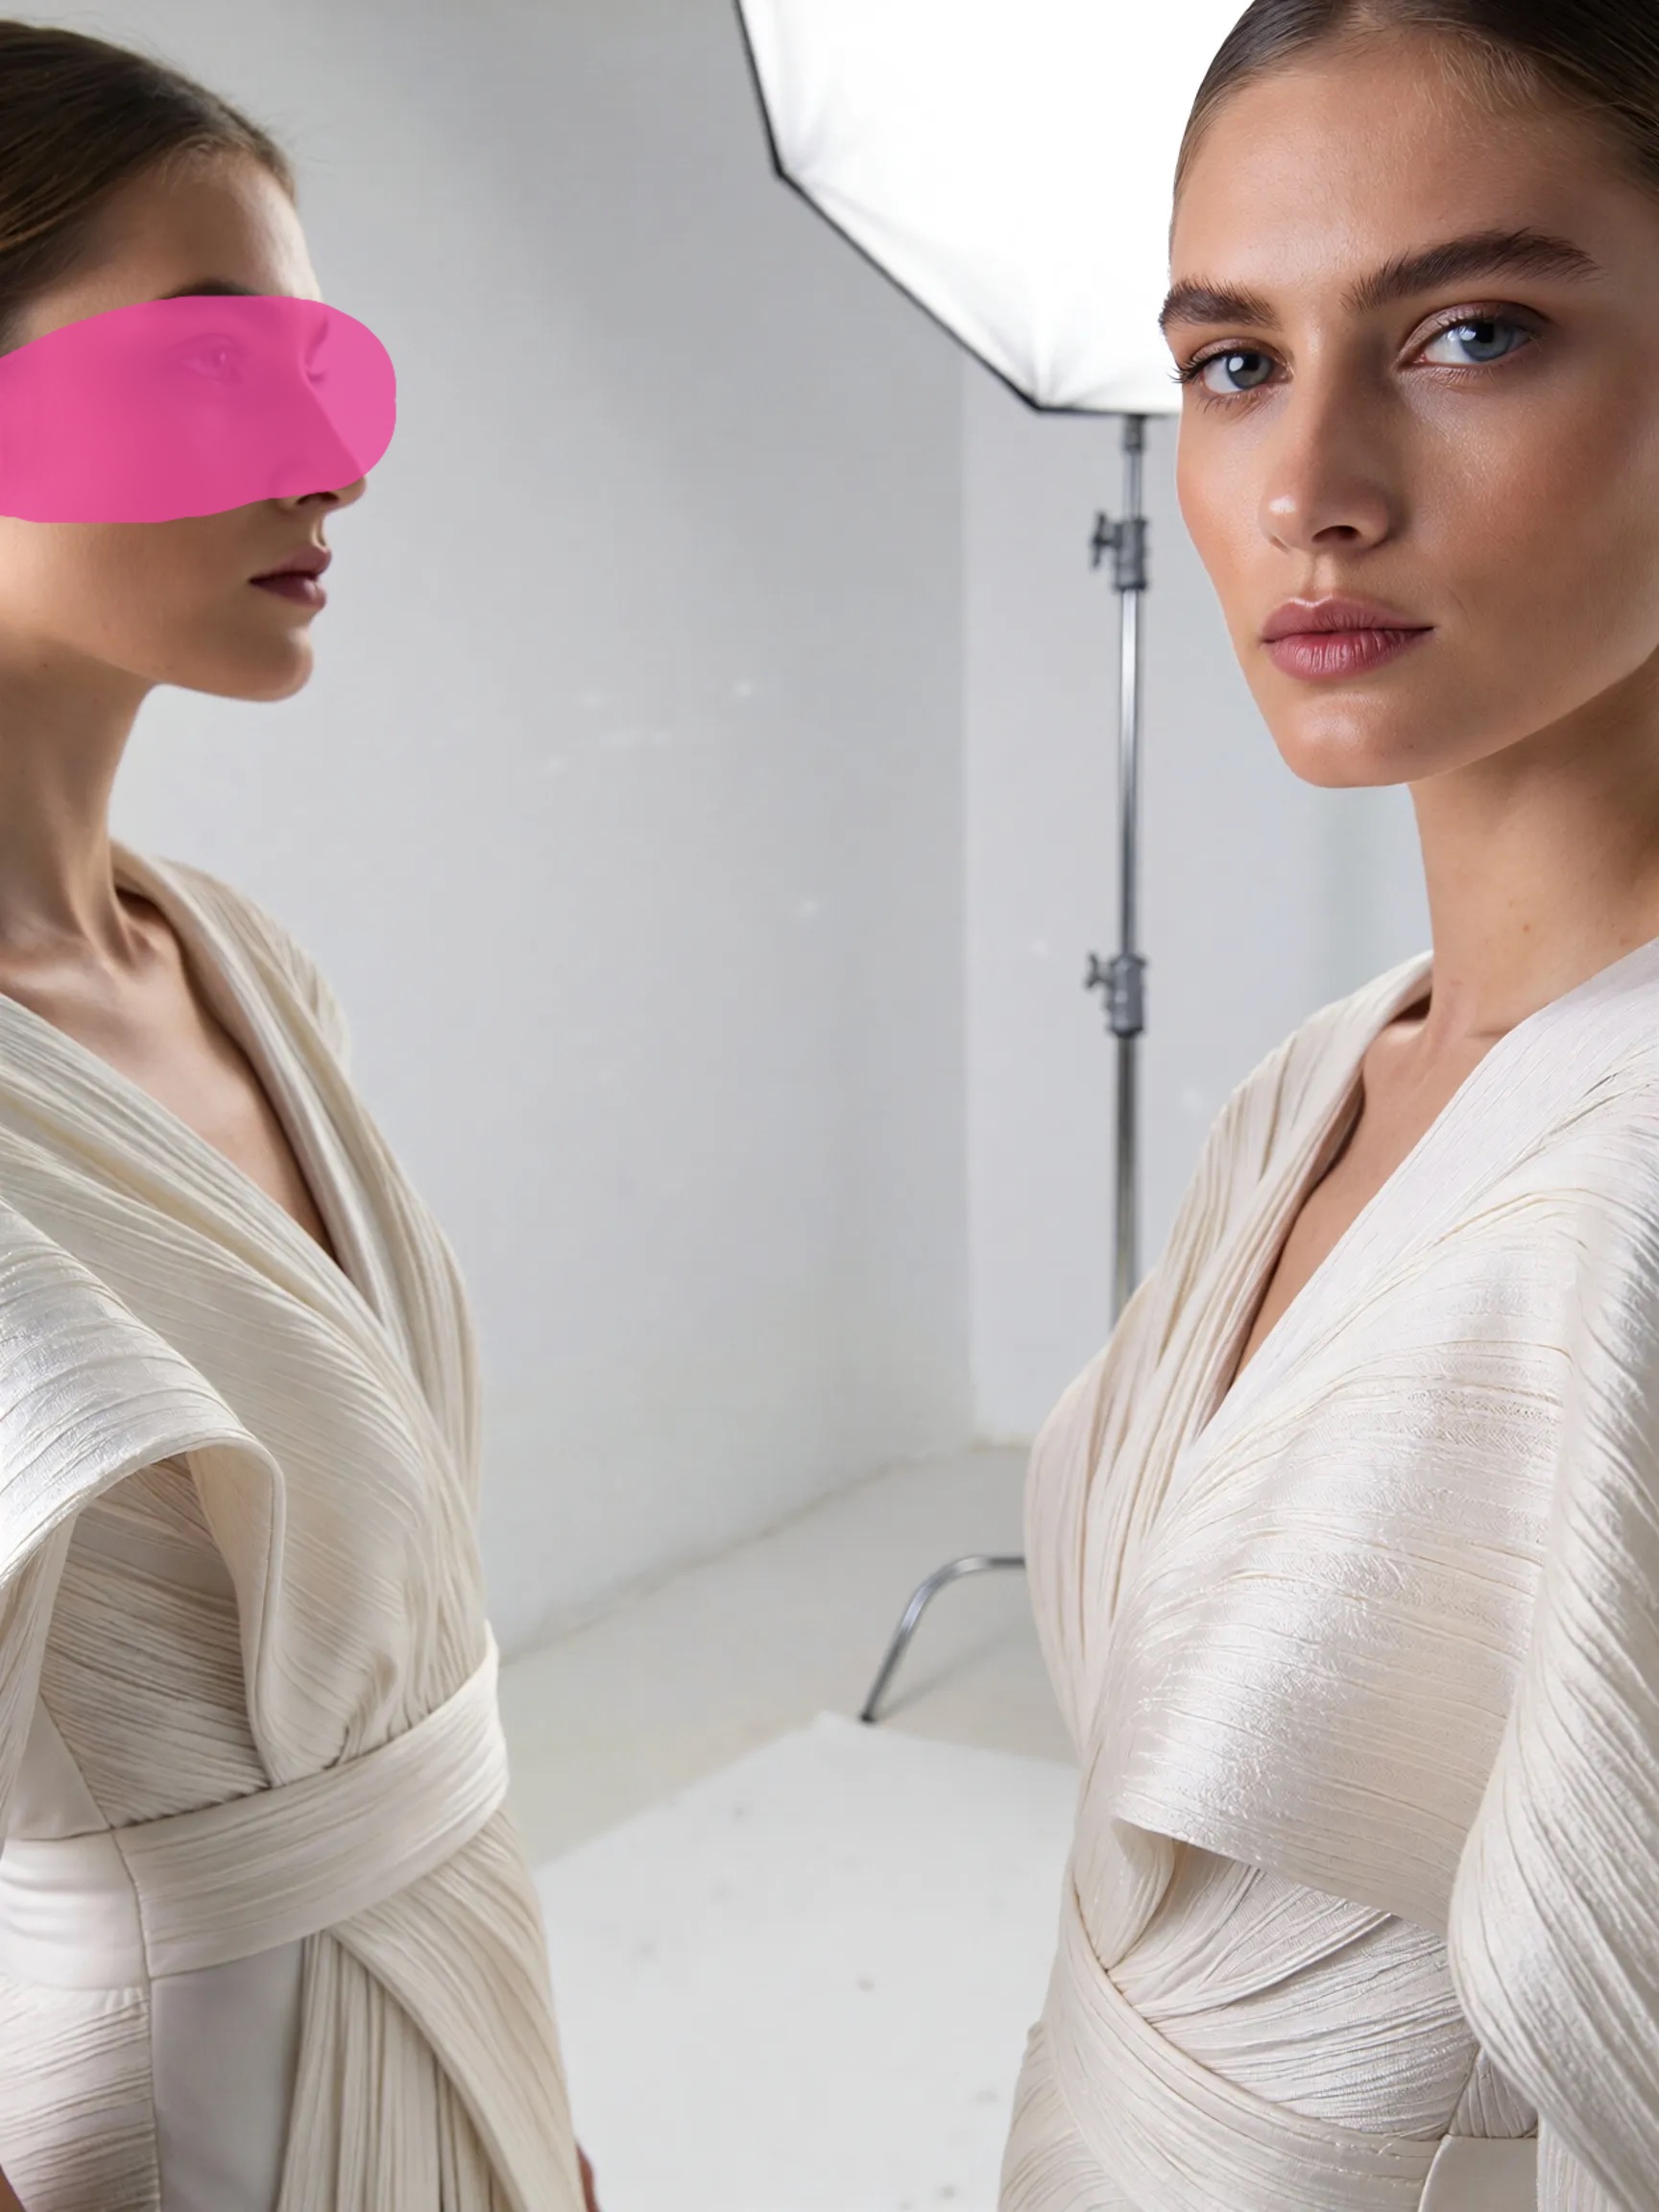
Need to change someone’s expression or reveal a hidden face? Mask the area and describe the change.
Inpaint-to-Area: Using a Reference Image
Instead of describing what to generate, you can attach a reference image. The AI places that reference into the masked area with proper blending, lighting, and perspective.
More examples with prompts and settings are in the inpainting gallery.
How AI Inpainting Works (the Technical Side)
Modern AI inpainting is powered by diffusion models — the same family of models behind Stable Diffusion, DALL-E, and Flux. If you’ve heard of stable diffusion inpainting, that’s exactly this technique — using a diffusion model to regenerate masked regions. Here’s the simplified version of what happens:
- You provide two inputs: the original image and a mask (a black-and-white image where white indicates the area to edit)
- The model adds noise to the masked region, essentially scrambling those pixels
- Step by step, the model removes that noise — but guided by your text prompt and the surrounding context. It “denoises” the masked area into something new while keeping the unmasked pixels frozen
- The result blends naturally because the model sees the full image context during generation
The model doesn’t just look at the masked area in isolation. It analyzes the entire image — the lighting direction, color palette, perspective lines, object relationships — and generates content that fits. This process is based on denoising diffusion probabilistic models, where the AI learns to reverse the noise process step by step, guided by both the text prompt and the visual context of the unmasked region.
Some models handle masks natively (they accept image + mask as separate inputs). Others work better with visual annotations — AI Edit’s Nano Banana Pro and Nano Banana 2 from Google use a clever approach where green borders and markers are drawn around the masked region directly on the image, giving the model clearer visual cues about what to change.
Where to Inpaint in AI Edit
AI Edit gives you two ways to inpaint — both use the same AI models and produce the same quality results, but the workflow is different.
1. Inpaint Tool — Full Control
Open aiedit.com/inpaint to access the dedicated inpaint online interface. This gives you the complete set of controls:
- Drawing canvas with adjustable brush and eraser for precise mask painting
- Model selector — choose between Nano Banana Pro and Nano Banana 2
- Resolution control — output at 1K, 2K, or 4K
- Reference image attachment for inpaint-to-area edits
- Side-by-side comparison of original and result
Use this when you need precise replacements, want to attach a reference image for inpaint-to-area, or need to remove objects from photos with full control over what fills the space.
2. AI Chat — Inpaint in Conversation
Open aiedit.com/chat and inpaint as part of a conversation with the AI. Upload an image (or use one you’ve already generated or edited in the chat), and the chat opens the same mask drawing canvas — you paint the mask, write your prompt, and the AI processes it.
The difference is context. In chat mode you can chain inpainting with other tools in a single session. Restore an old photo, then inpaint out a scratch, then upscale the result to 4K — all within the same conversation, without downloading and re-uploading between steps. You can also pick any image from your chat history as a reference image for inpaint-to-area.
Chat mode uses the same models and mask drawing tools as the dedicated inpaint page. The only difference is the workflow — everything happens inside the chat.
Step-by-Step: How to Inpaint an Image
Here’s the full workflow from upload to result. Open the inpaint tool and follow along.
1. Upload your image
Drag and drop or click to select your photo.
2. Select your model
Pick the AI model before you start drawing. AI Edit offers two Google models built for inpainting:
- Nano Banana Pro — Google’s flagship inpainting model. Excellent at editing specific areas, placing new objects into a scene at the exact position you mask, and compositing a reference image into the photo with natural blending
- Nano Banana 2 — equally capable, with a different generation approach that can produce different interpretations of the same prompt. Worth trying both on the same edit to see which result you prefer
Both models support text prompts and reference image input. You can also set the output resolution — 1K for quick iterations, 2K for most edits, 4K when you need maximum detail.
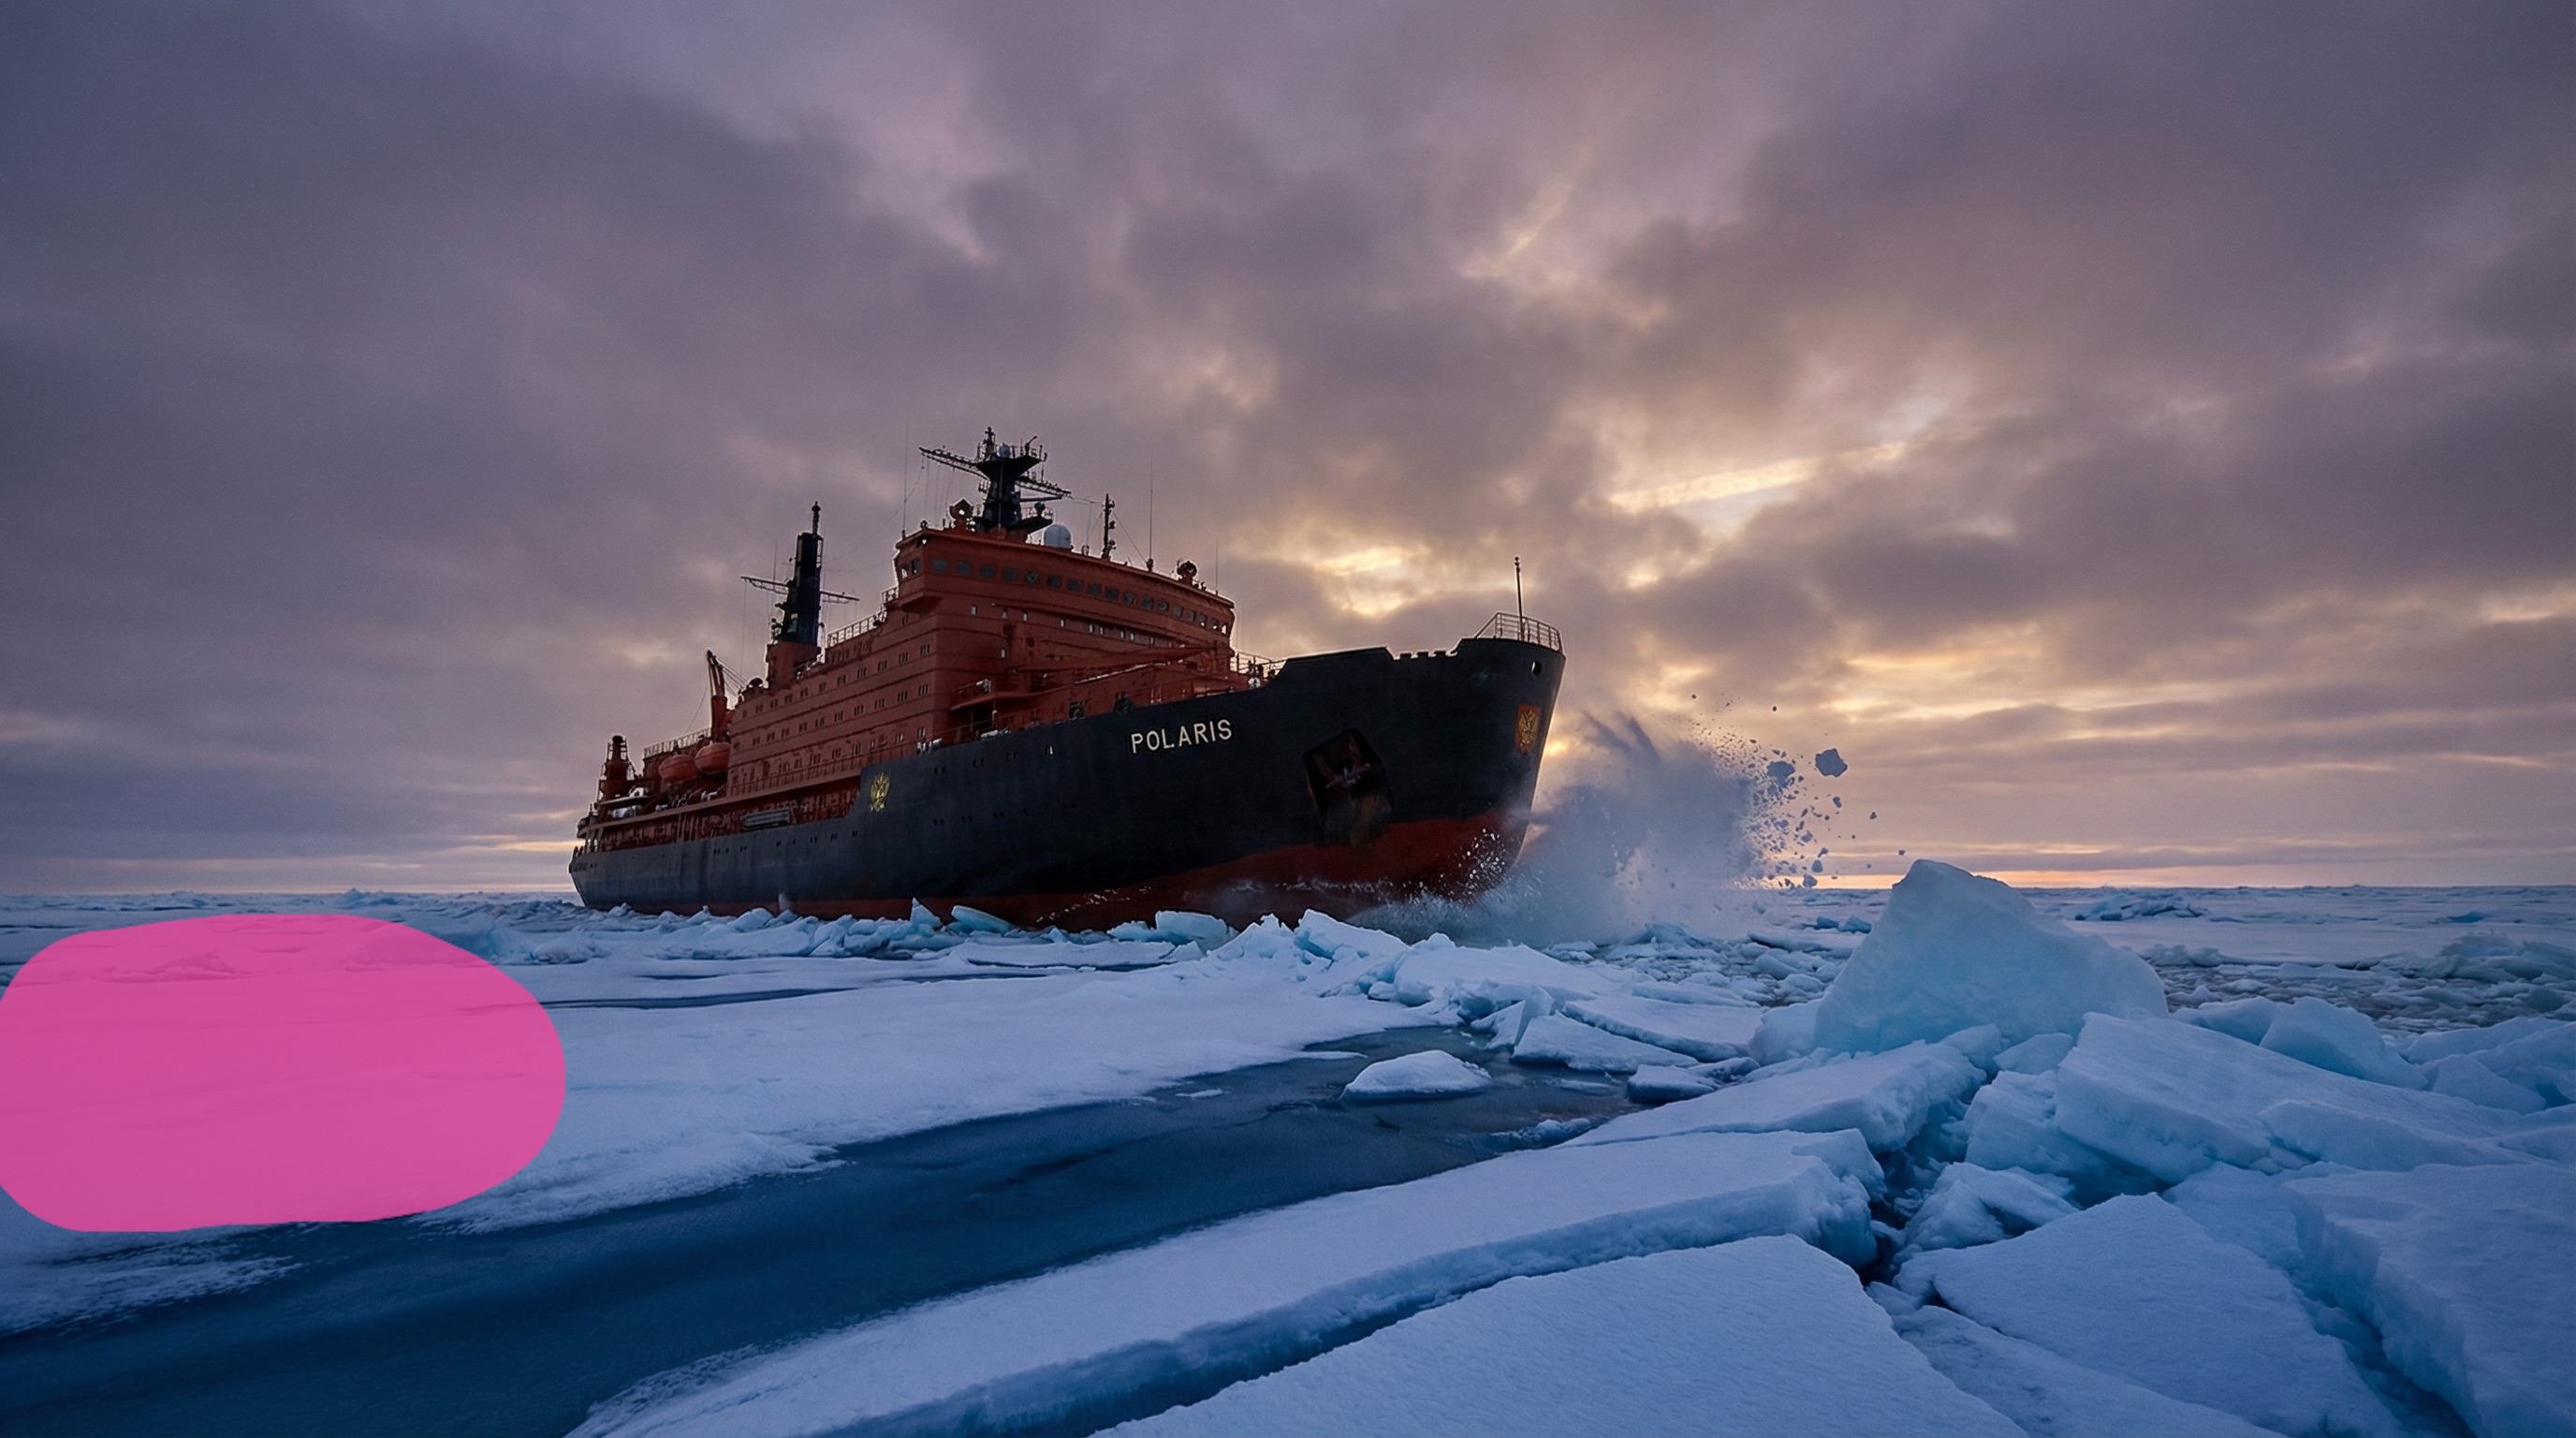
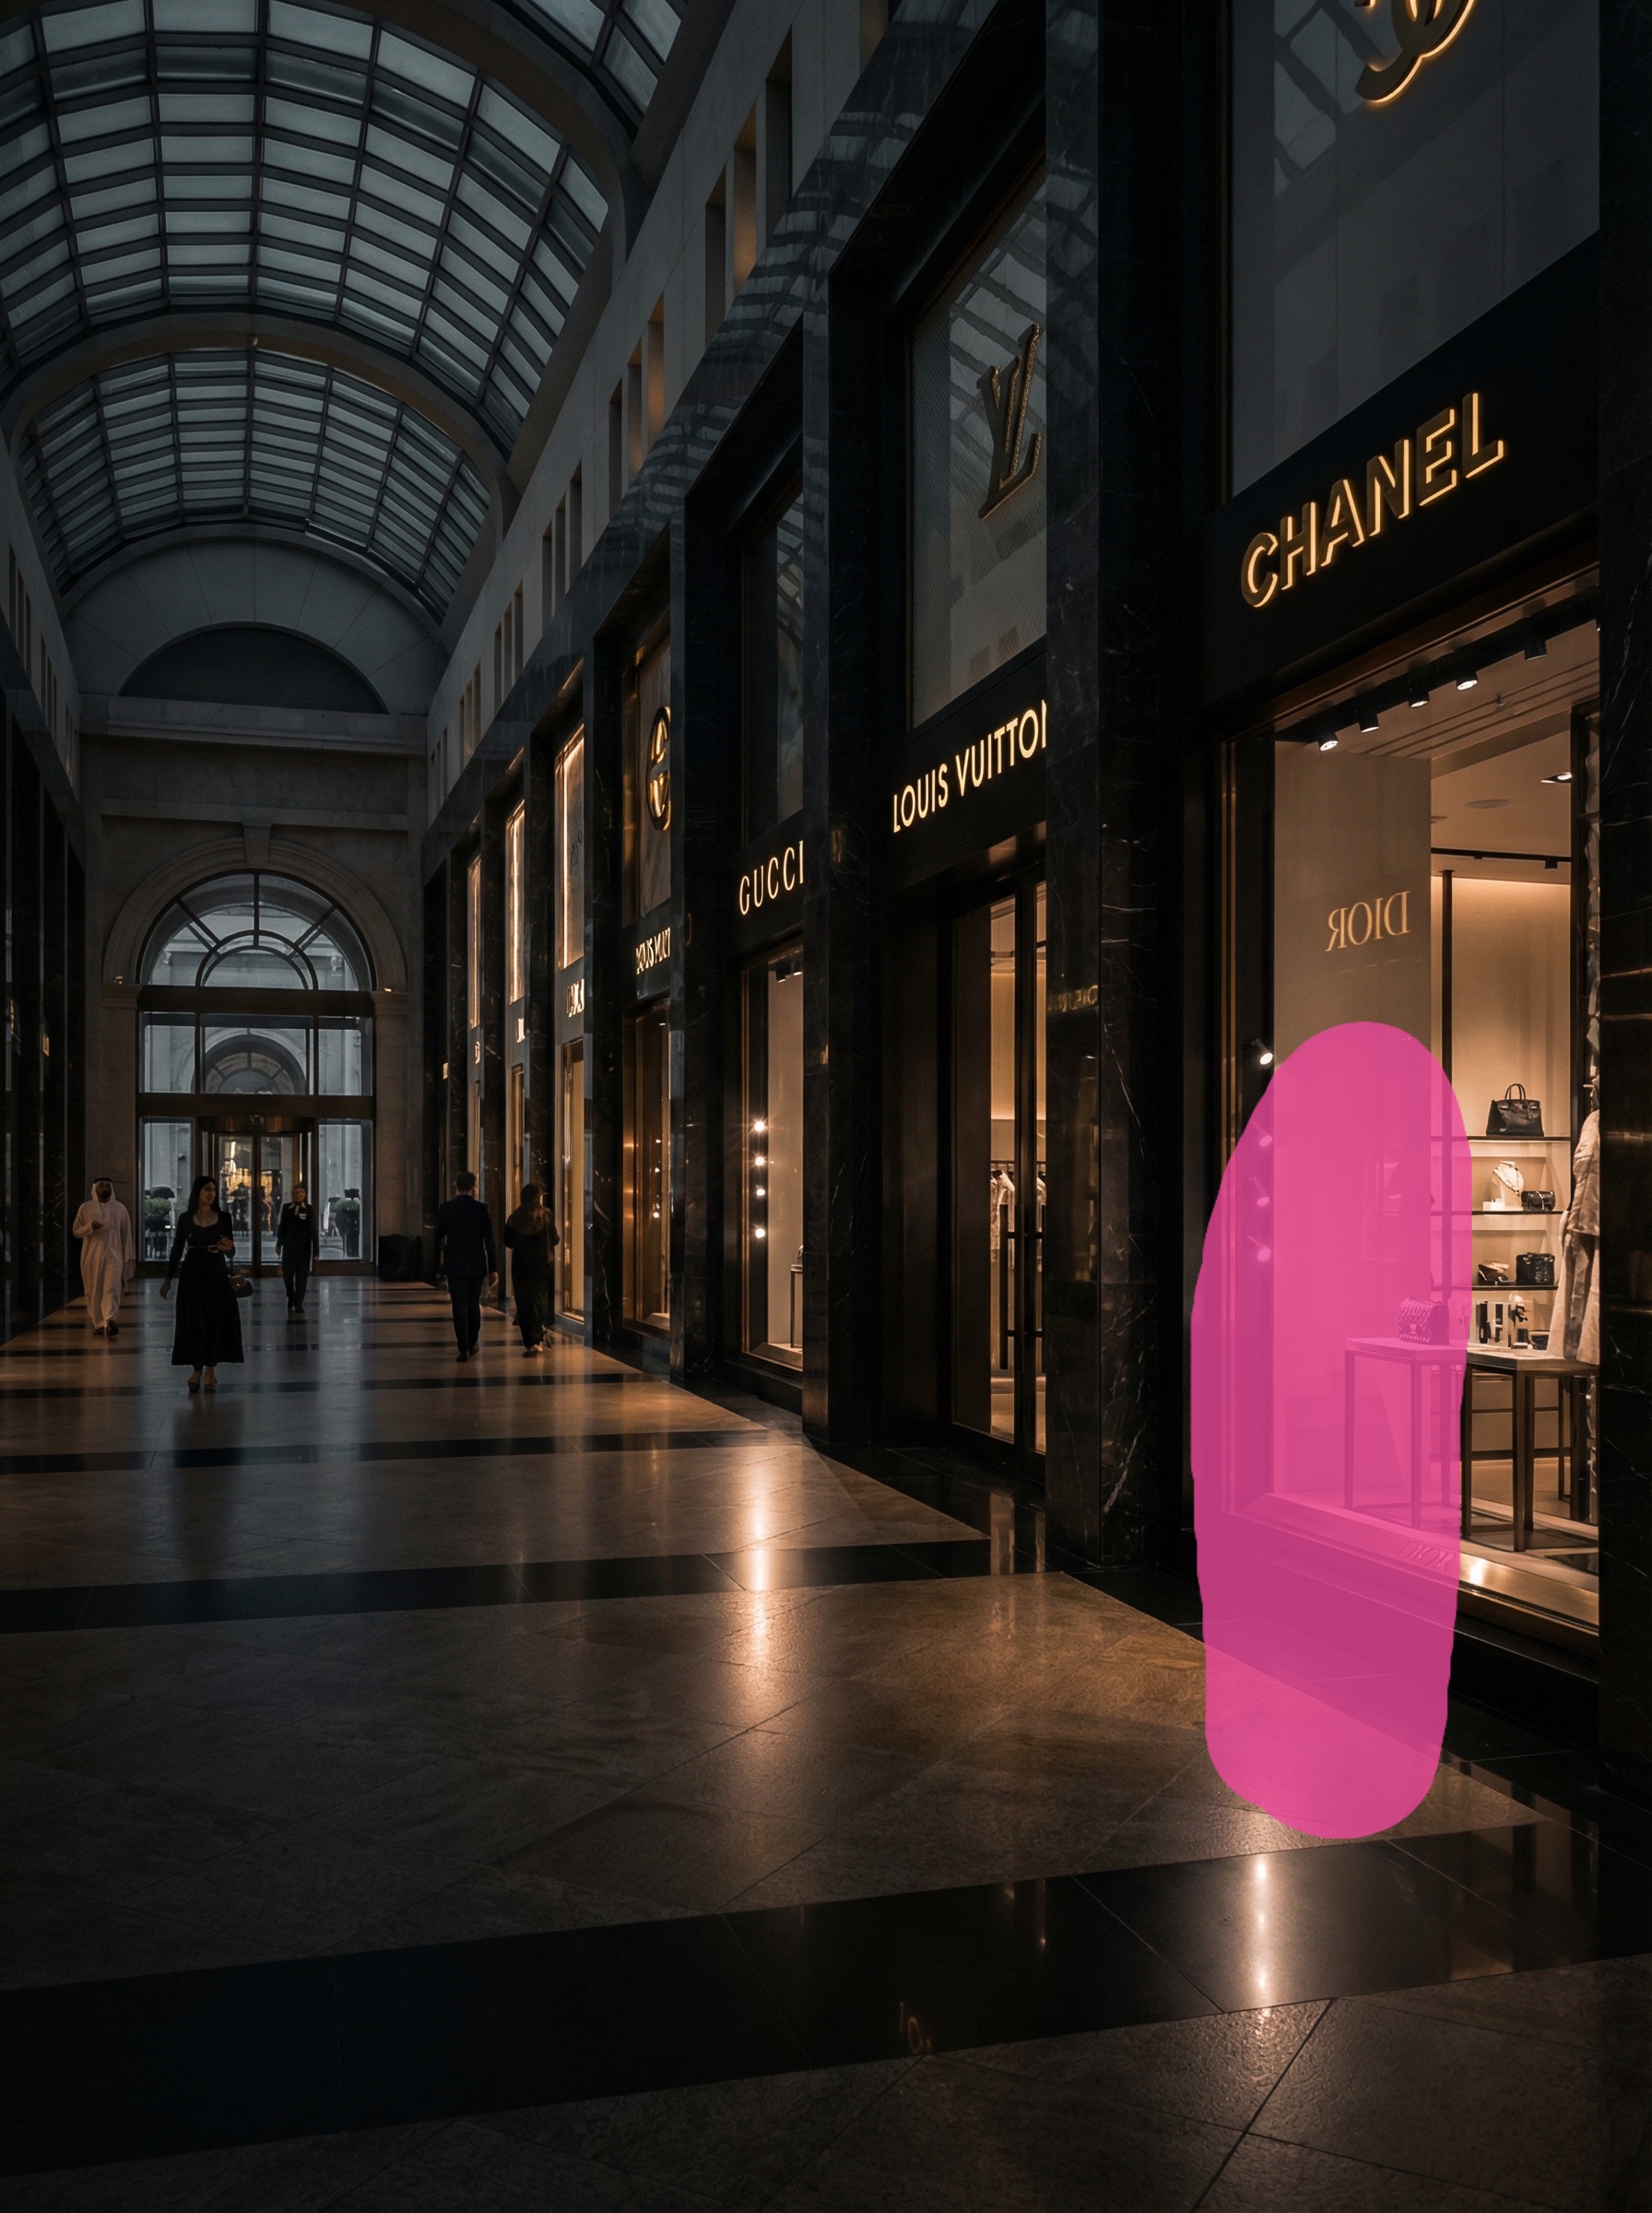
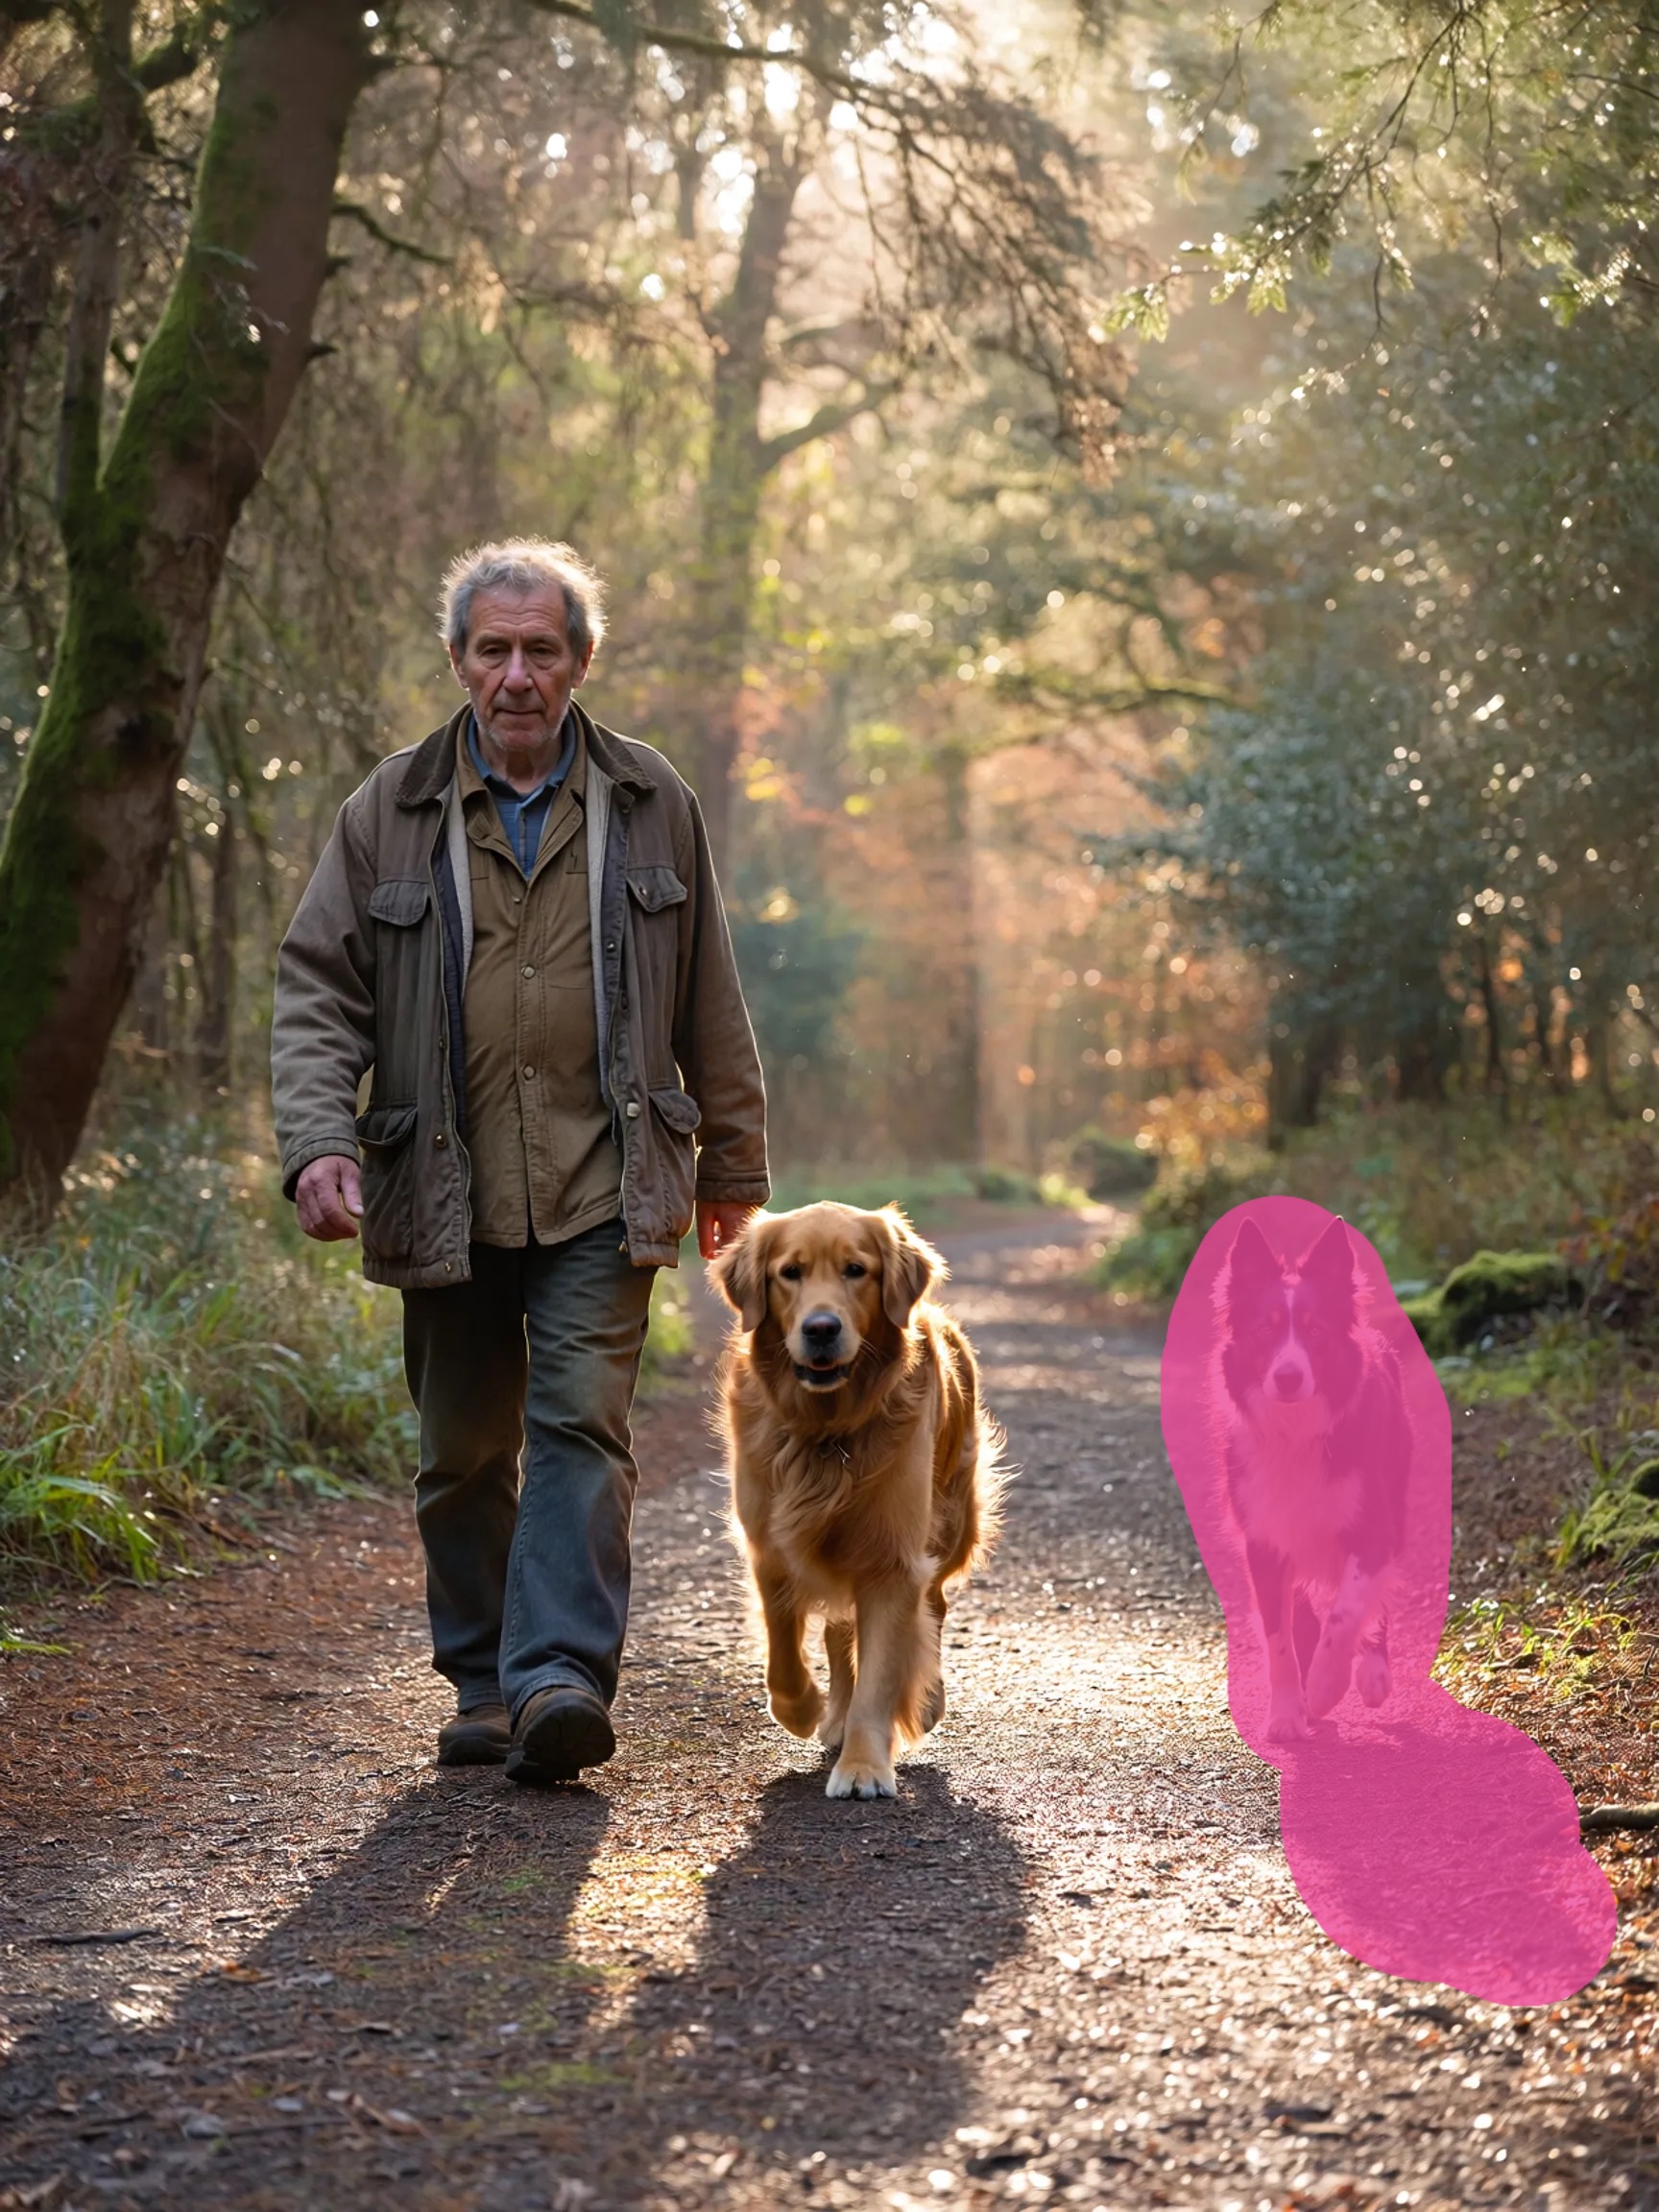
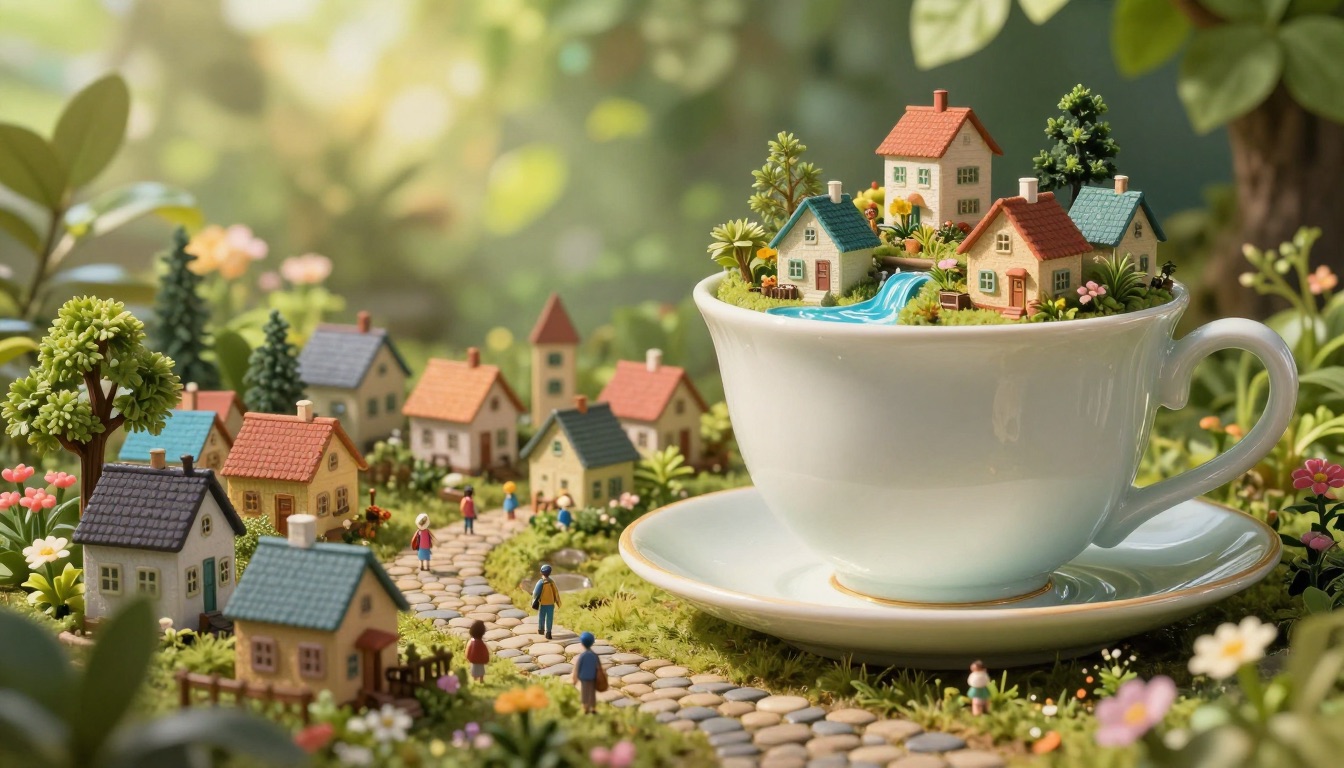
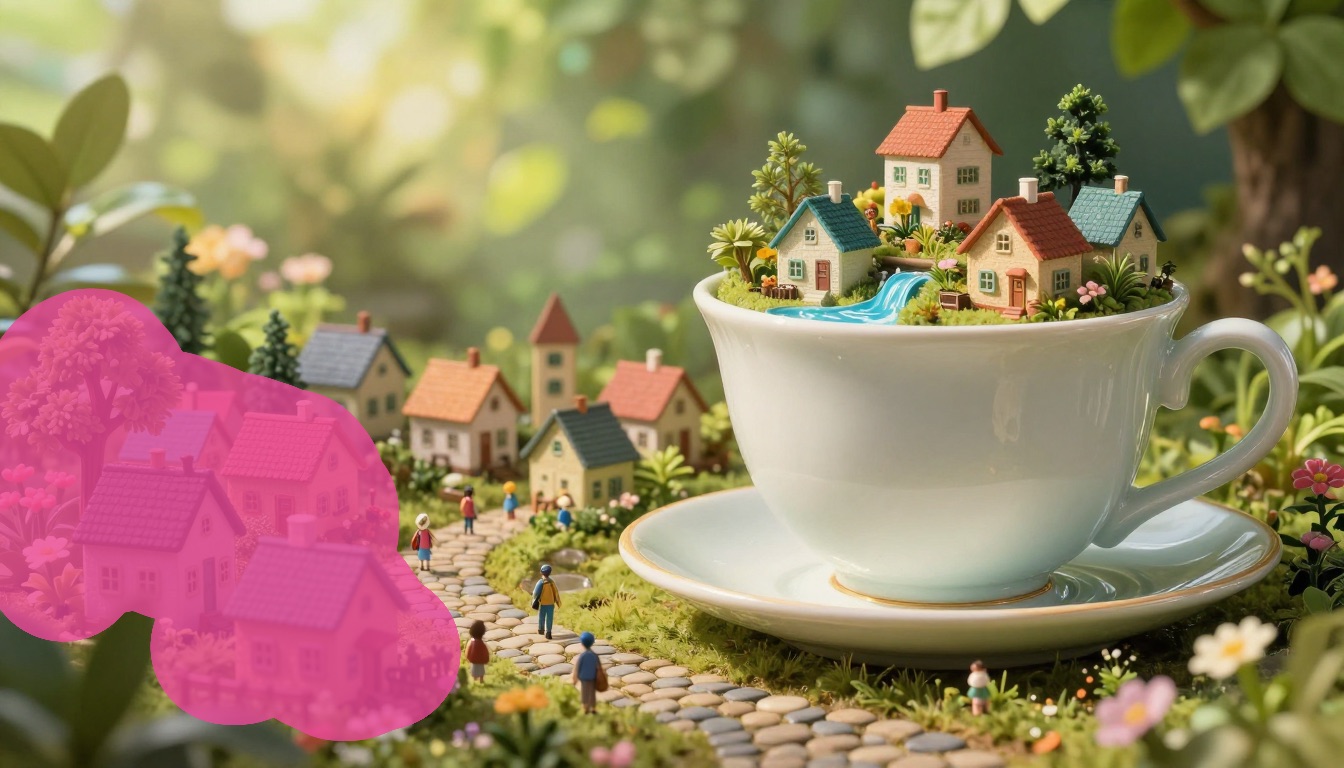
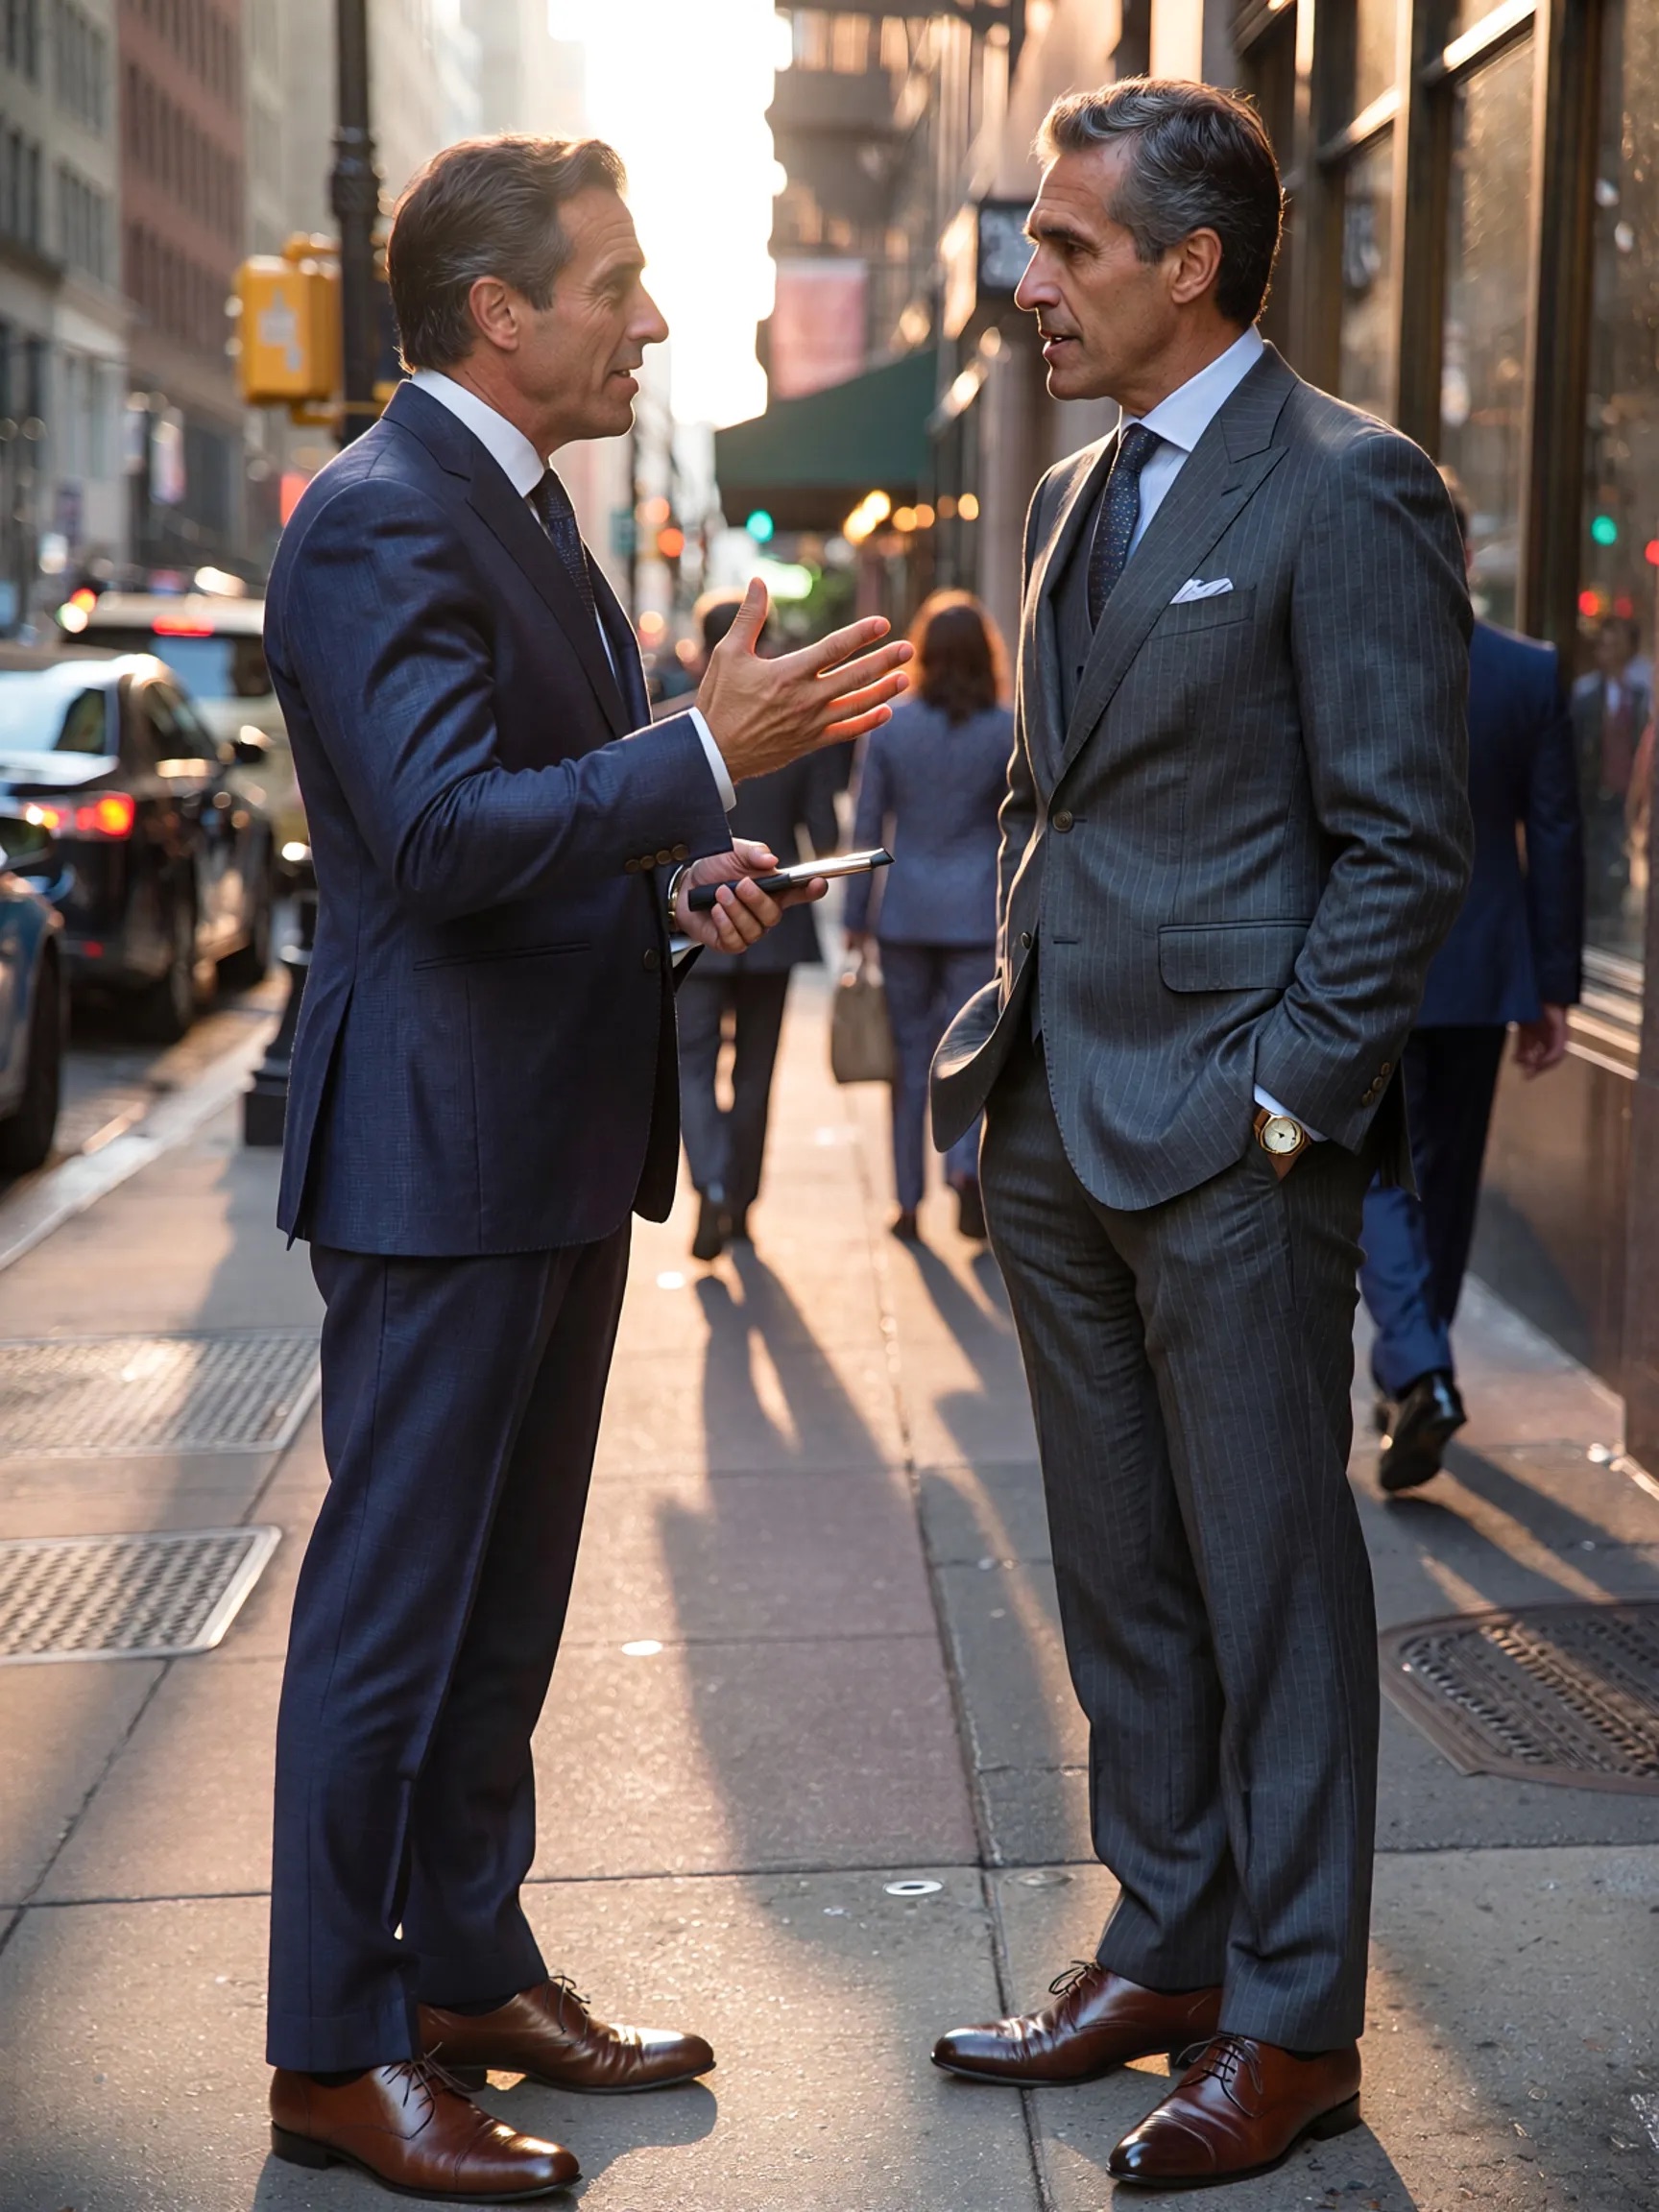
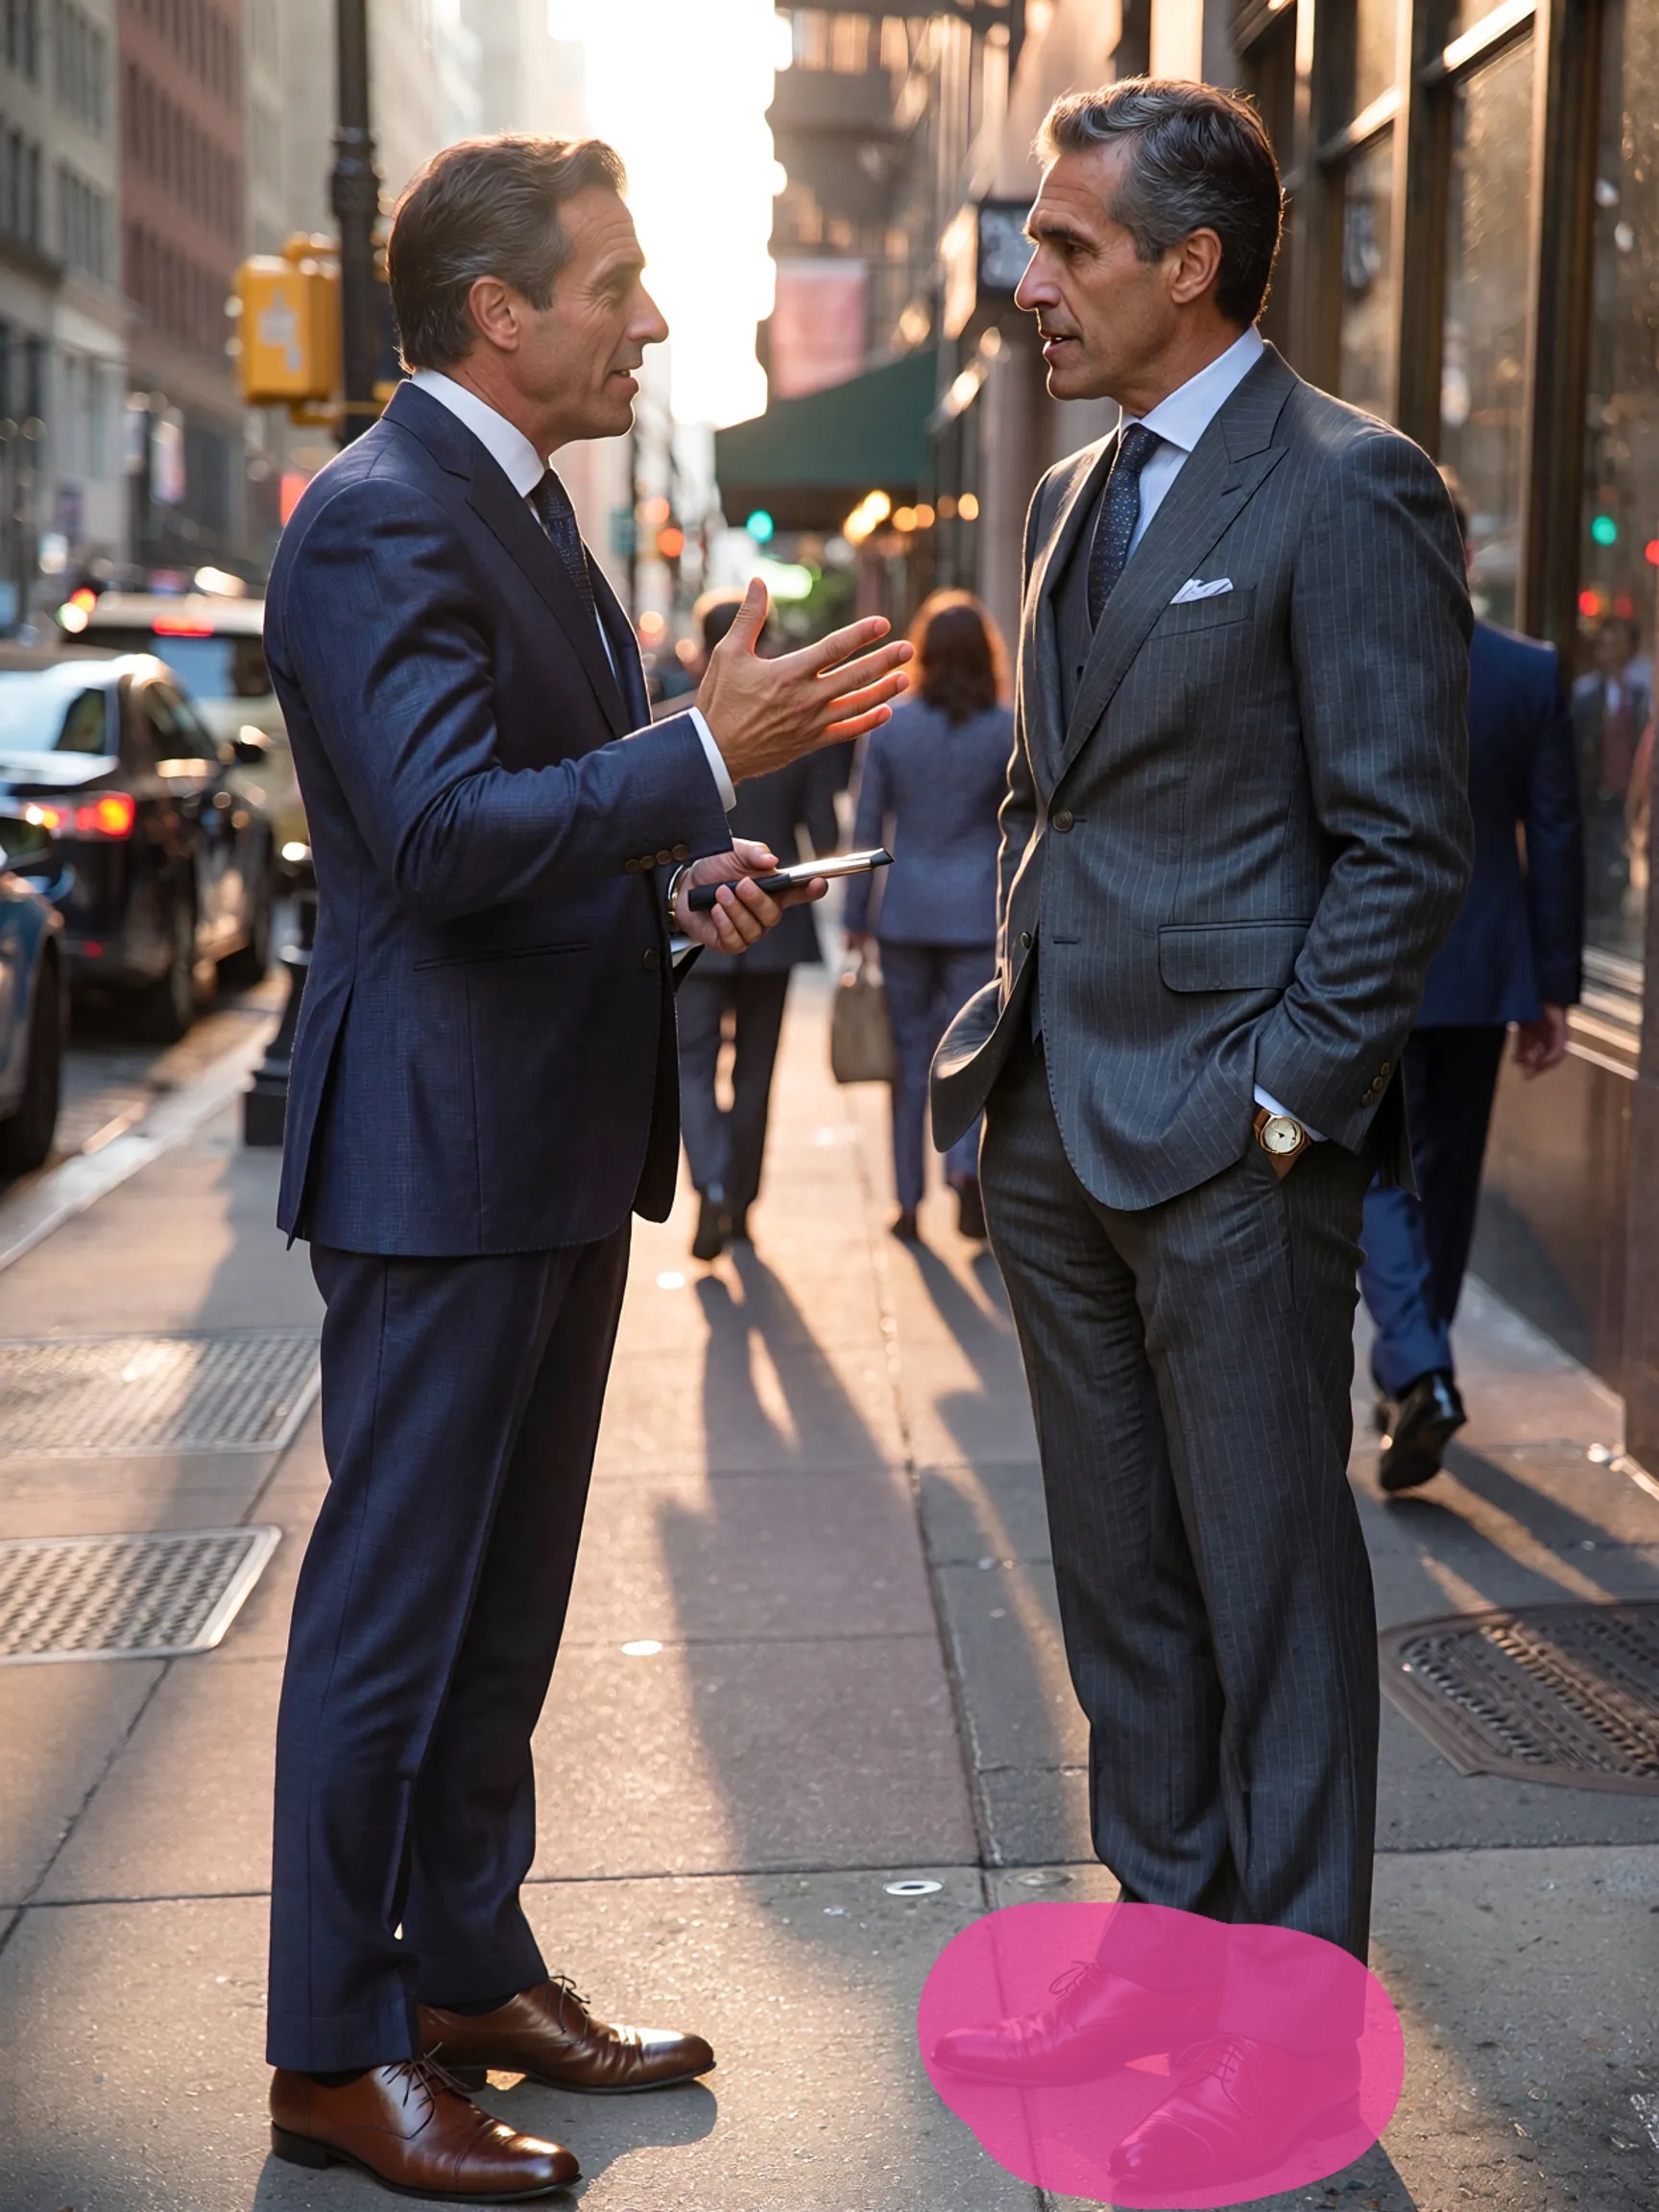
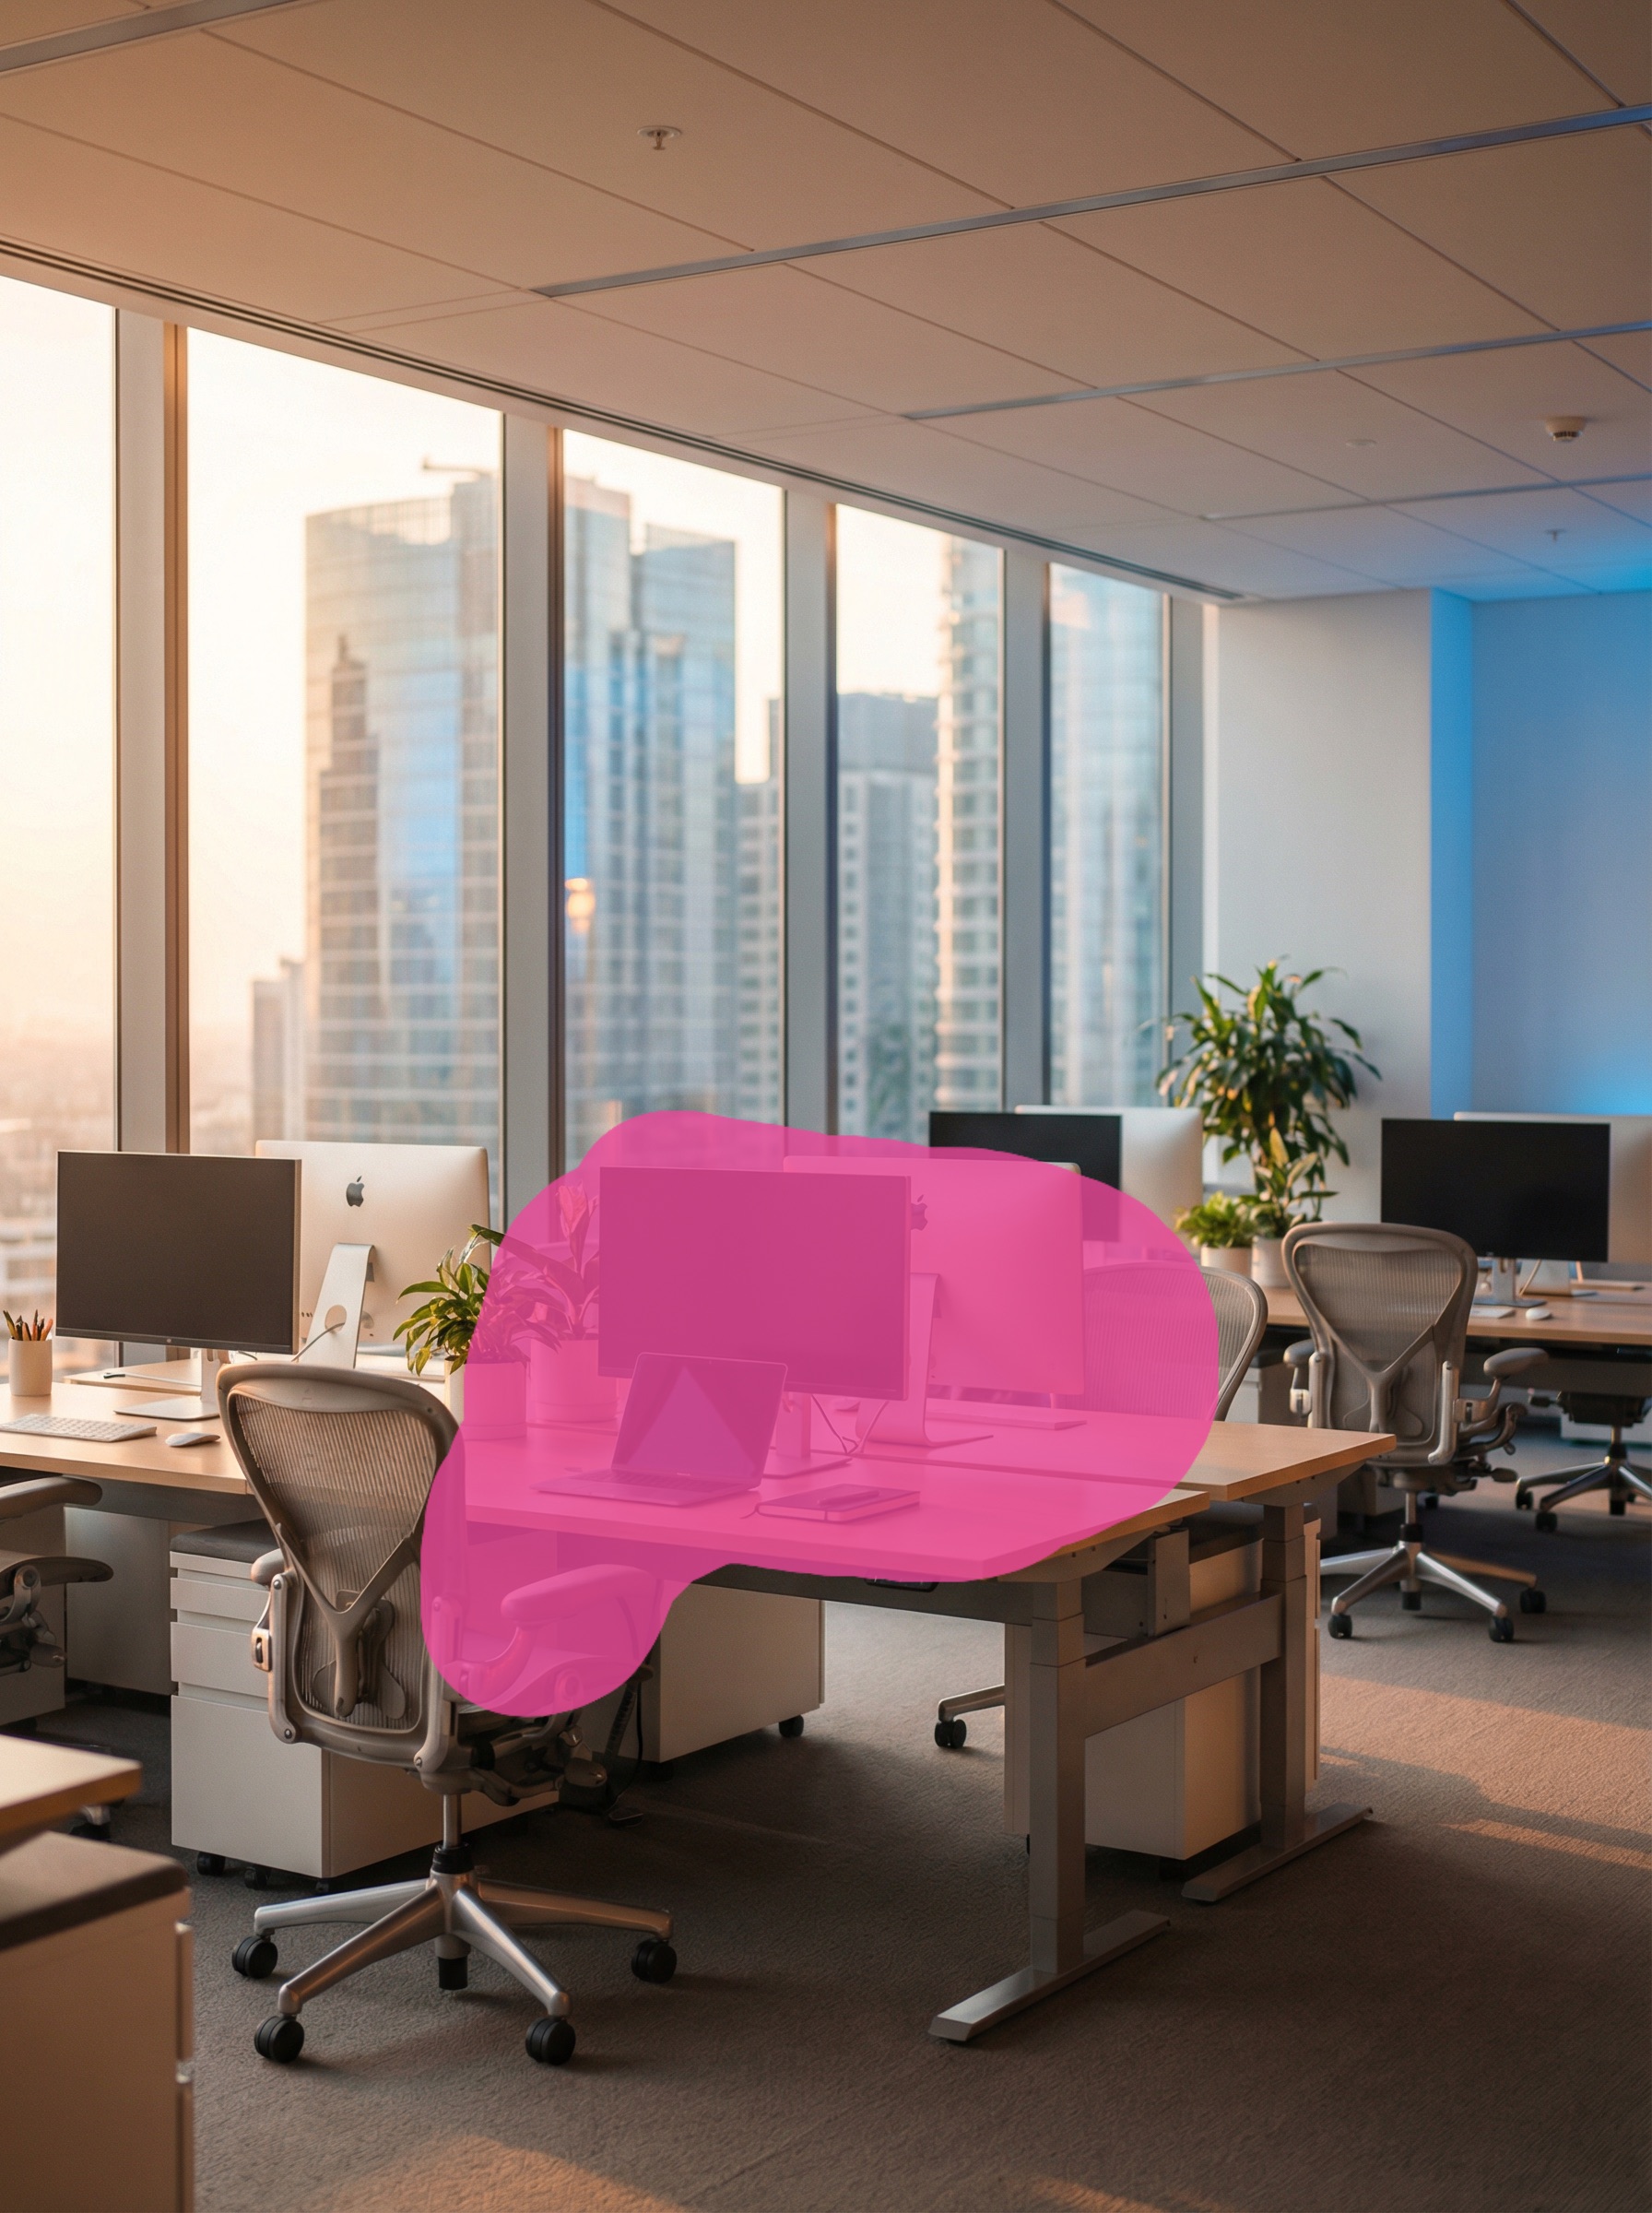
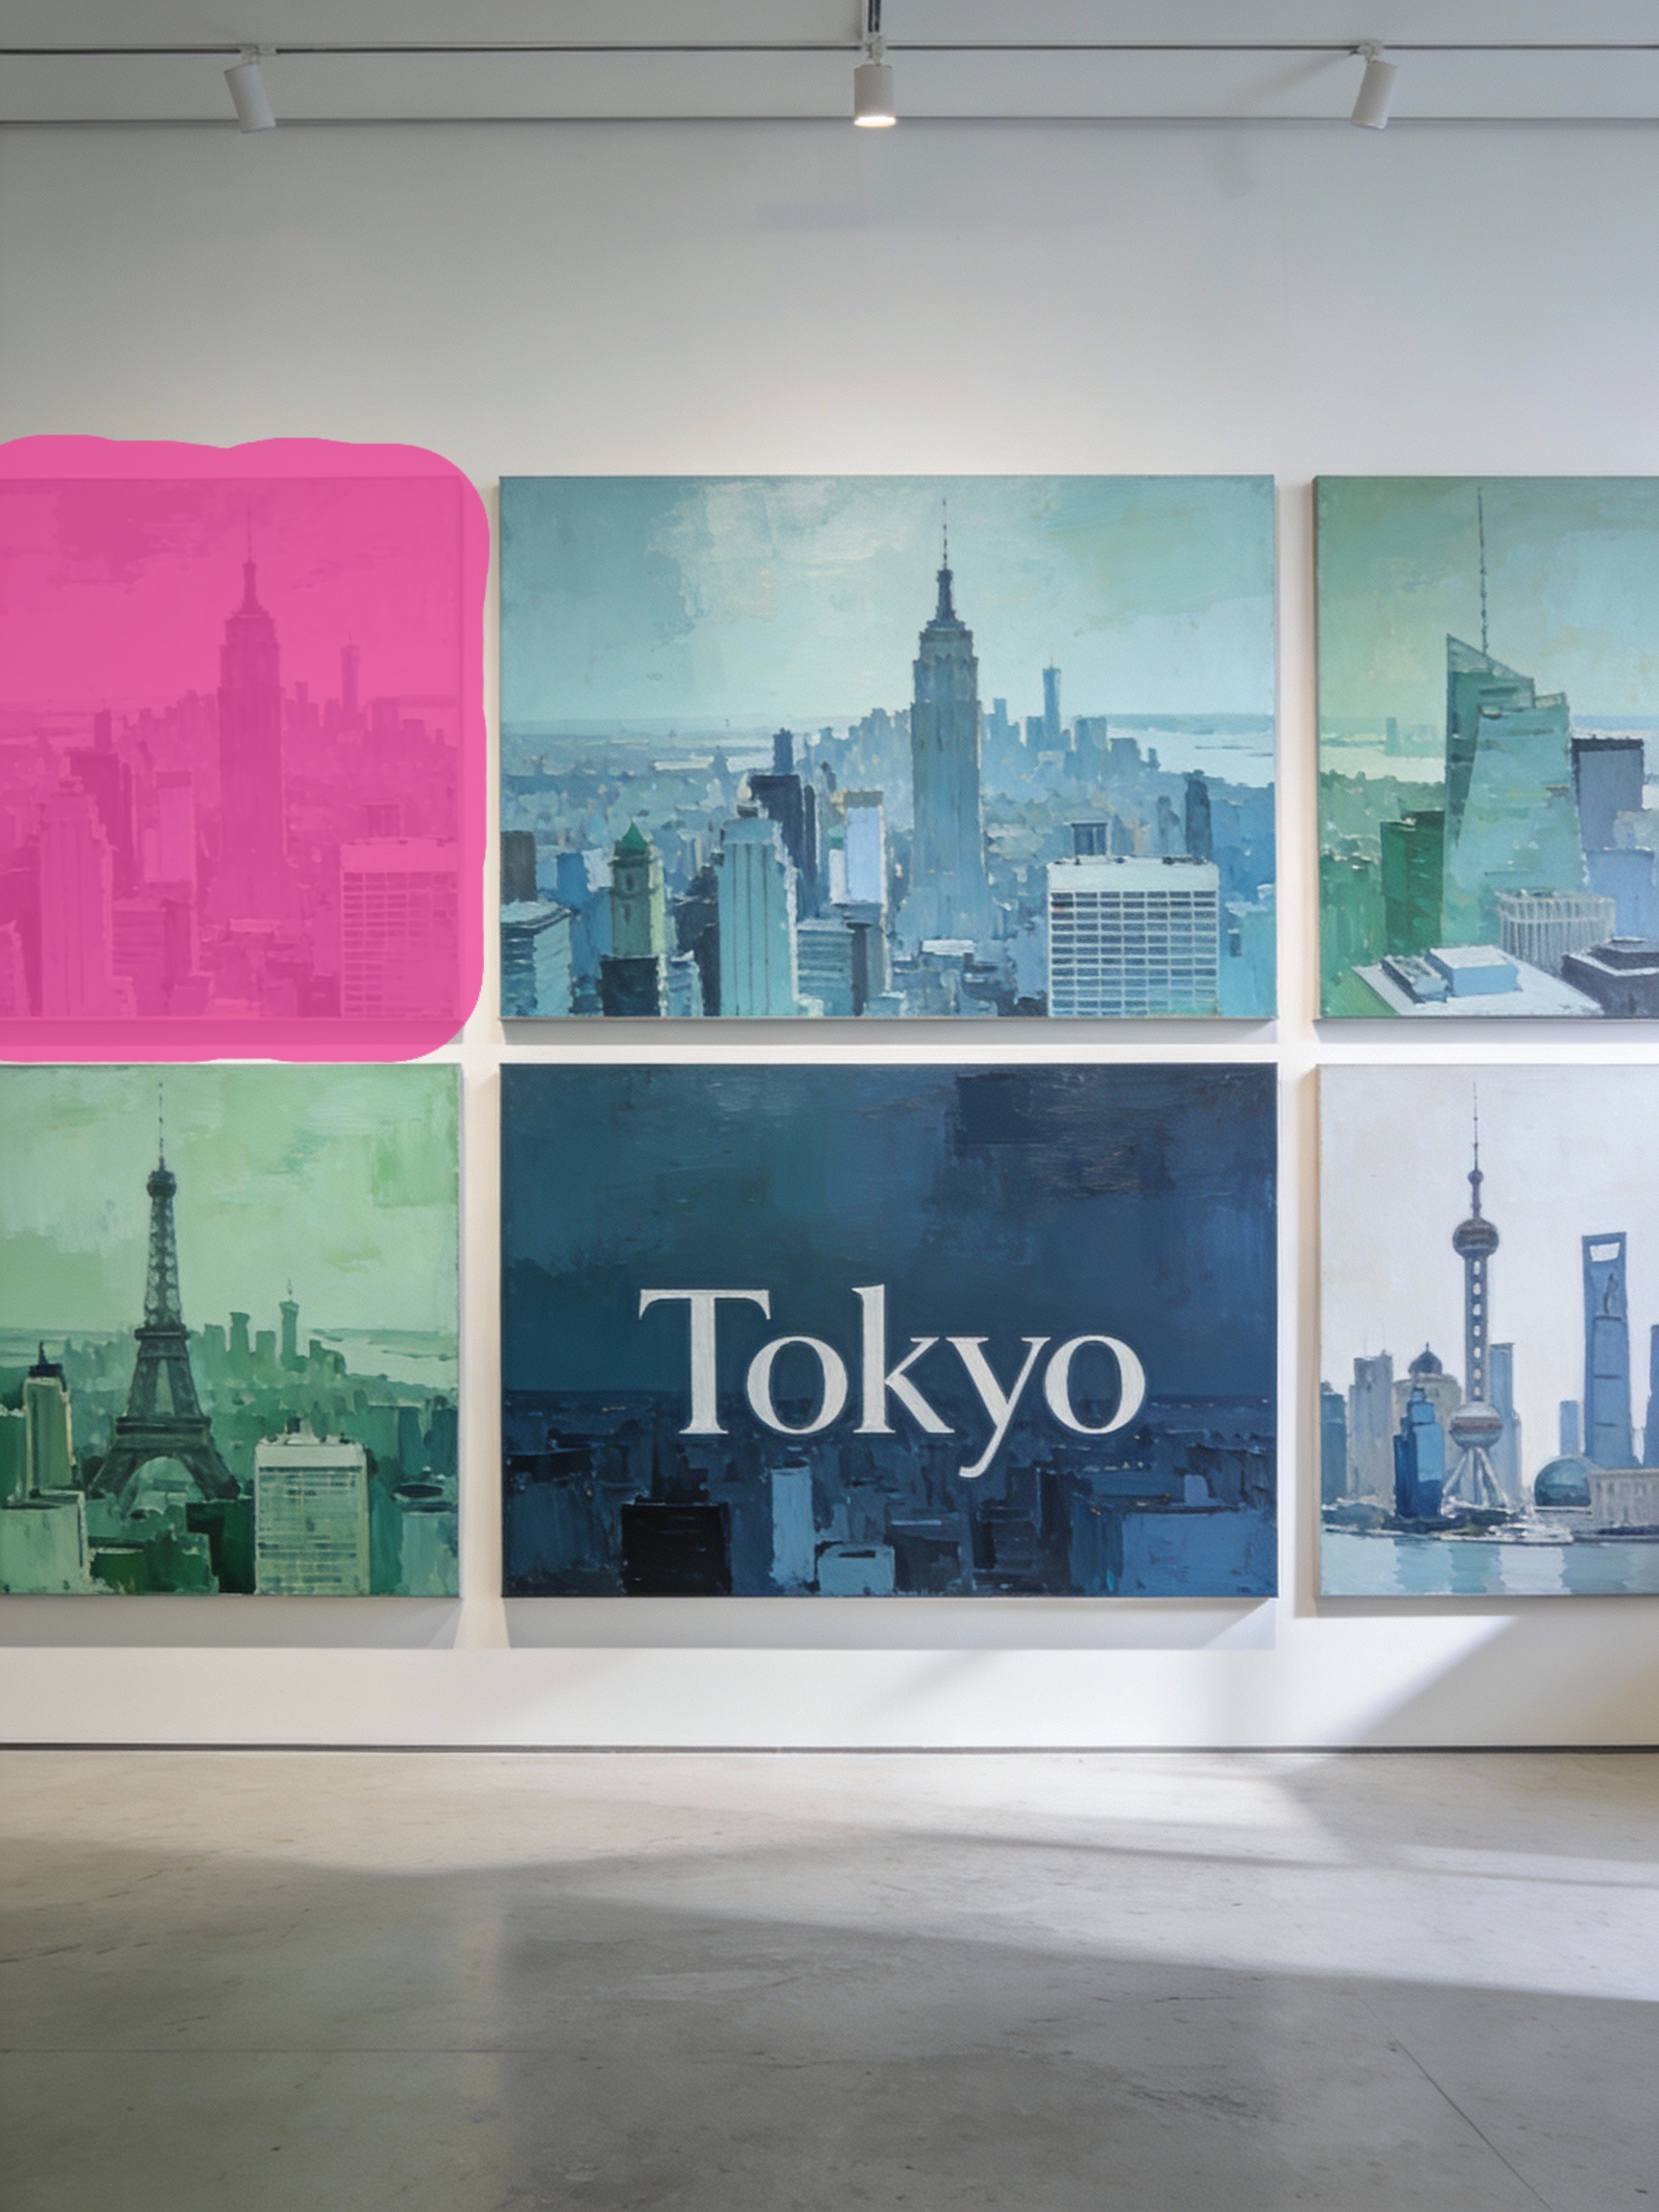
3. Paint the mask
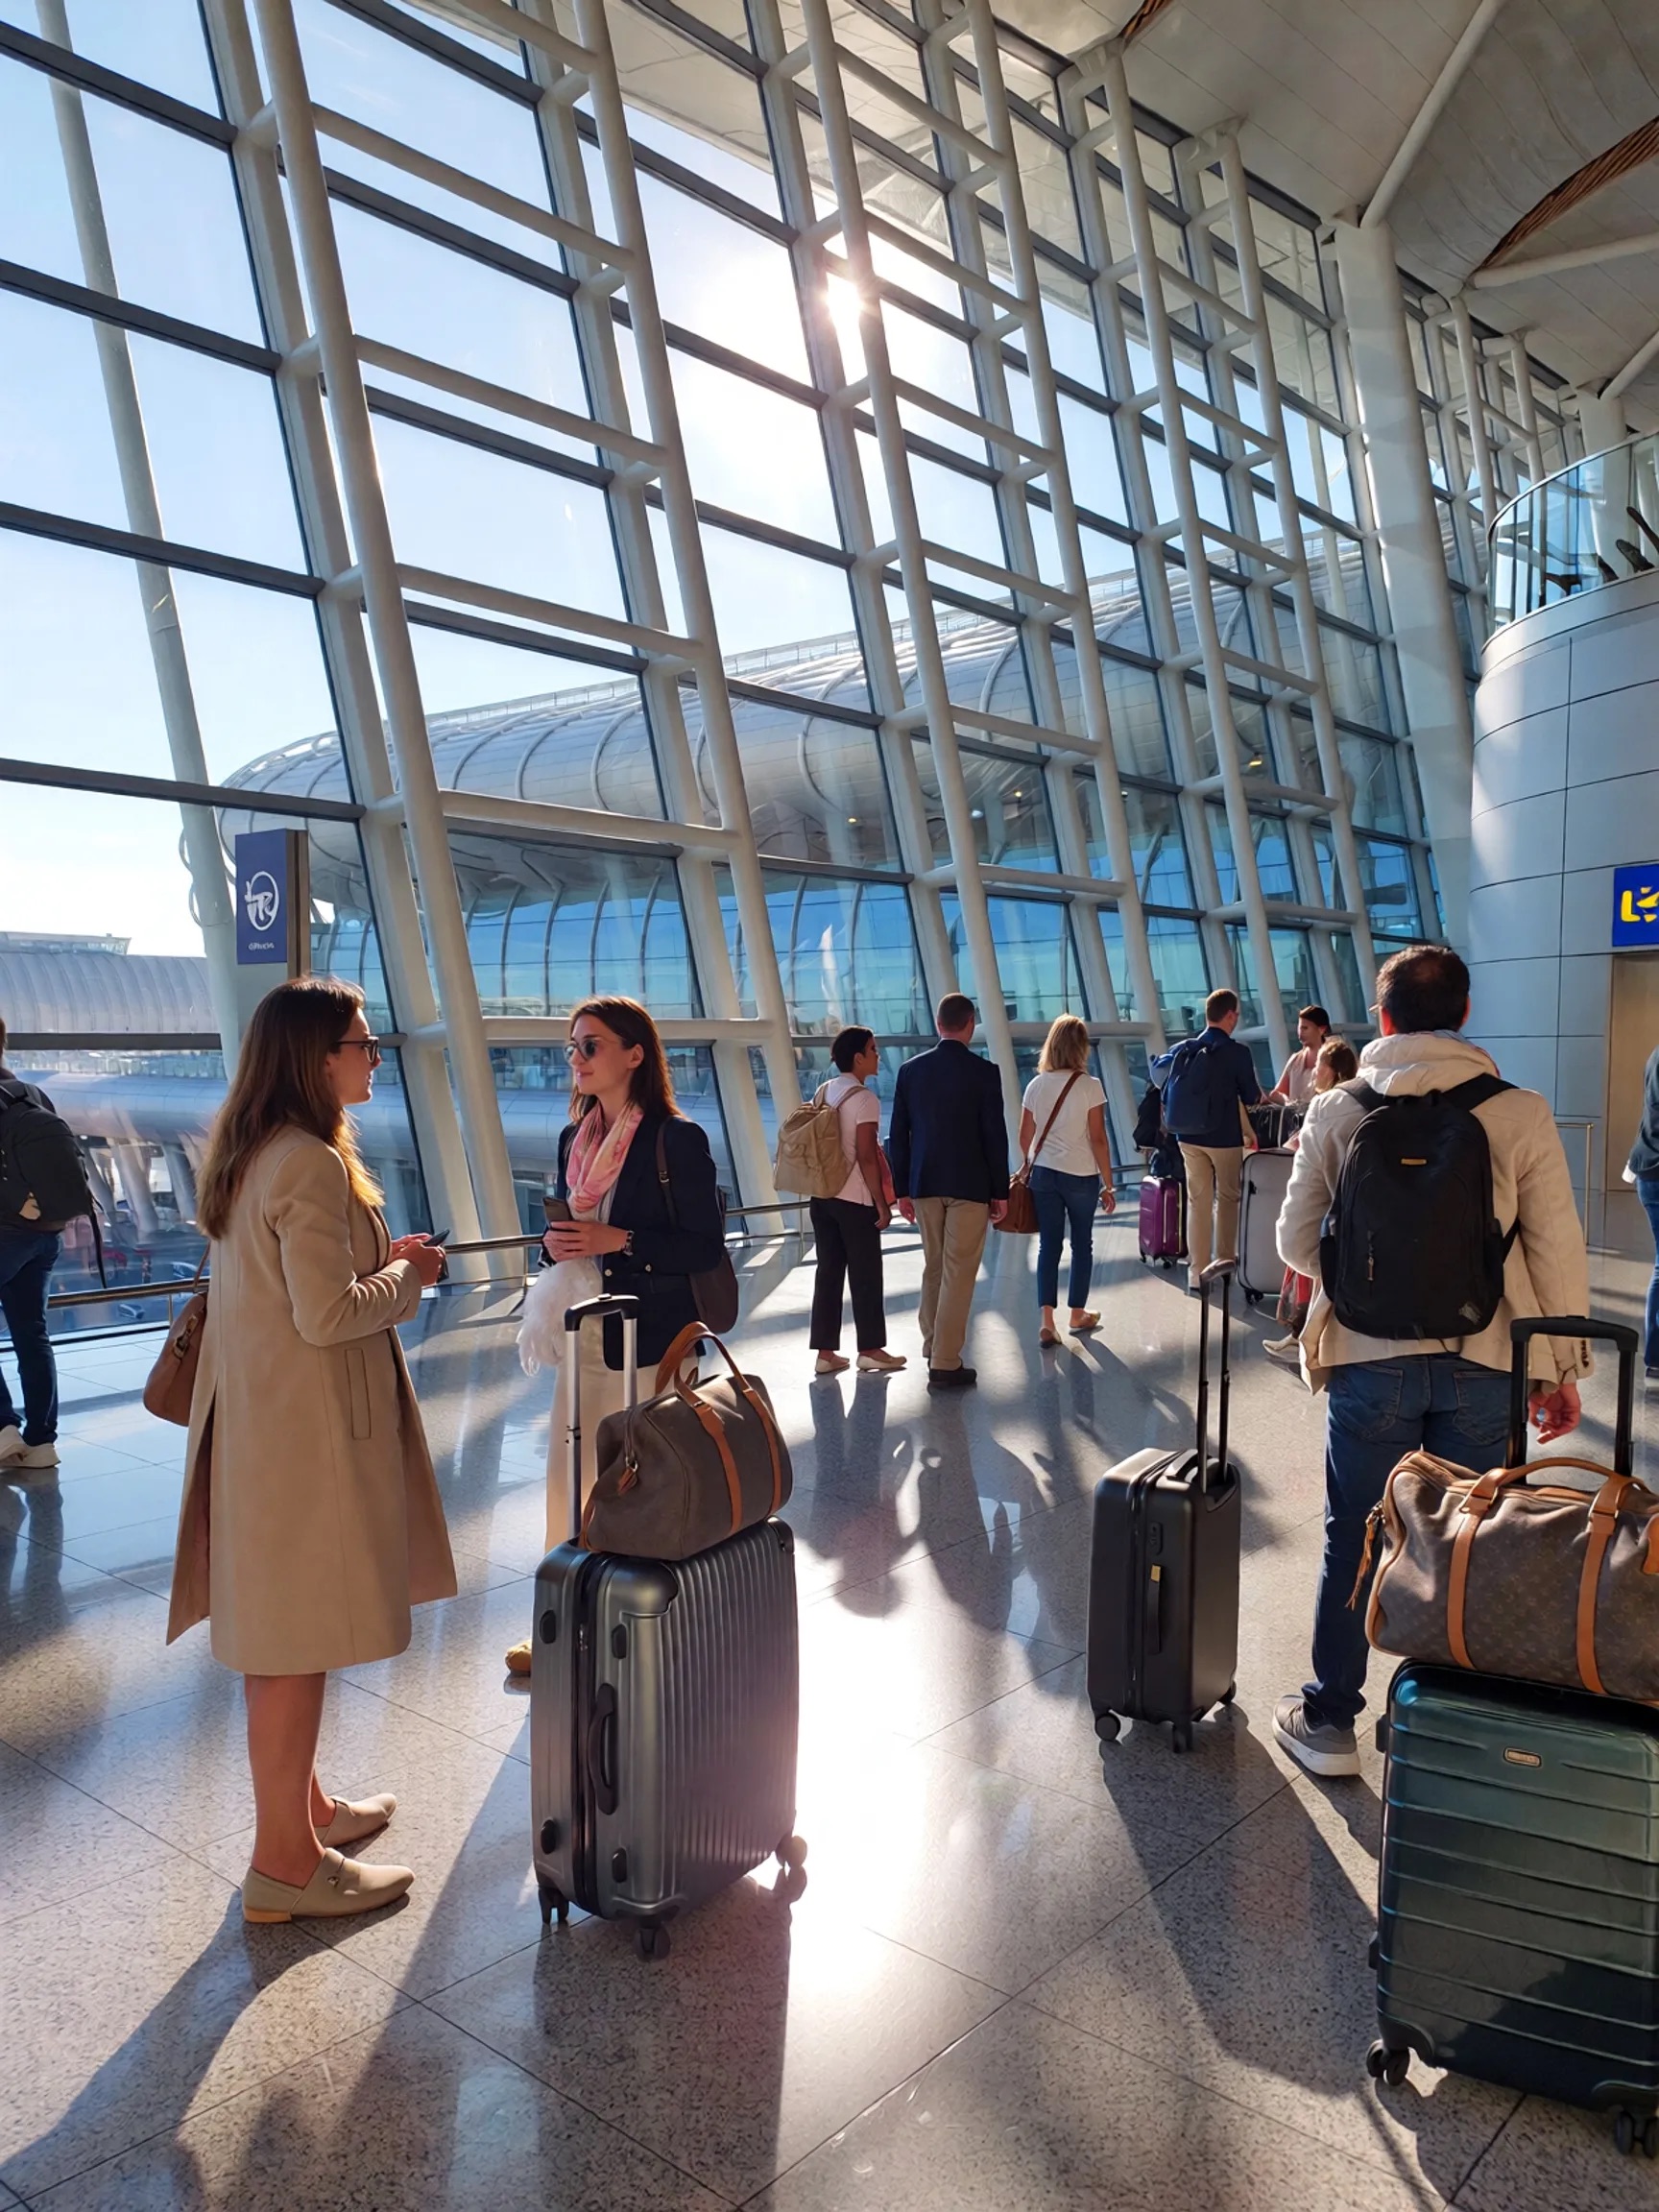
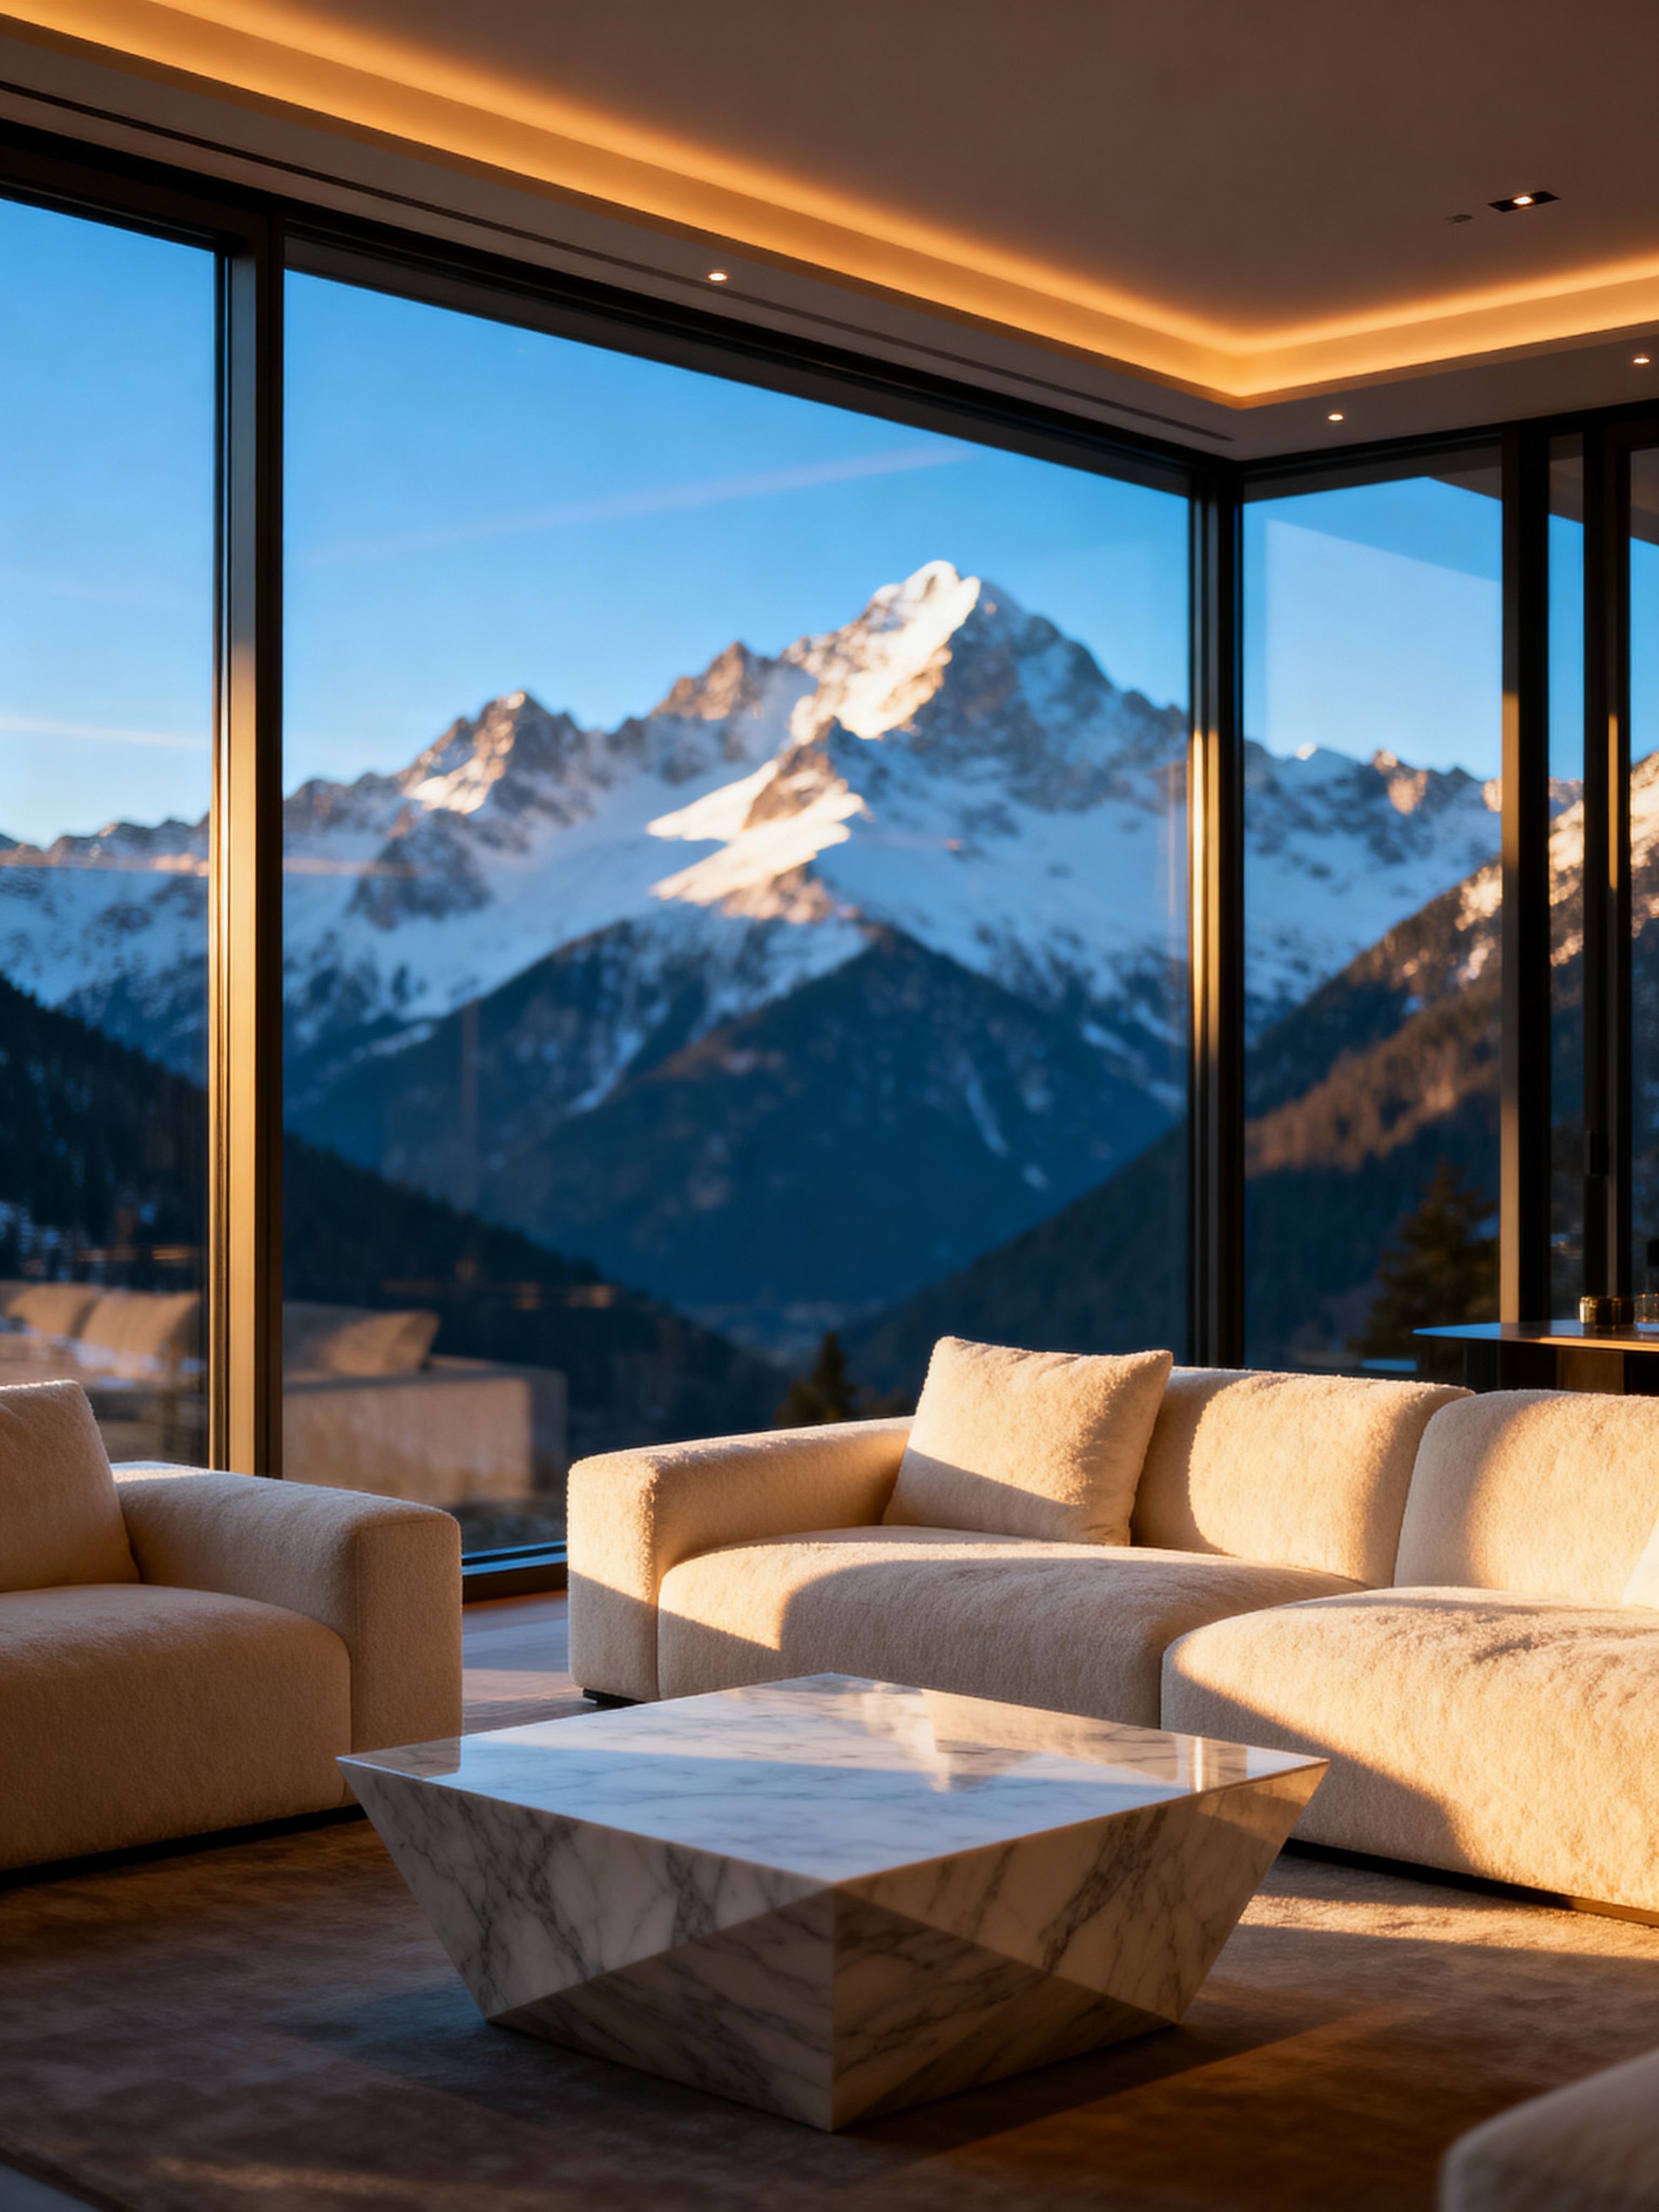
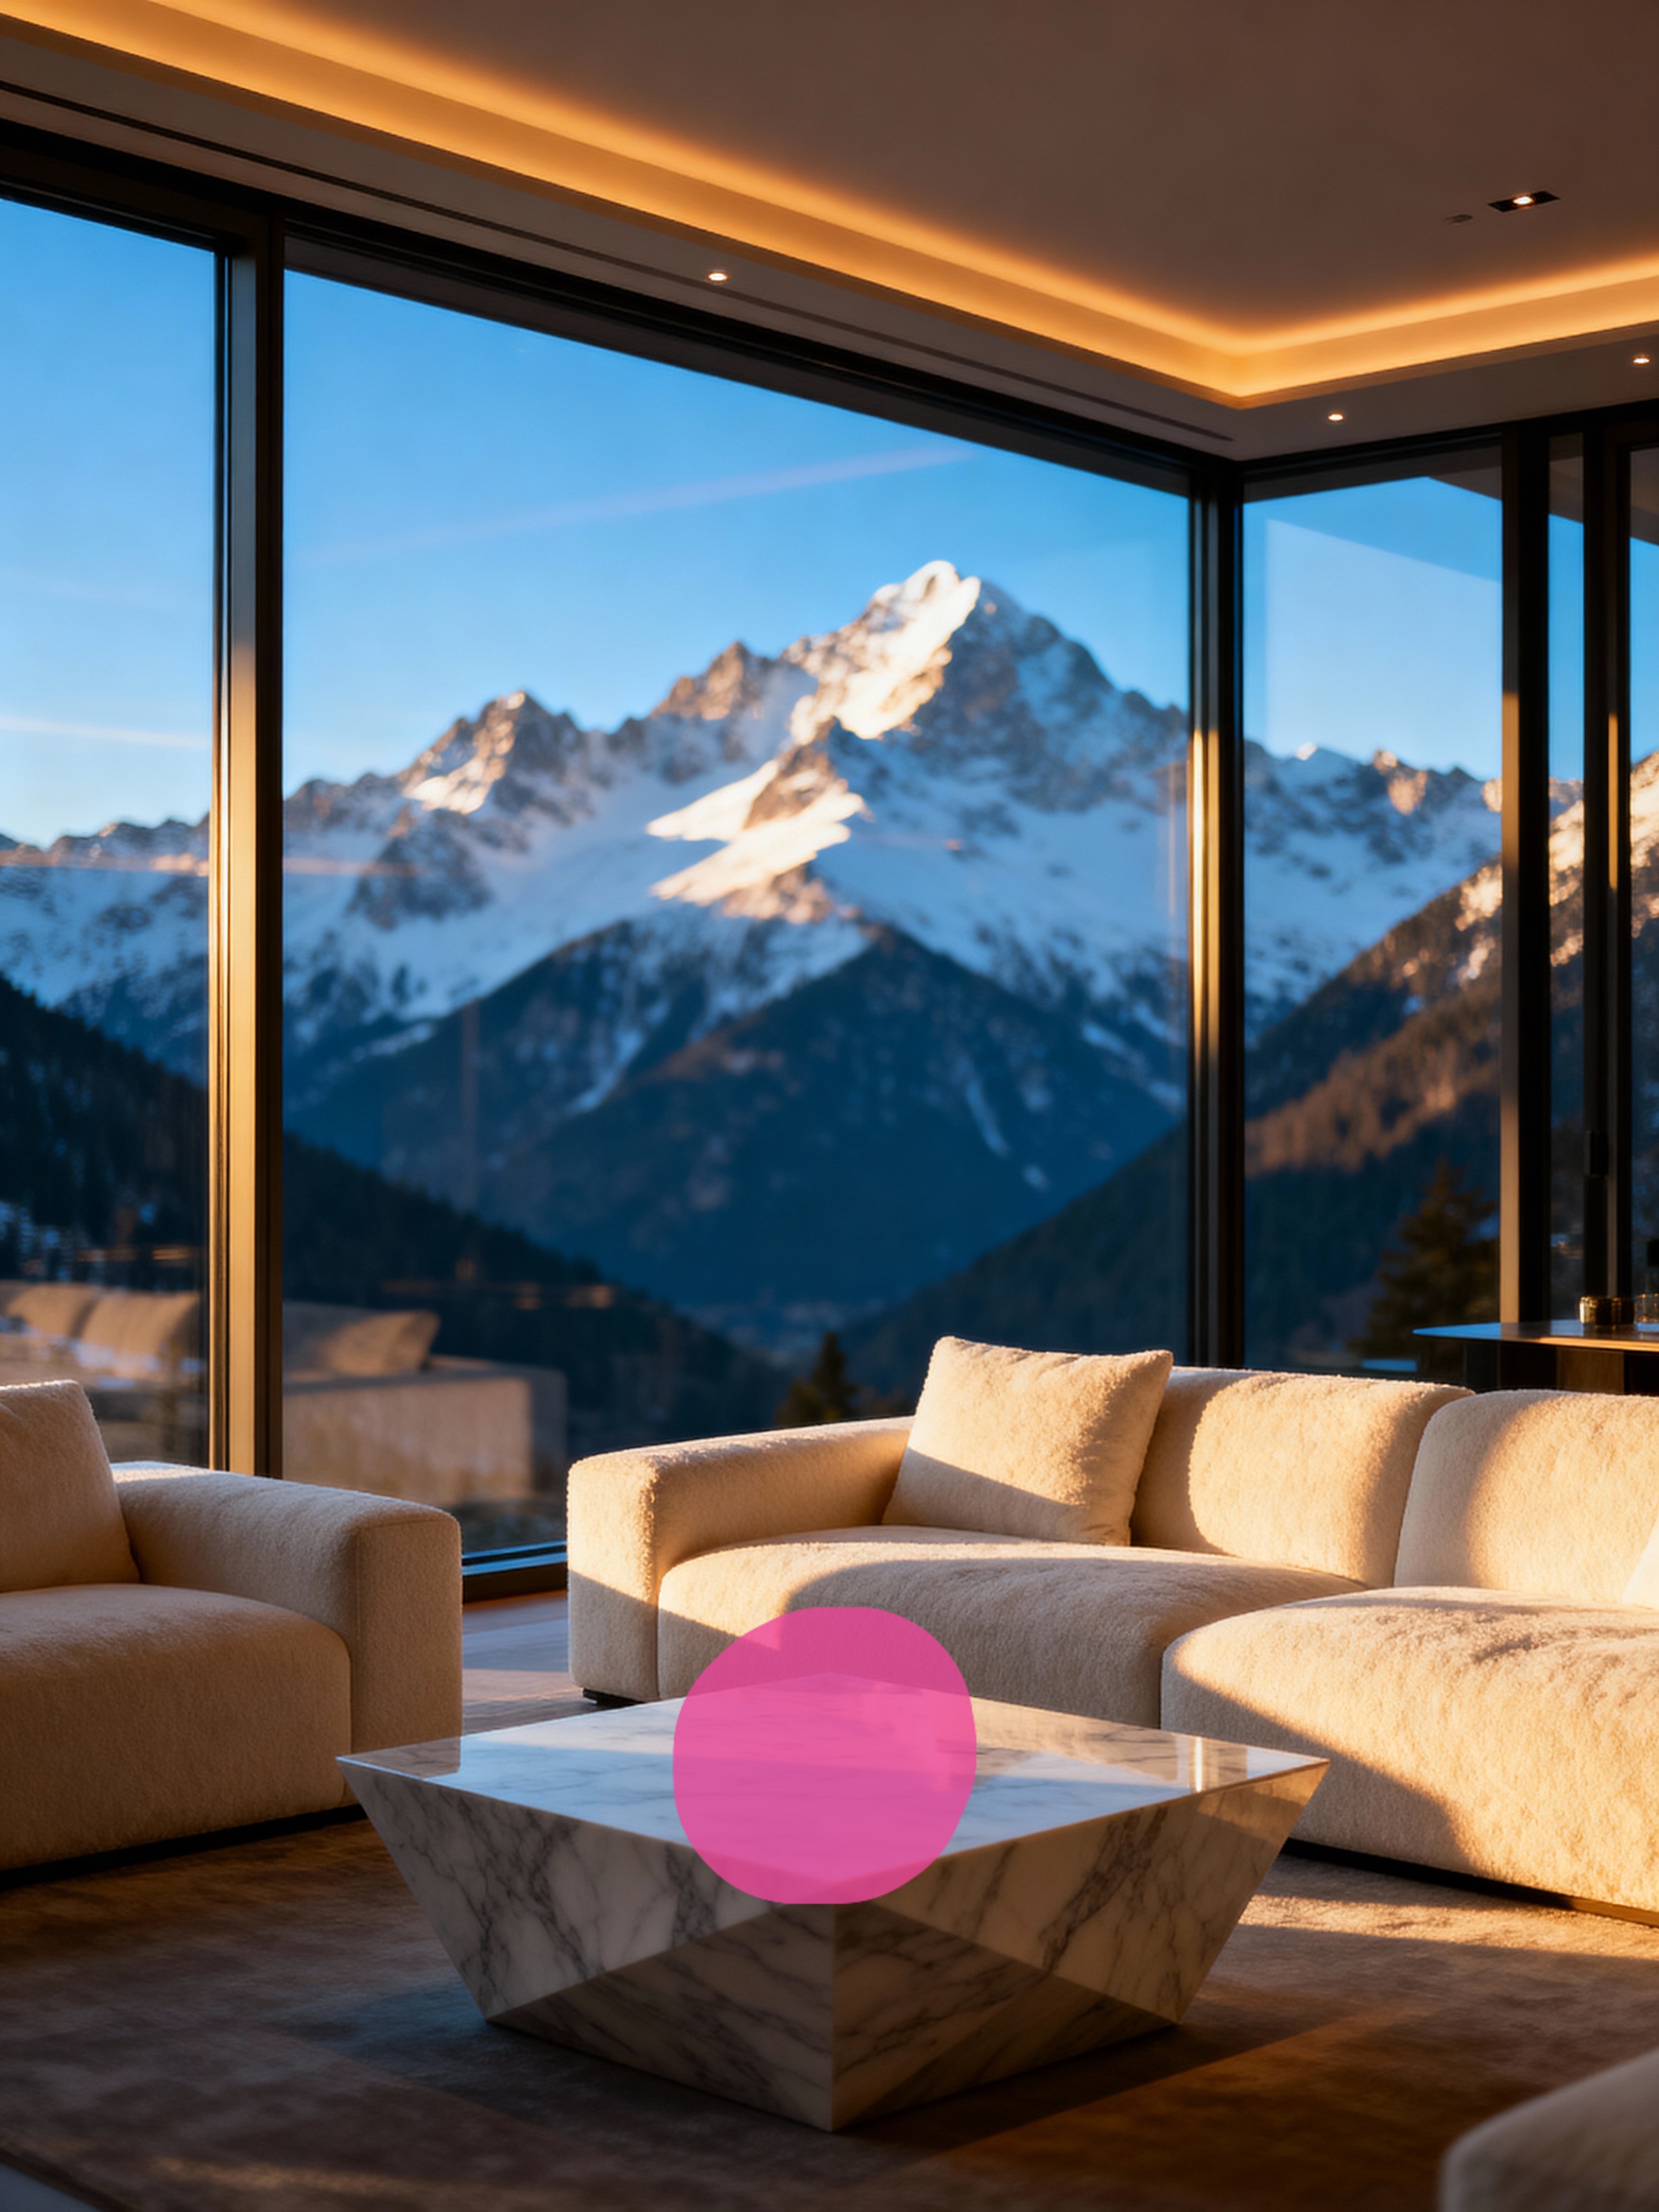
Use the brush to paint over the area you want to change. The masked region appears as a pink overlay so you can see exactly what’s covered.
- Adjust brush size with the slider (5px–200px). Go large for broad areas, small for edges and fine details
- Switch to eraser if you overpaint — trim the mask boundary so it doesn’t bleed into areas you want to keep
- Clear the mask with one click to start over
How precise does the mask need to be? For adding new objects, a rough outline works fine — the model fills in edges naturally. For replacements and removals, mask a few pixels wider than the target object. This gives the AI a buffer zone to blend seamlessly.
4. Write a prompt
Tell the AI what should appear in the masked area. The prompt describes the result — what you want to see there, not what’s currently there.
Here are real use cases and how to prompt for each:
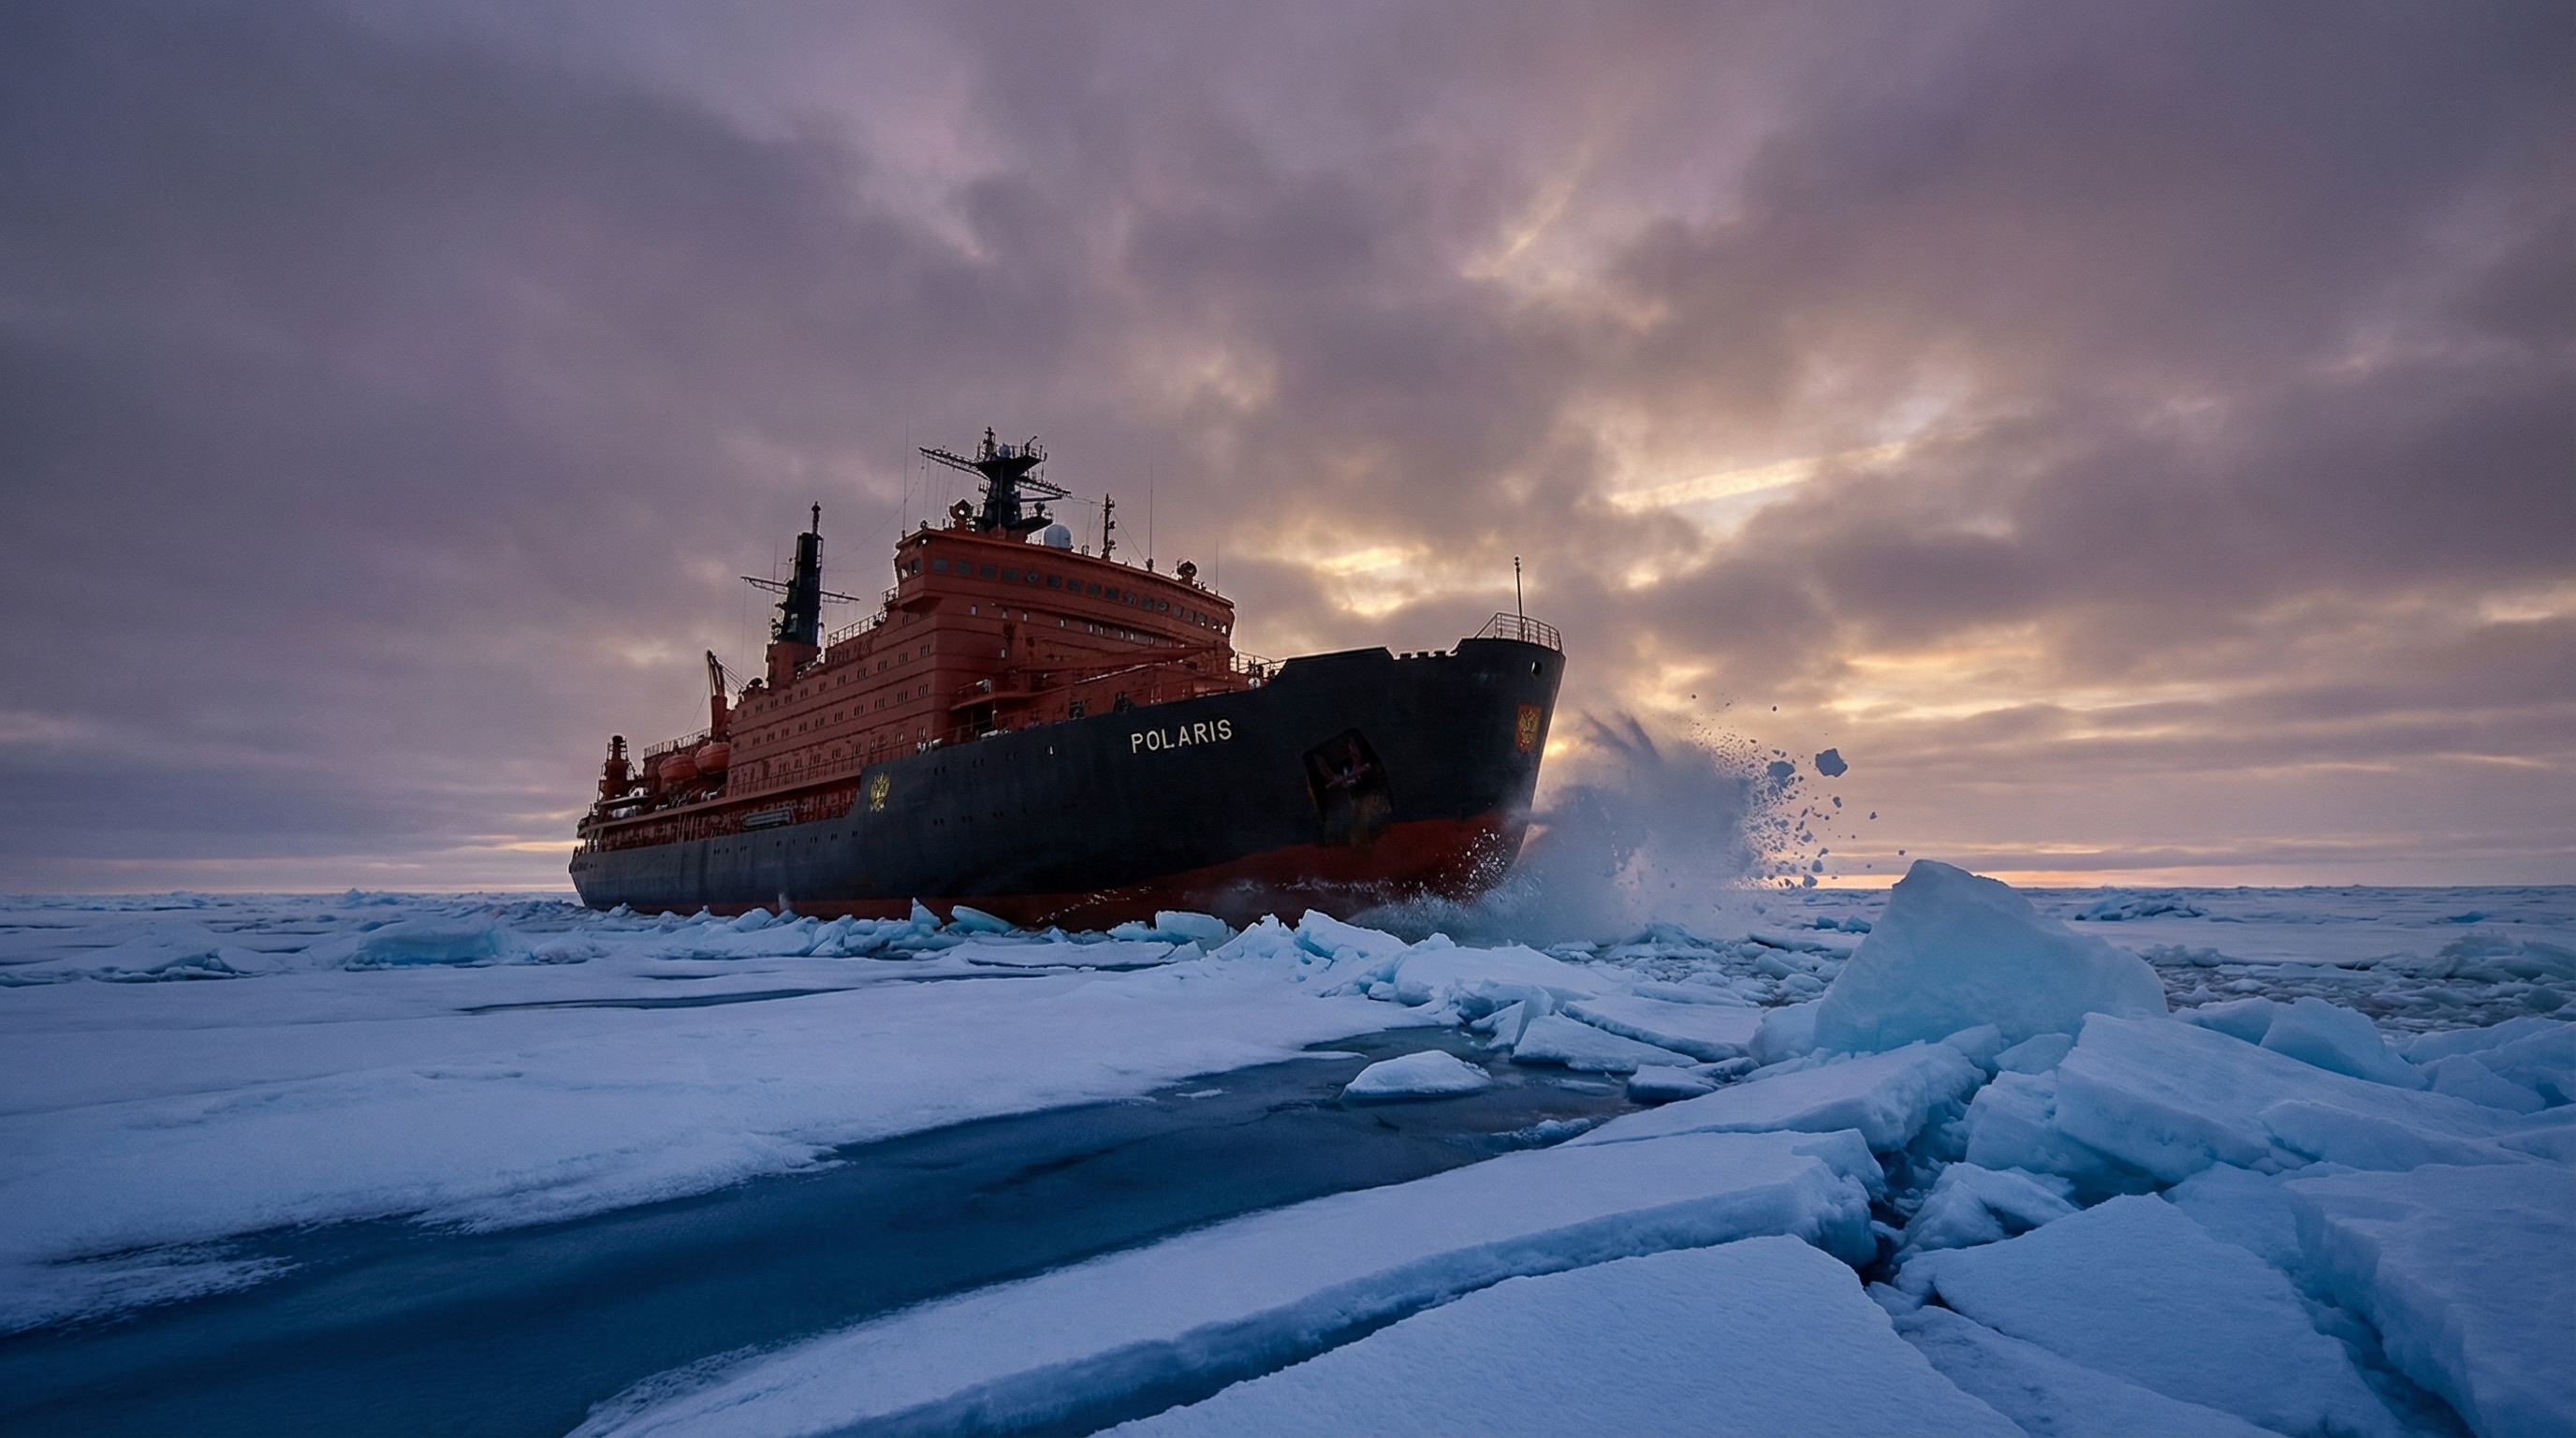
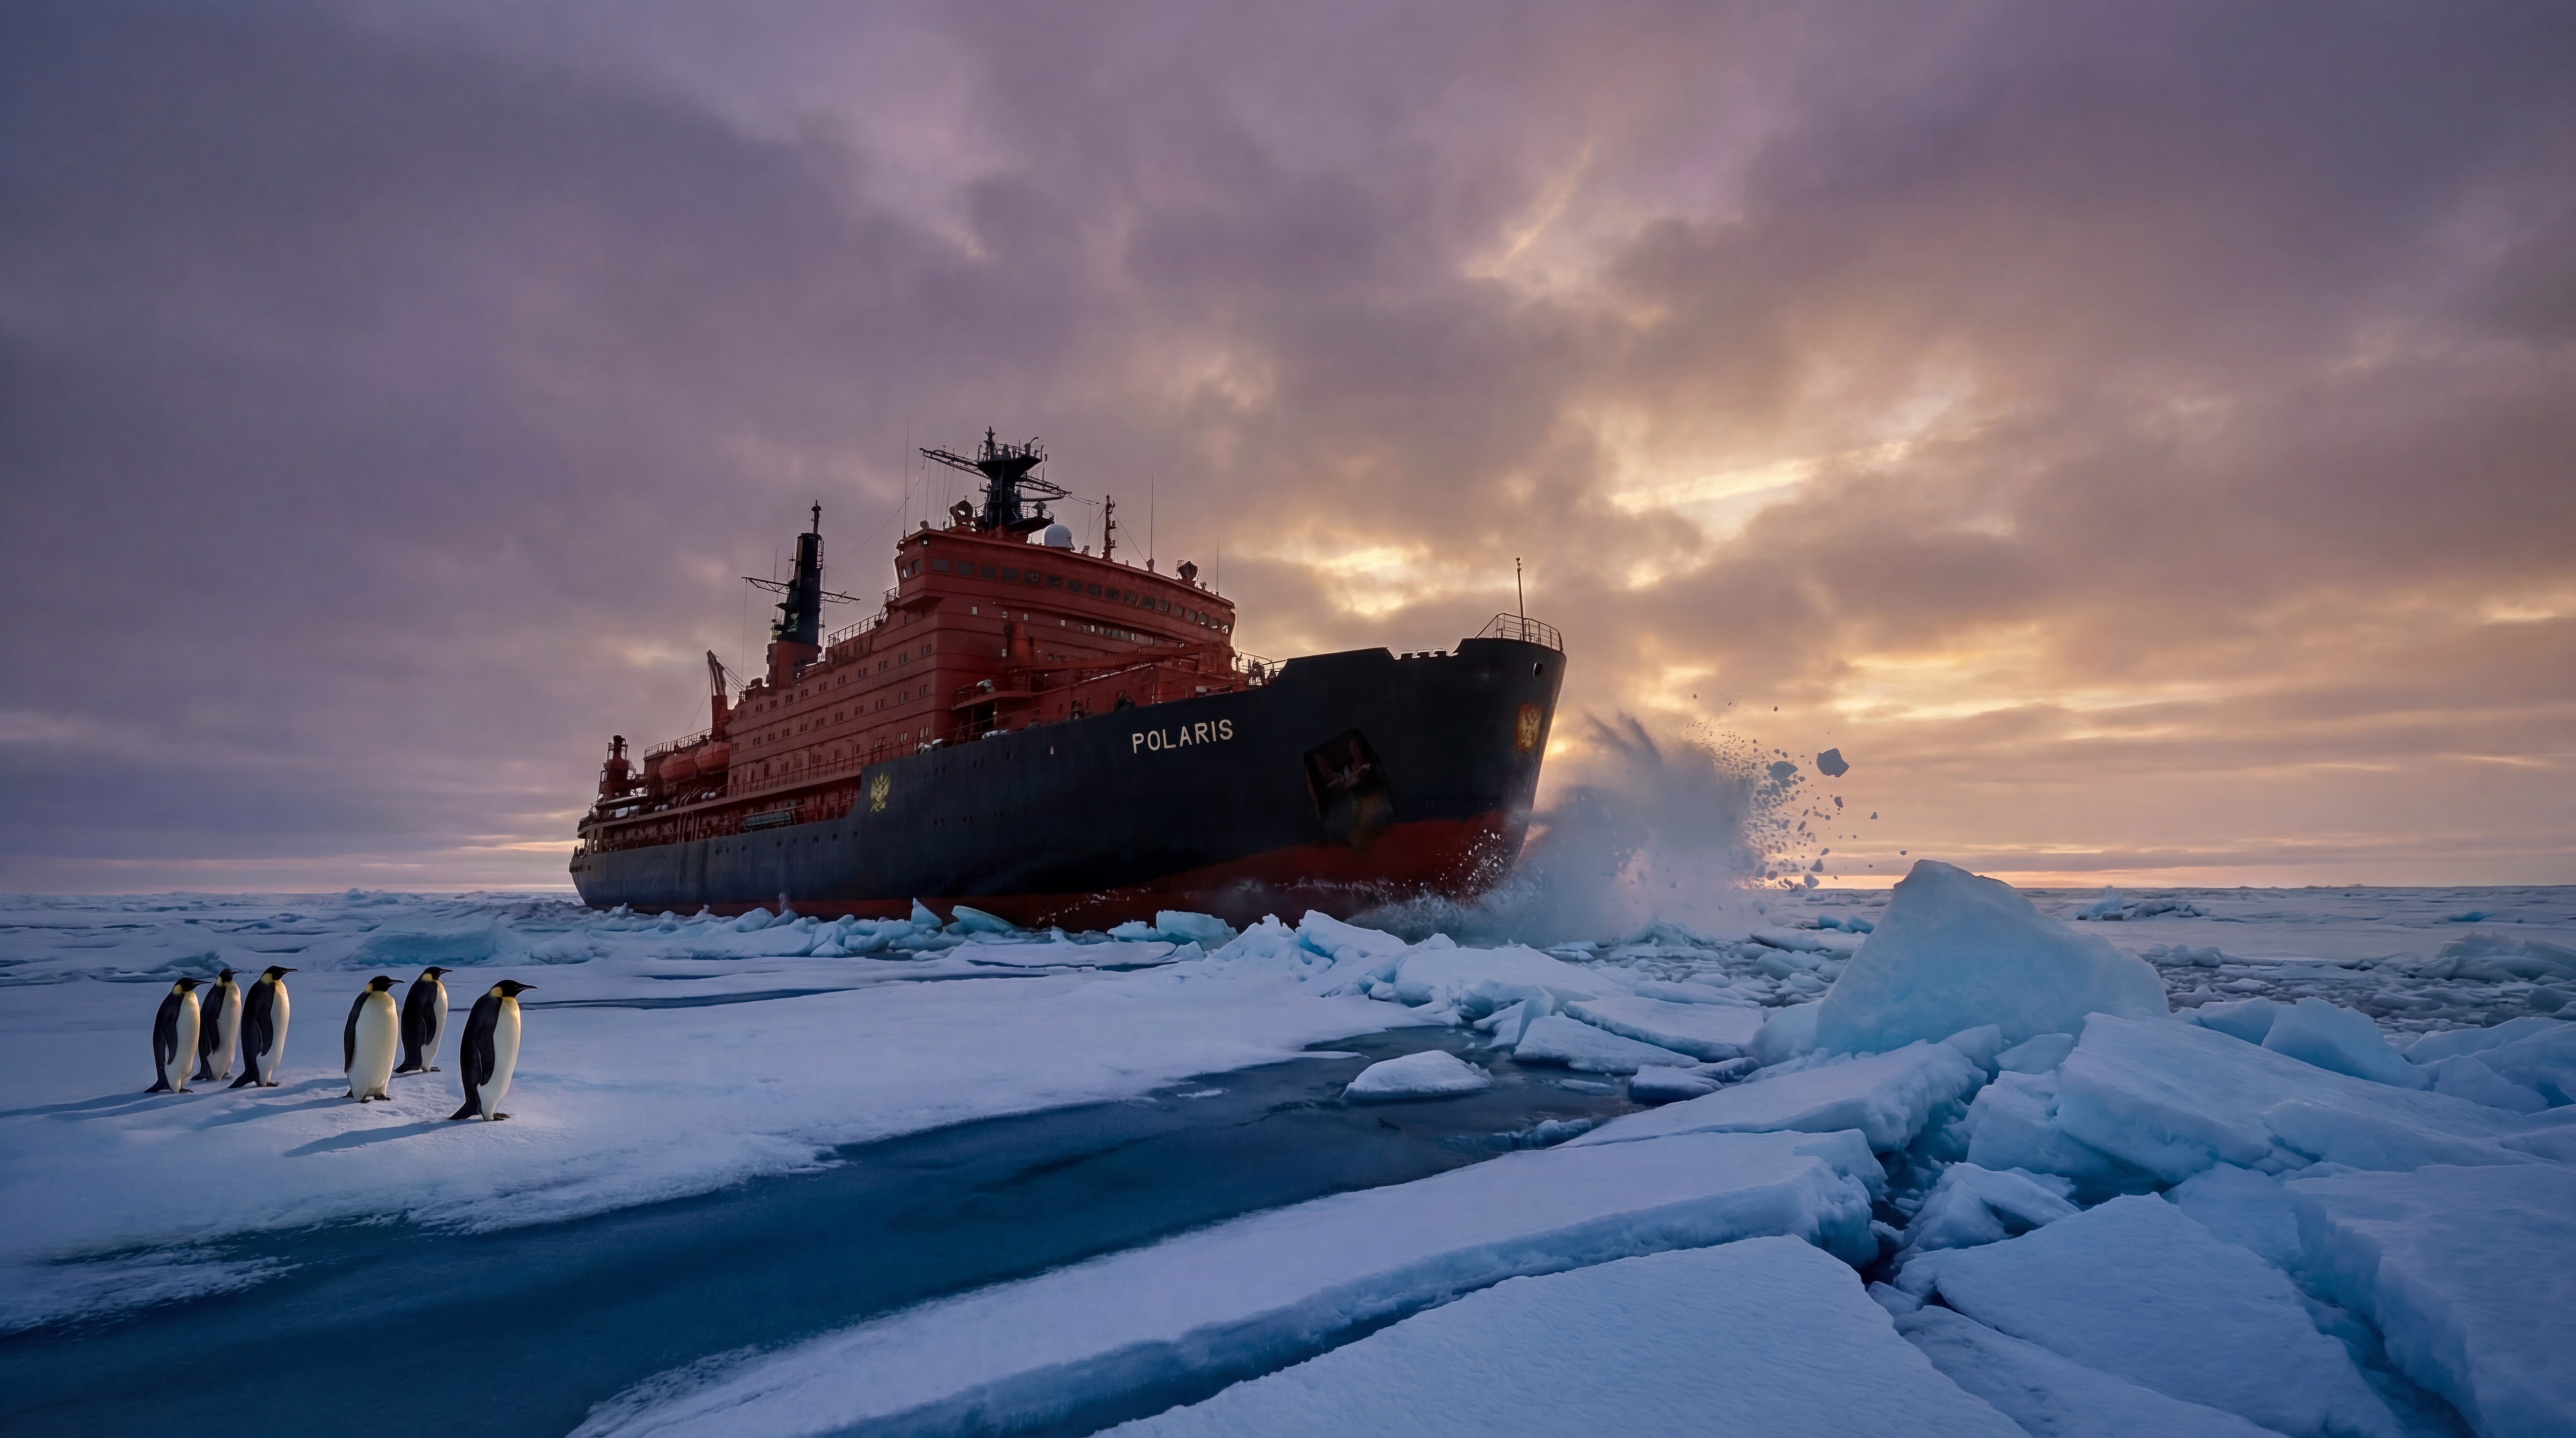
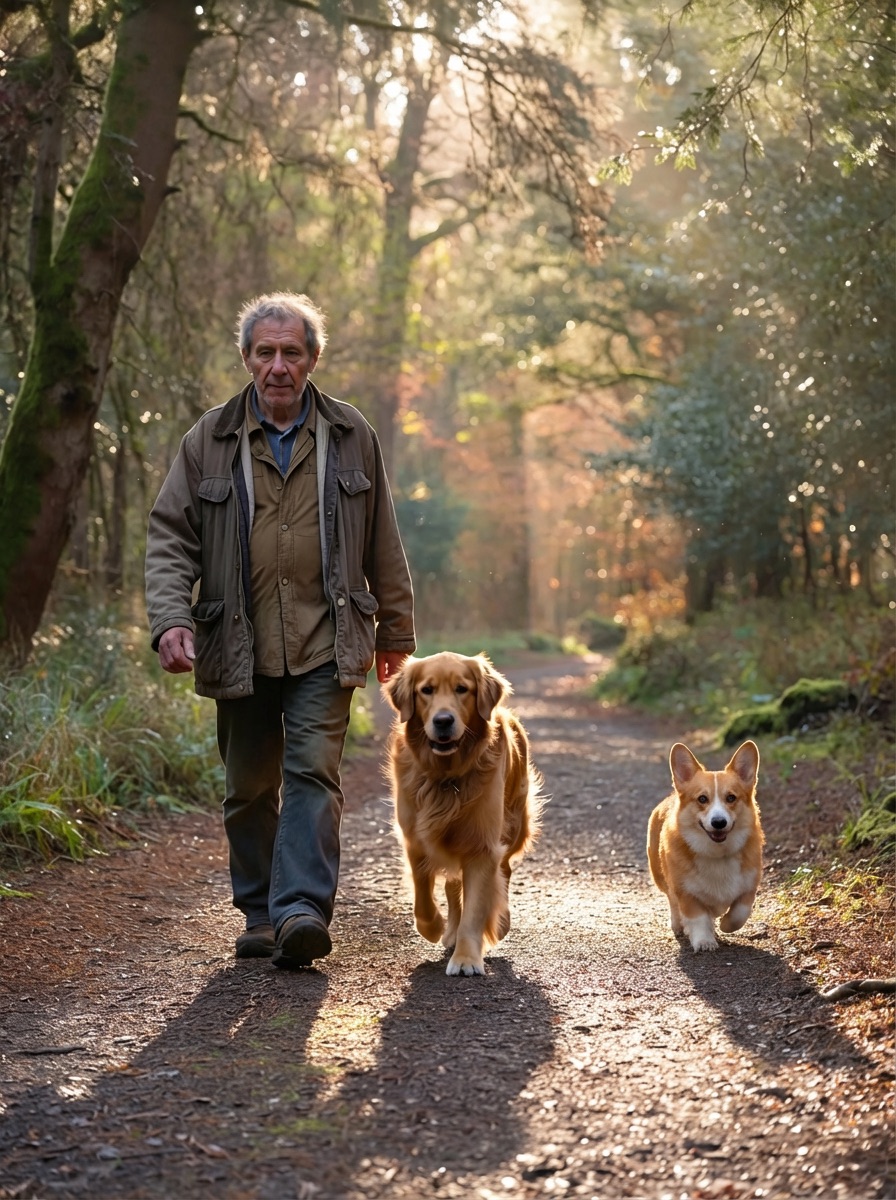
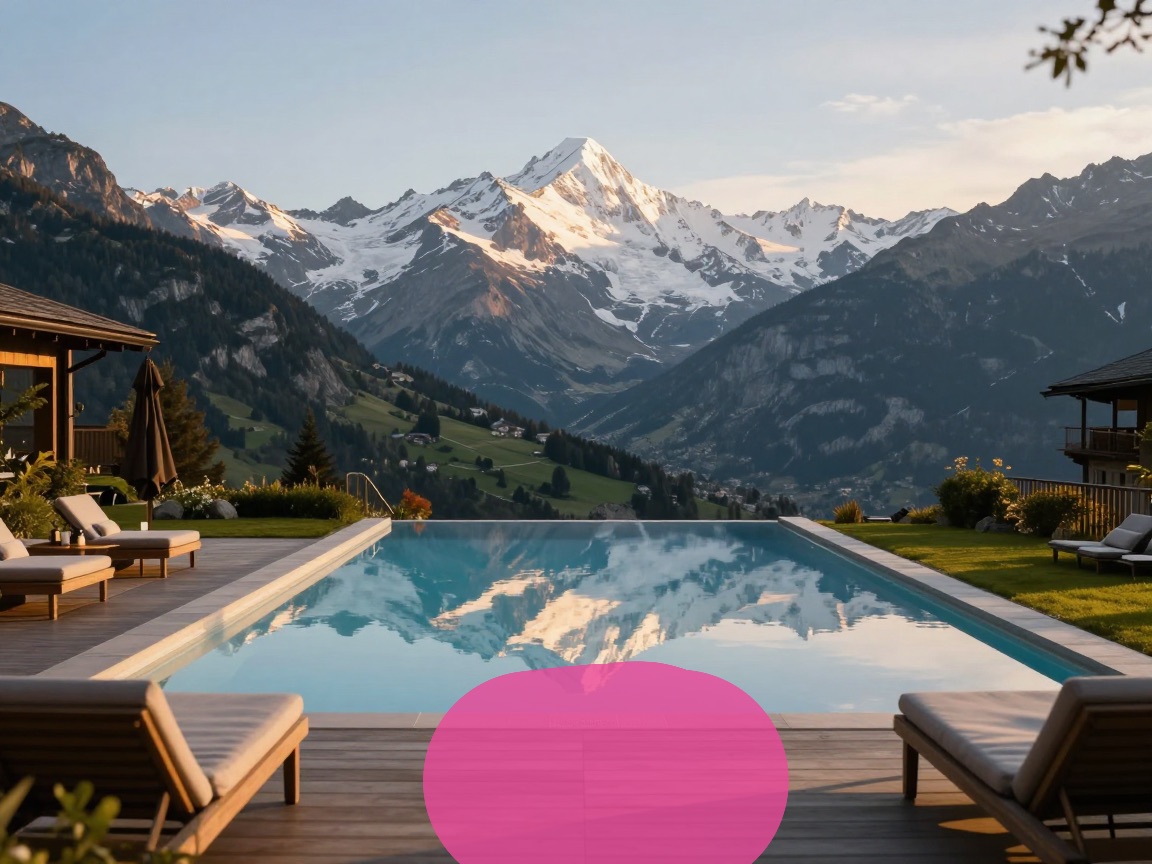
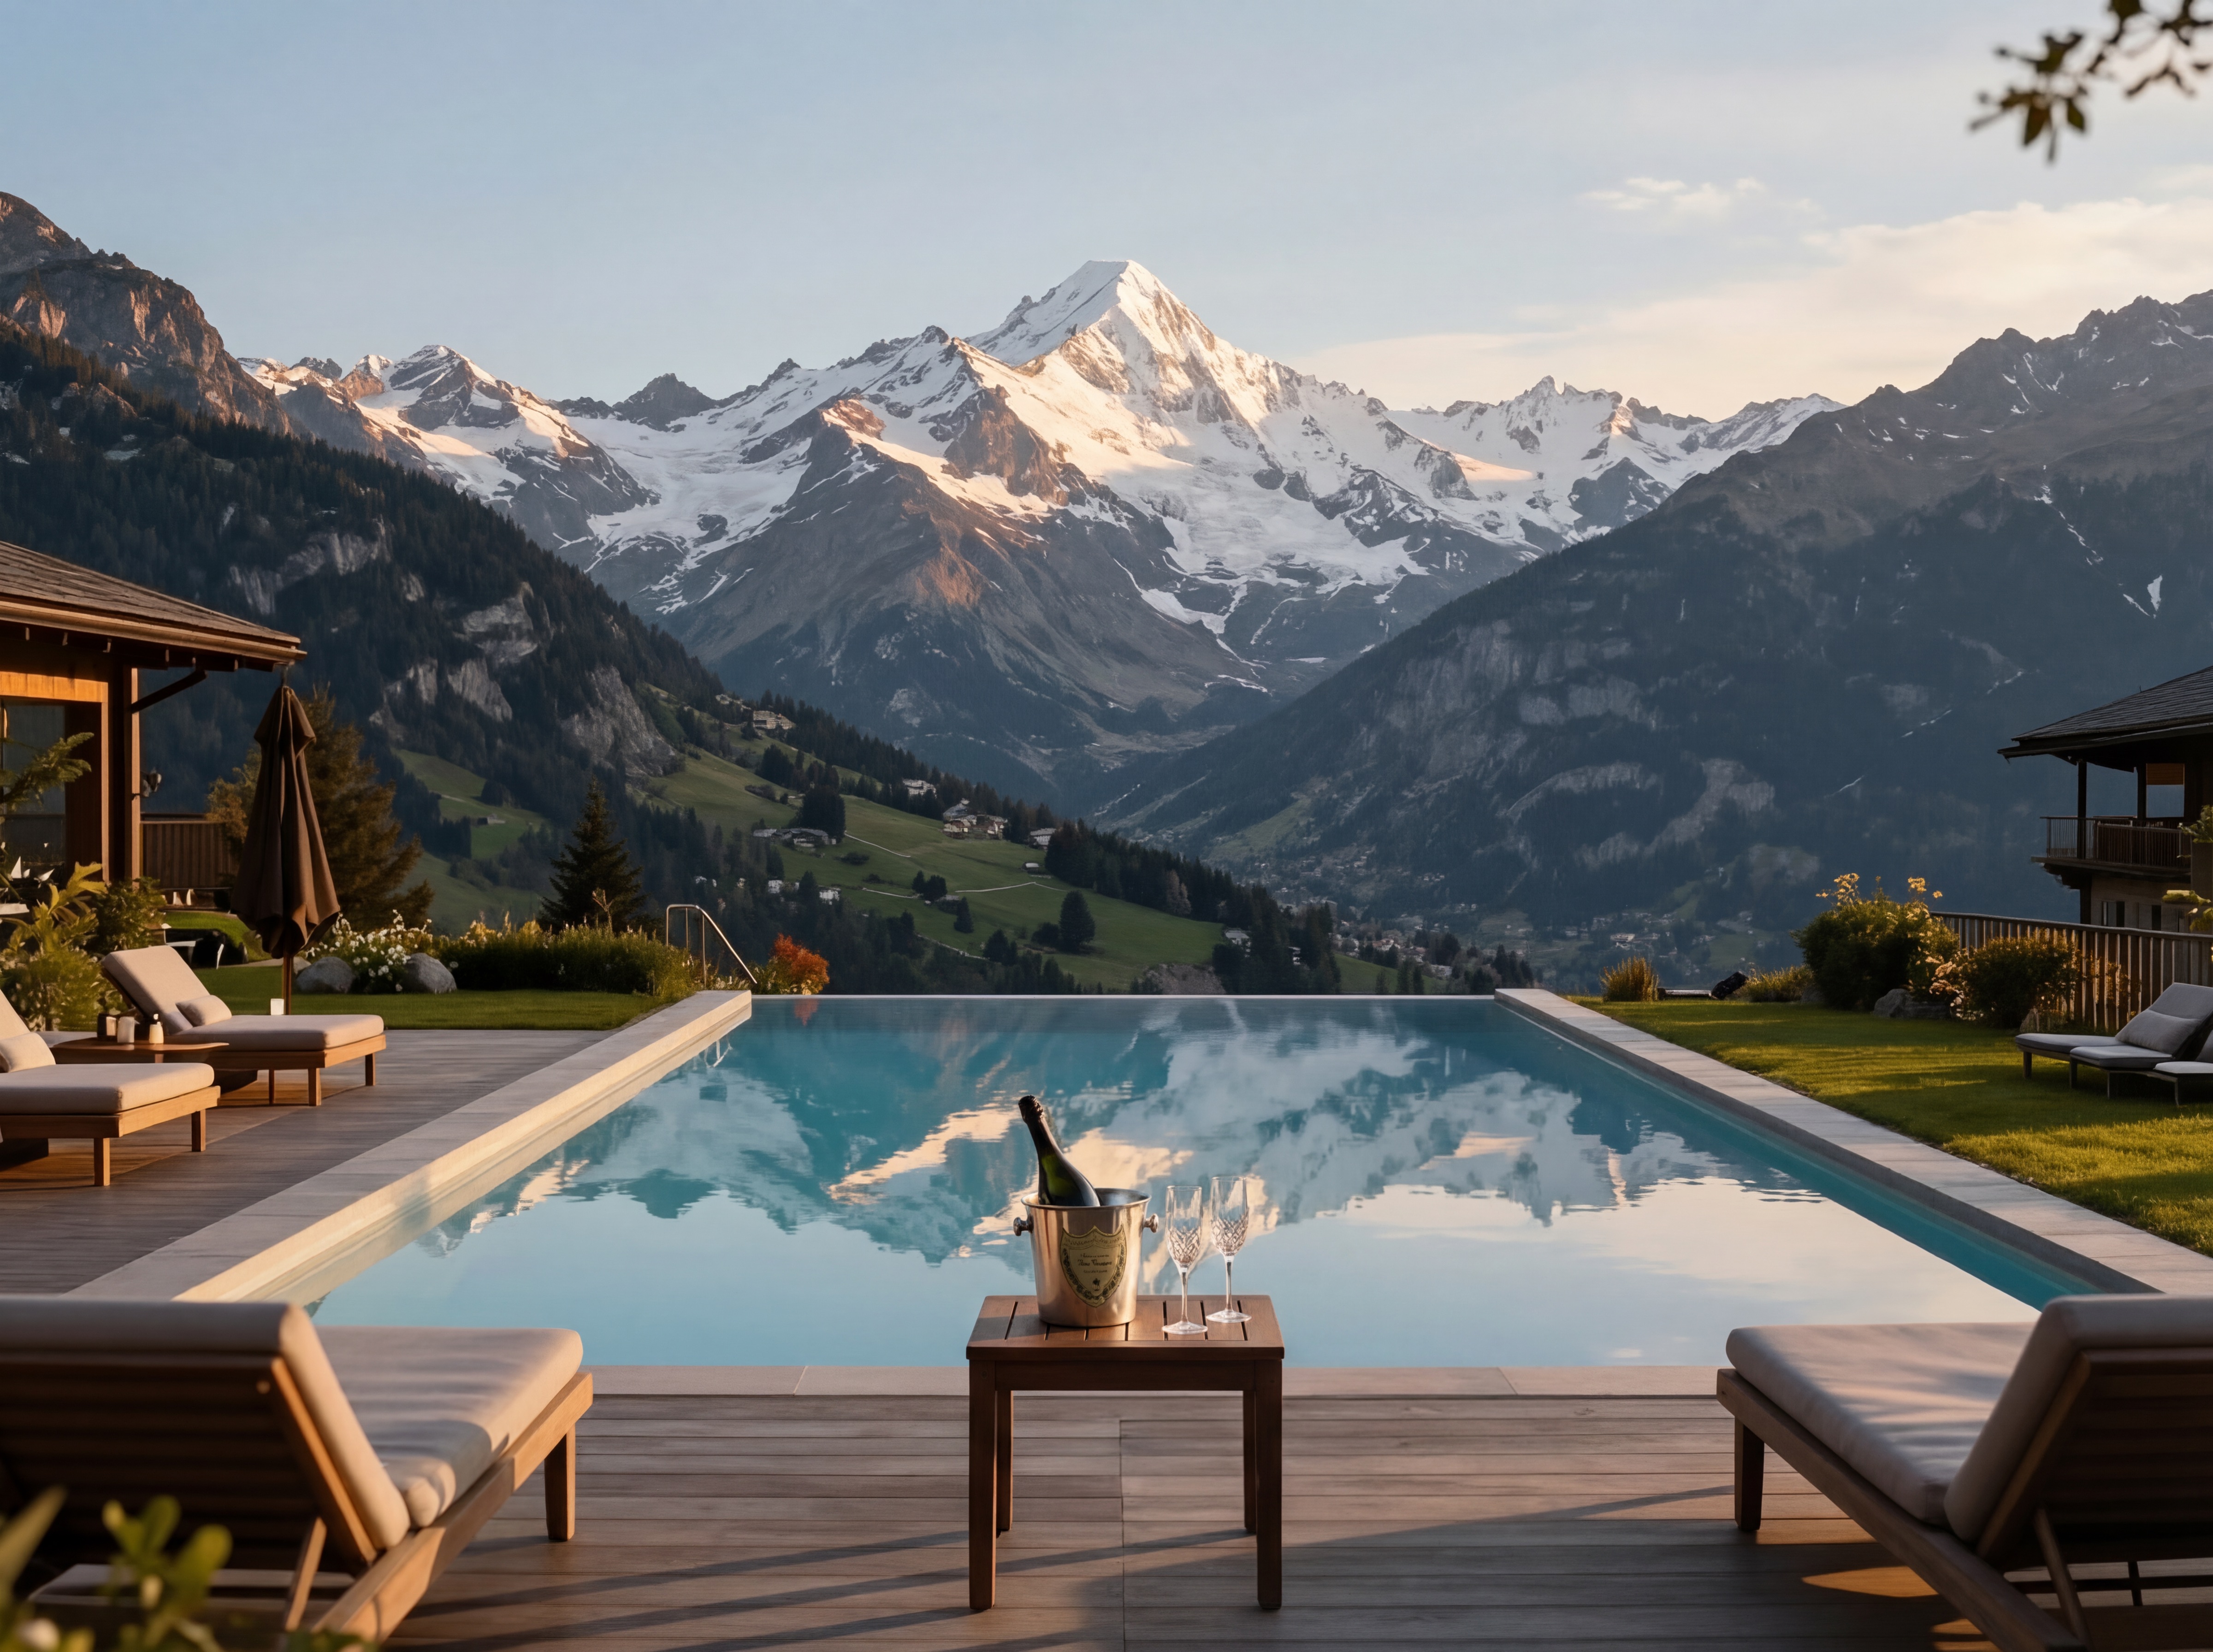
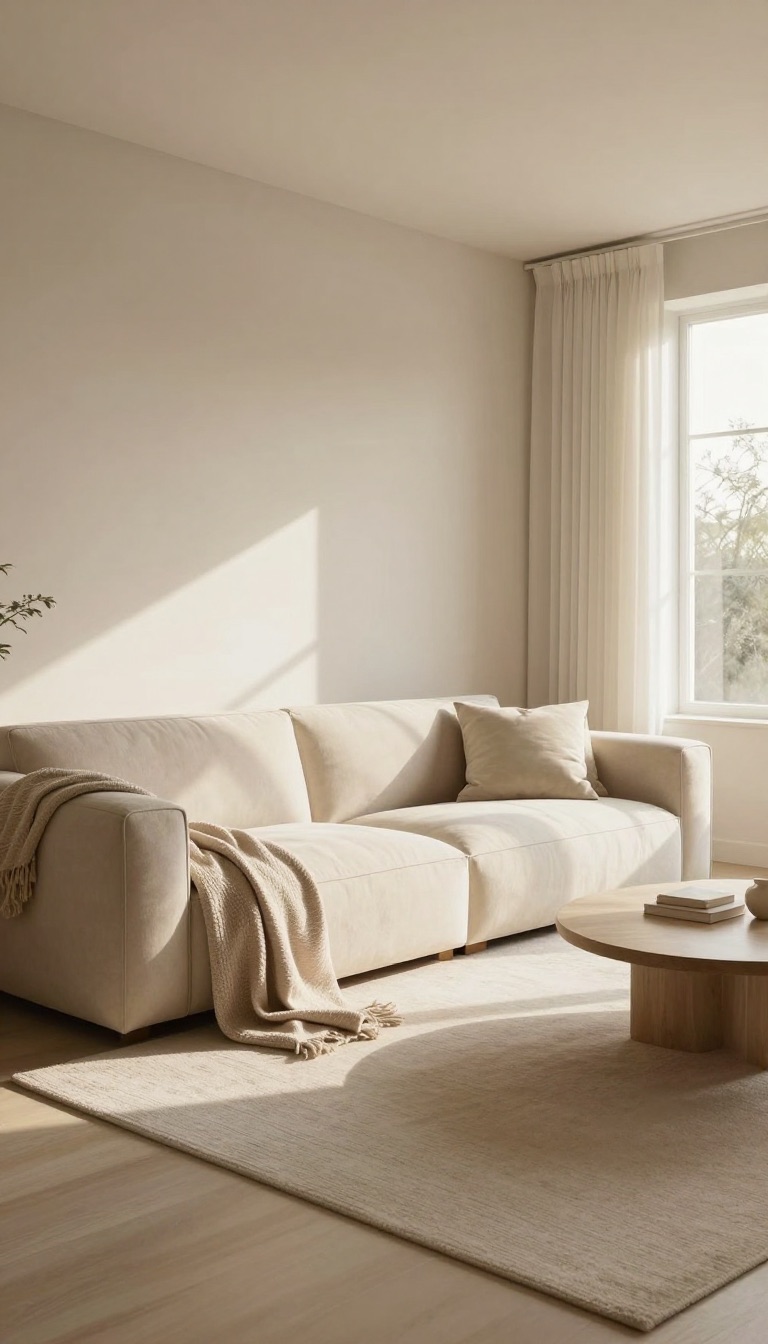
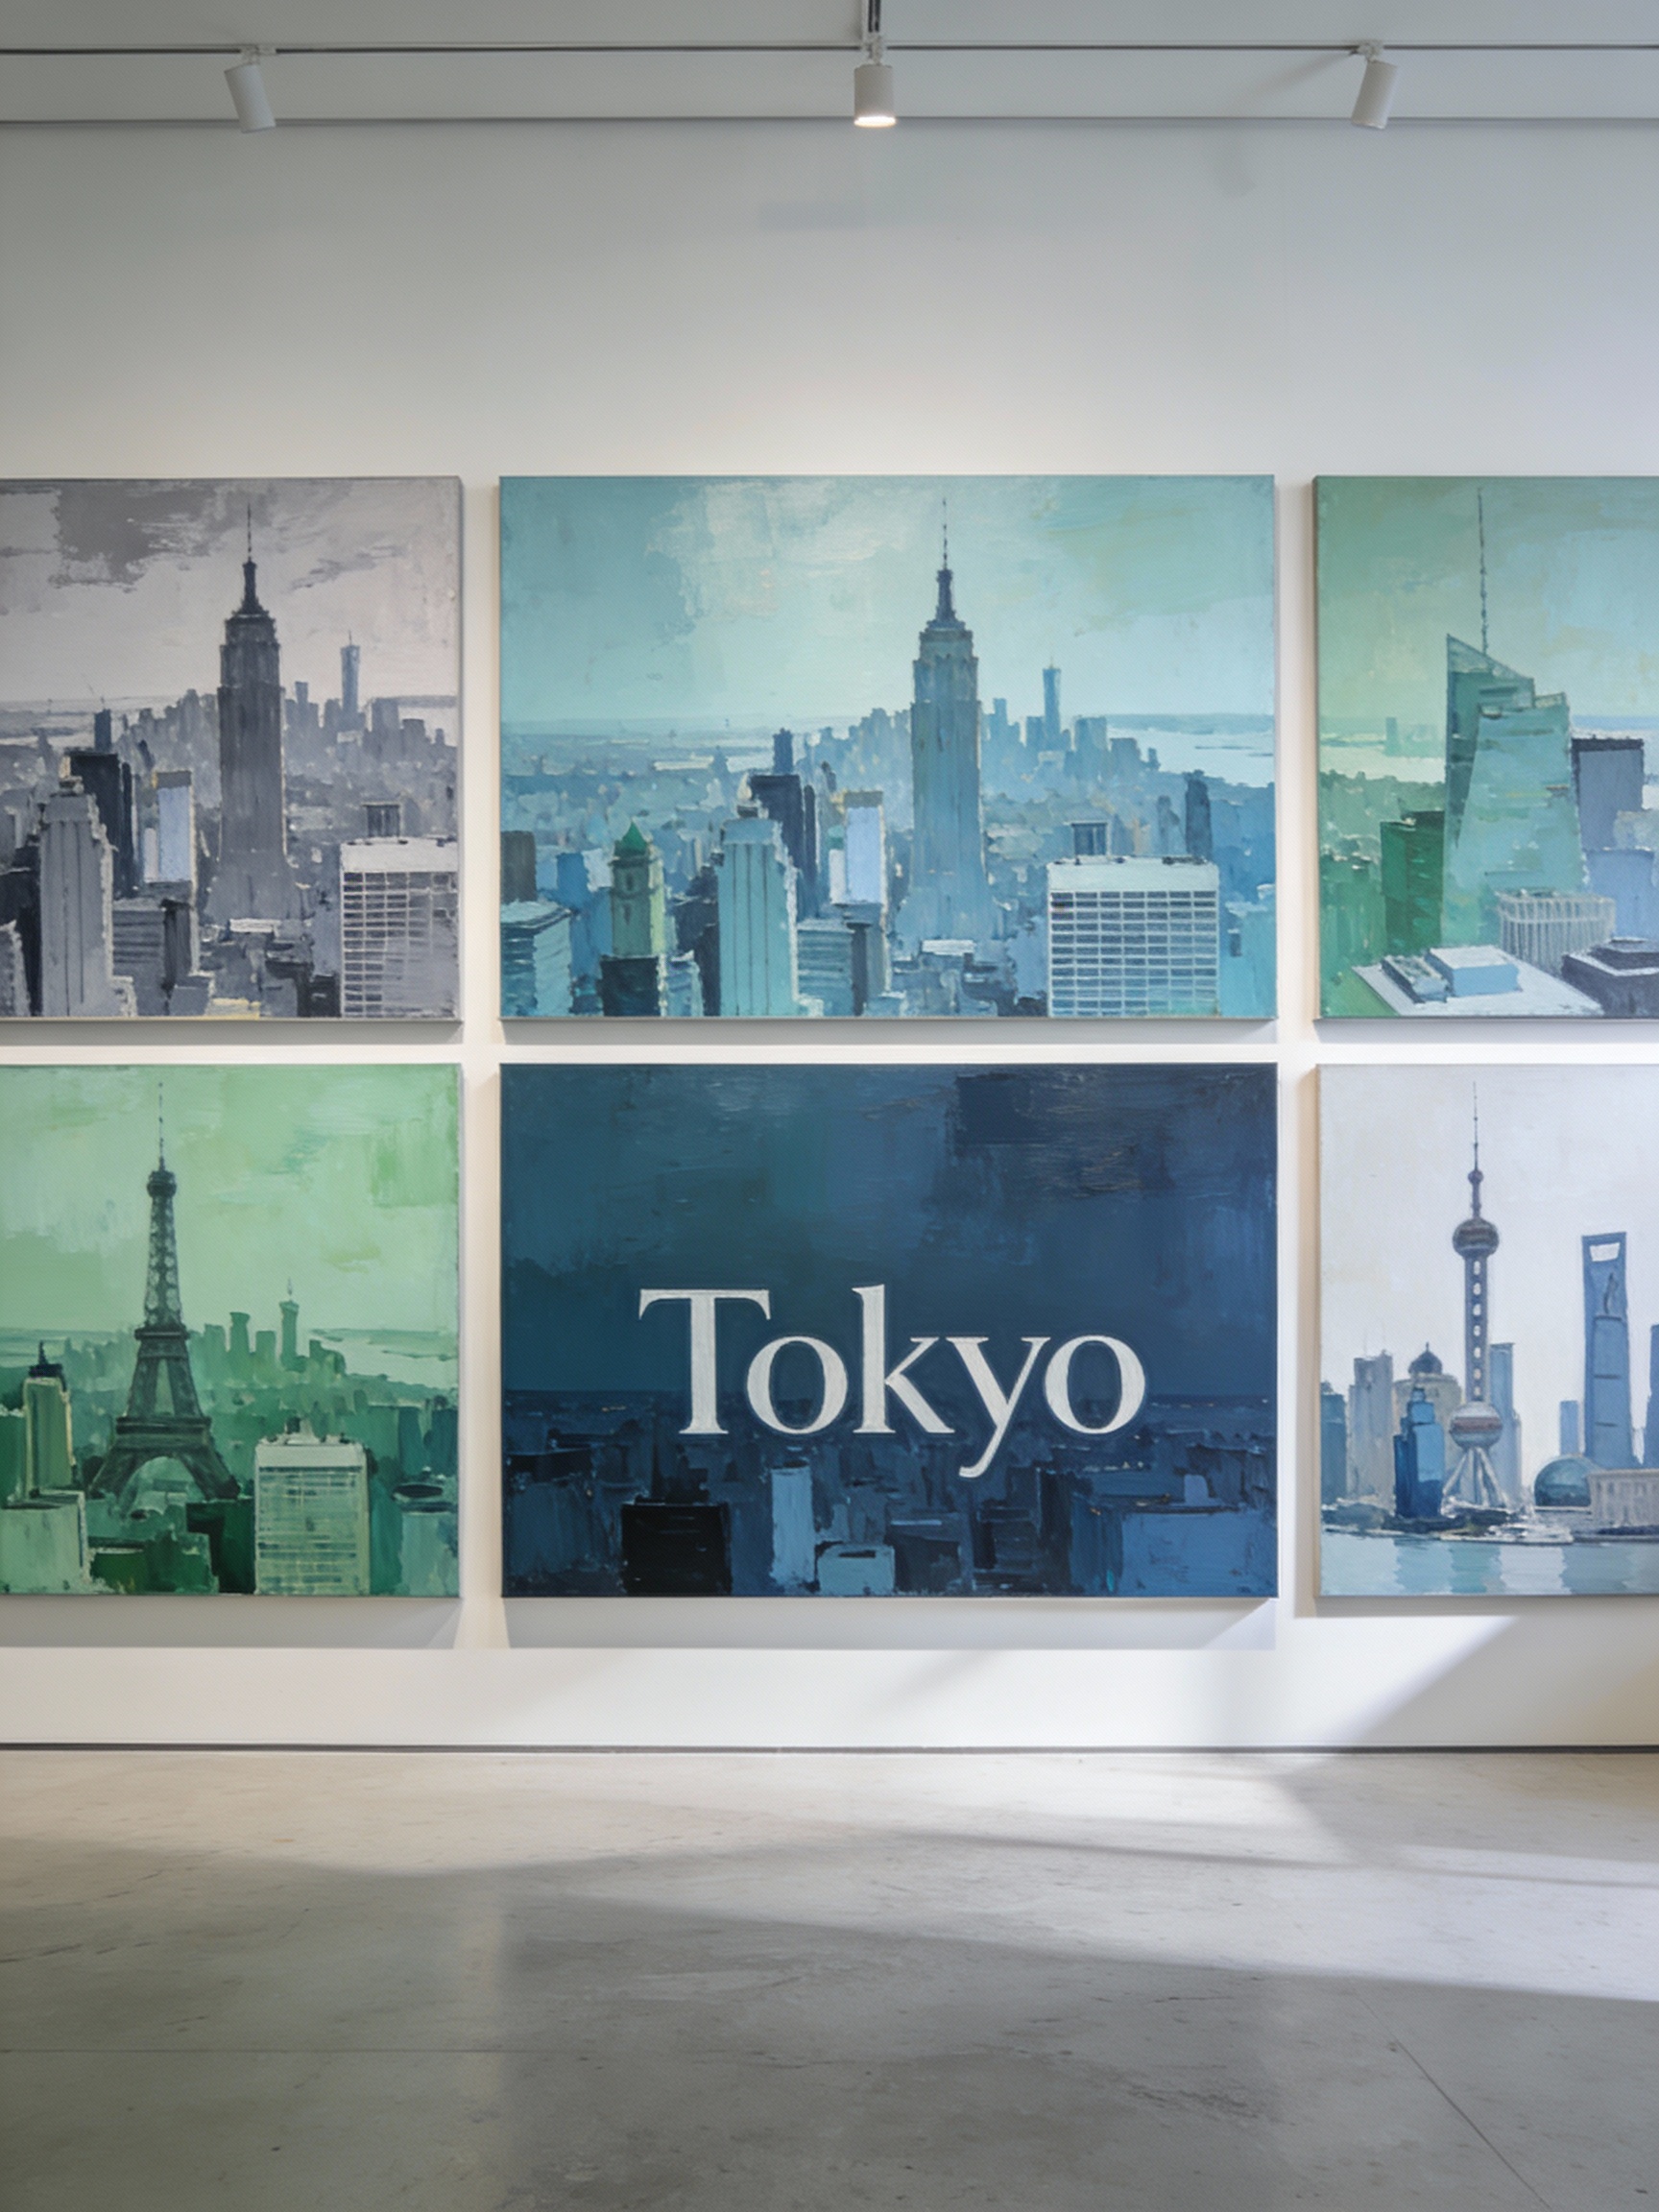
Add a new object to a scene. Mask an empty area — a wall, a table, a patch of sky — and describe what should appear. “A corgi dog sitting on the grass”, “Dom Pérignon champagne on the table”, “penguins walking on the ice”. The AI generates the object with correct lighting and perspective to match the surroundings.
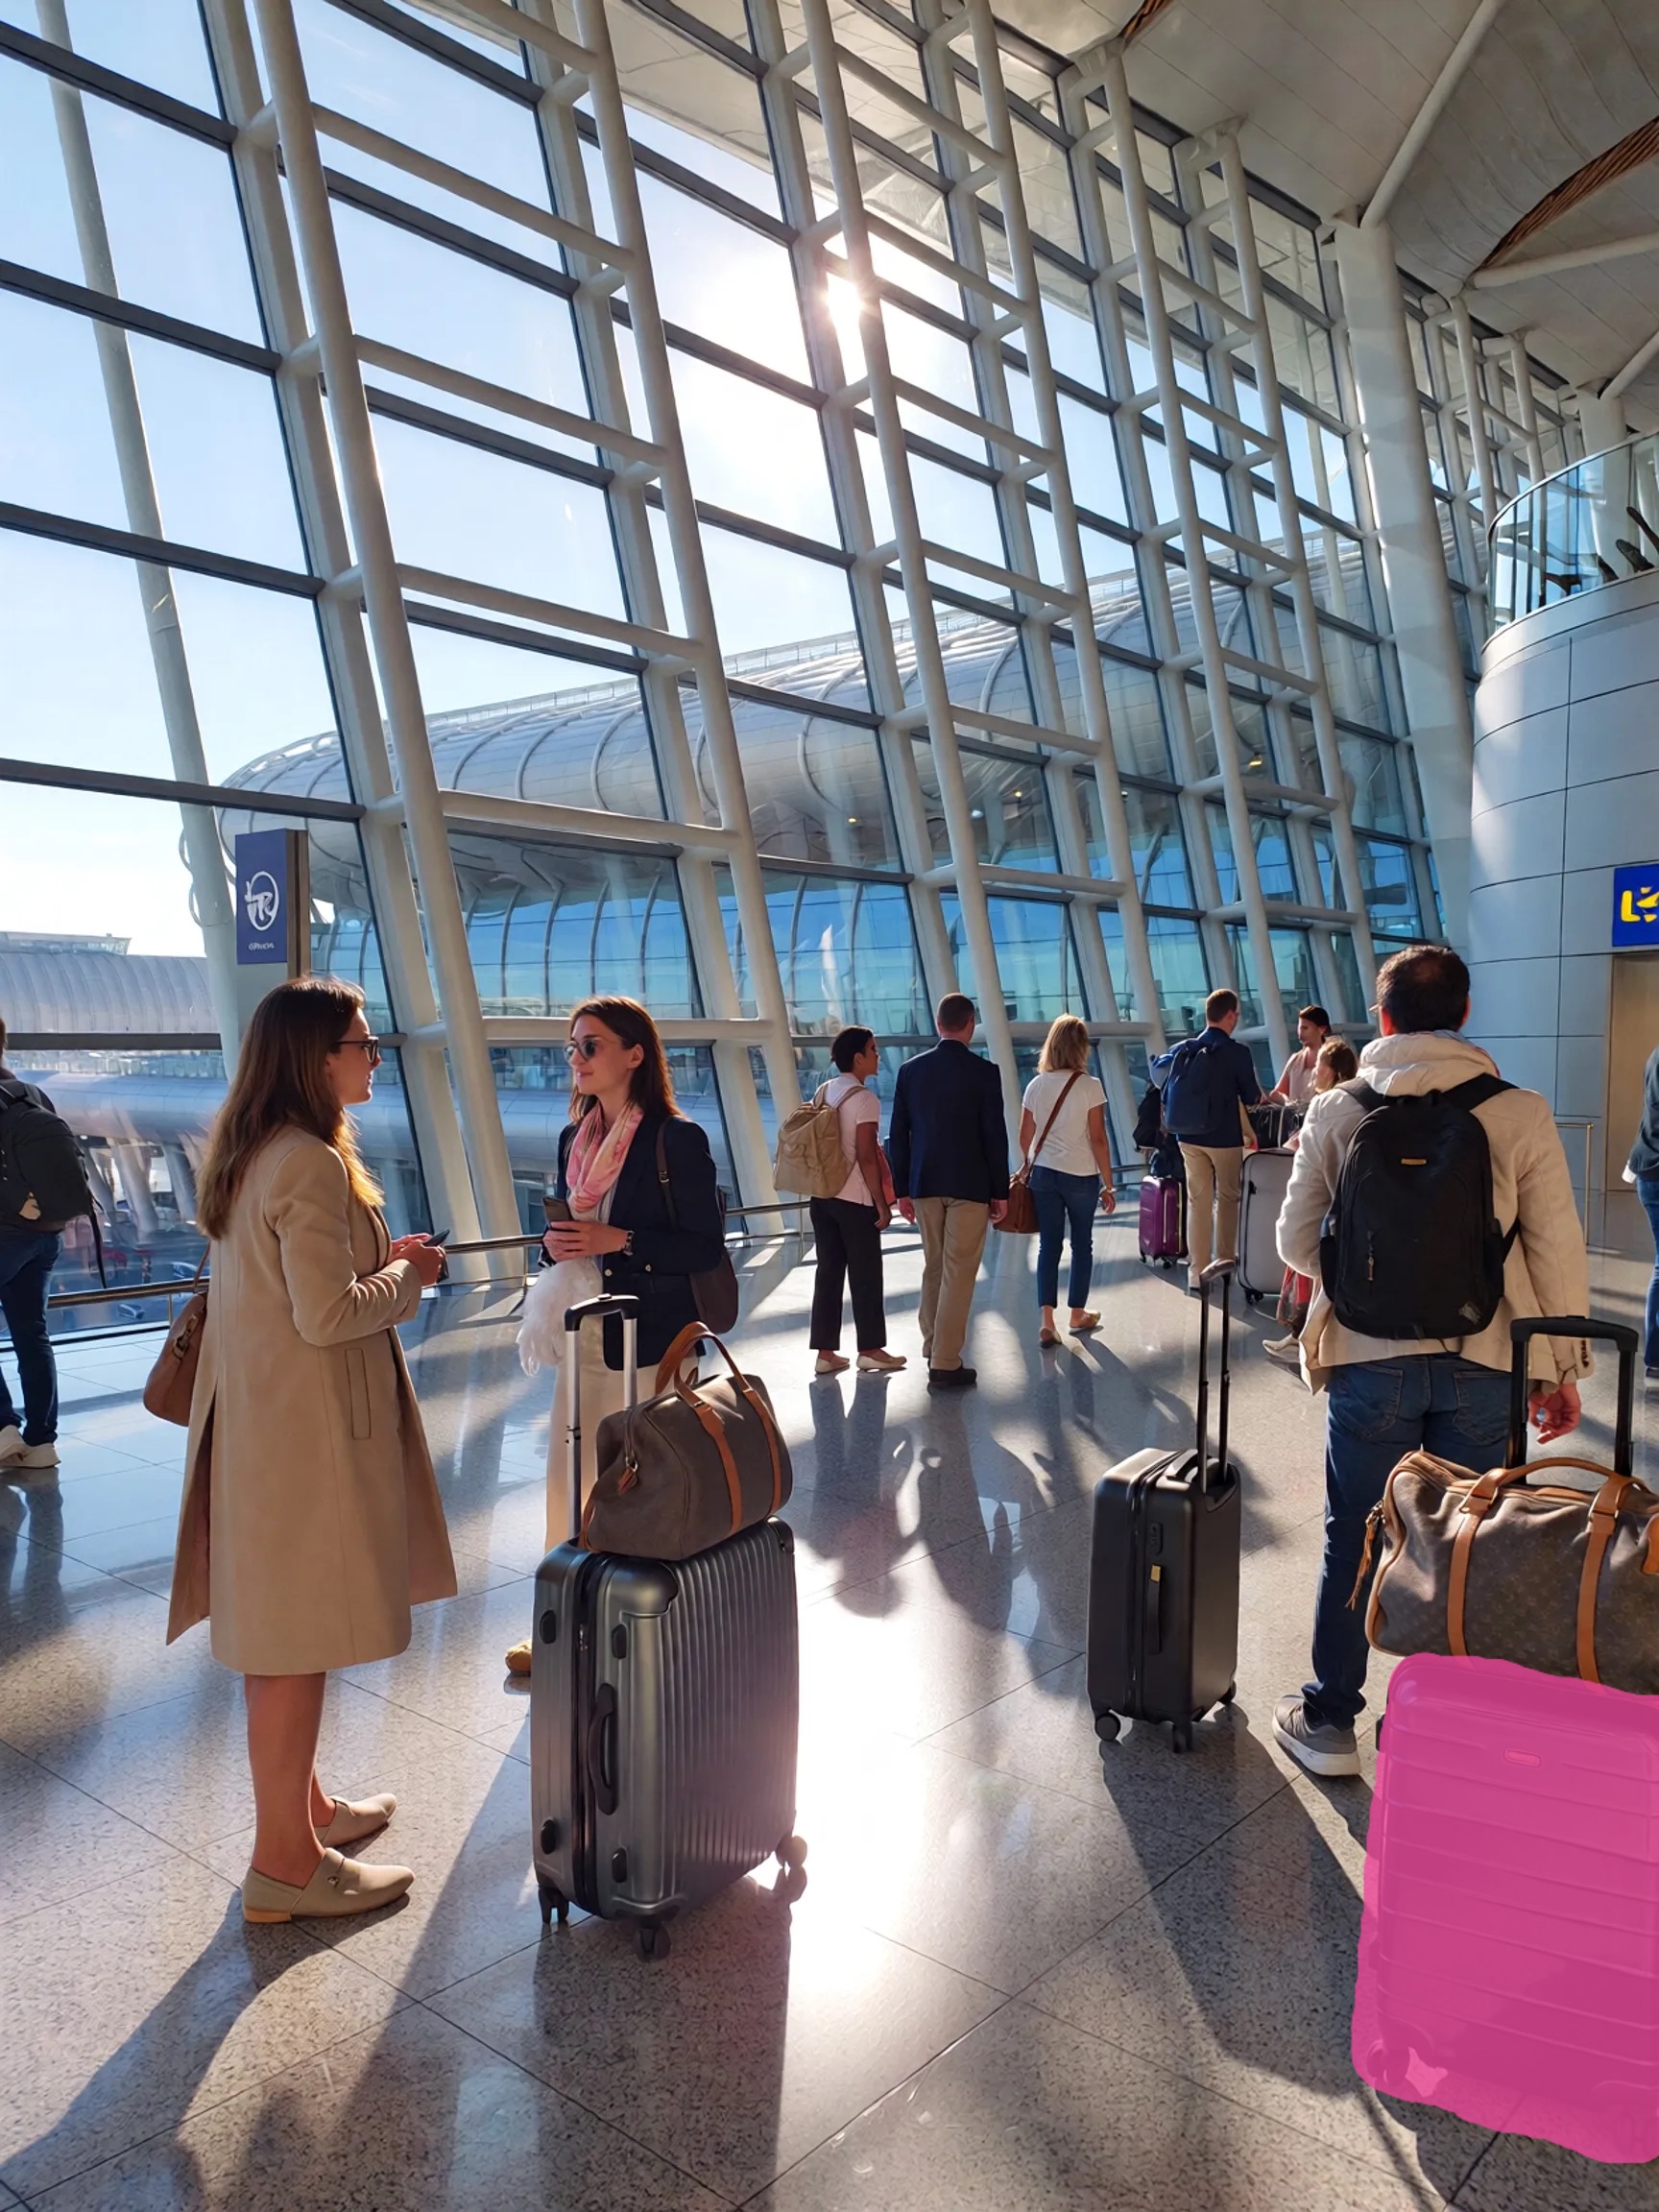
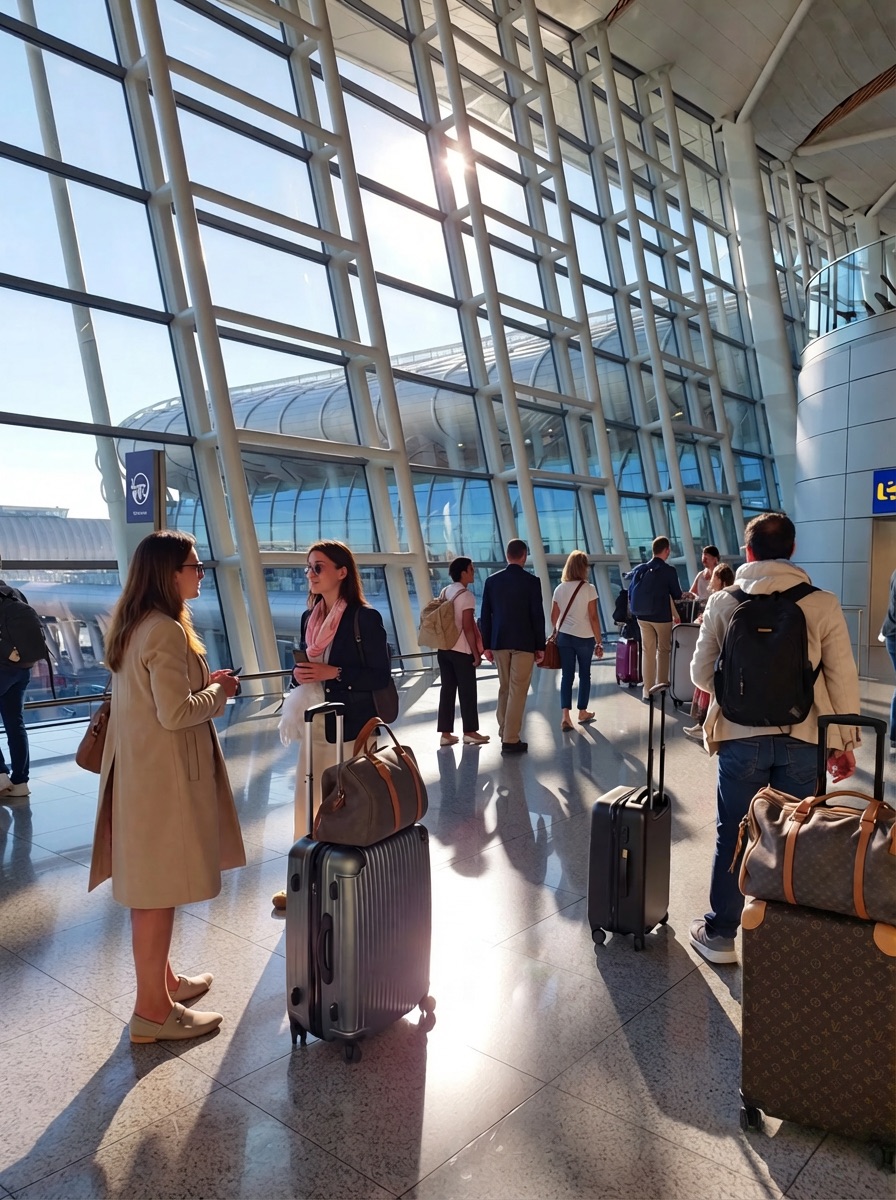
Replace one object with another. Mask the object you want to swap and describe the replacement. “Louis Vuitton suitcase” to swap out a bag, “red sports car” to replace a parked vehicle, “bouquet of white roses” to change flowers in a vase.
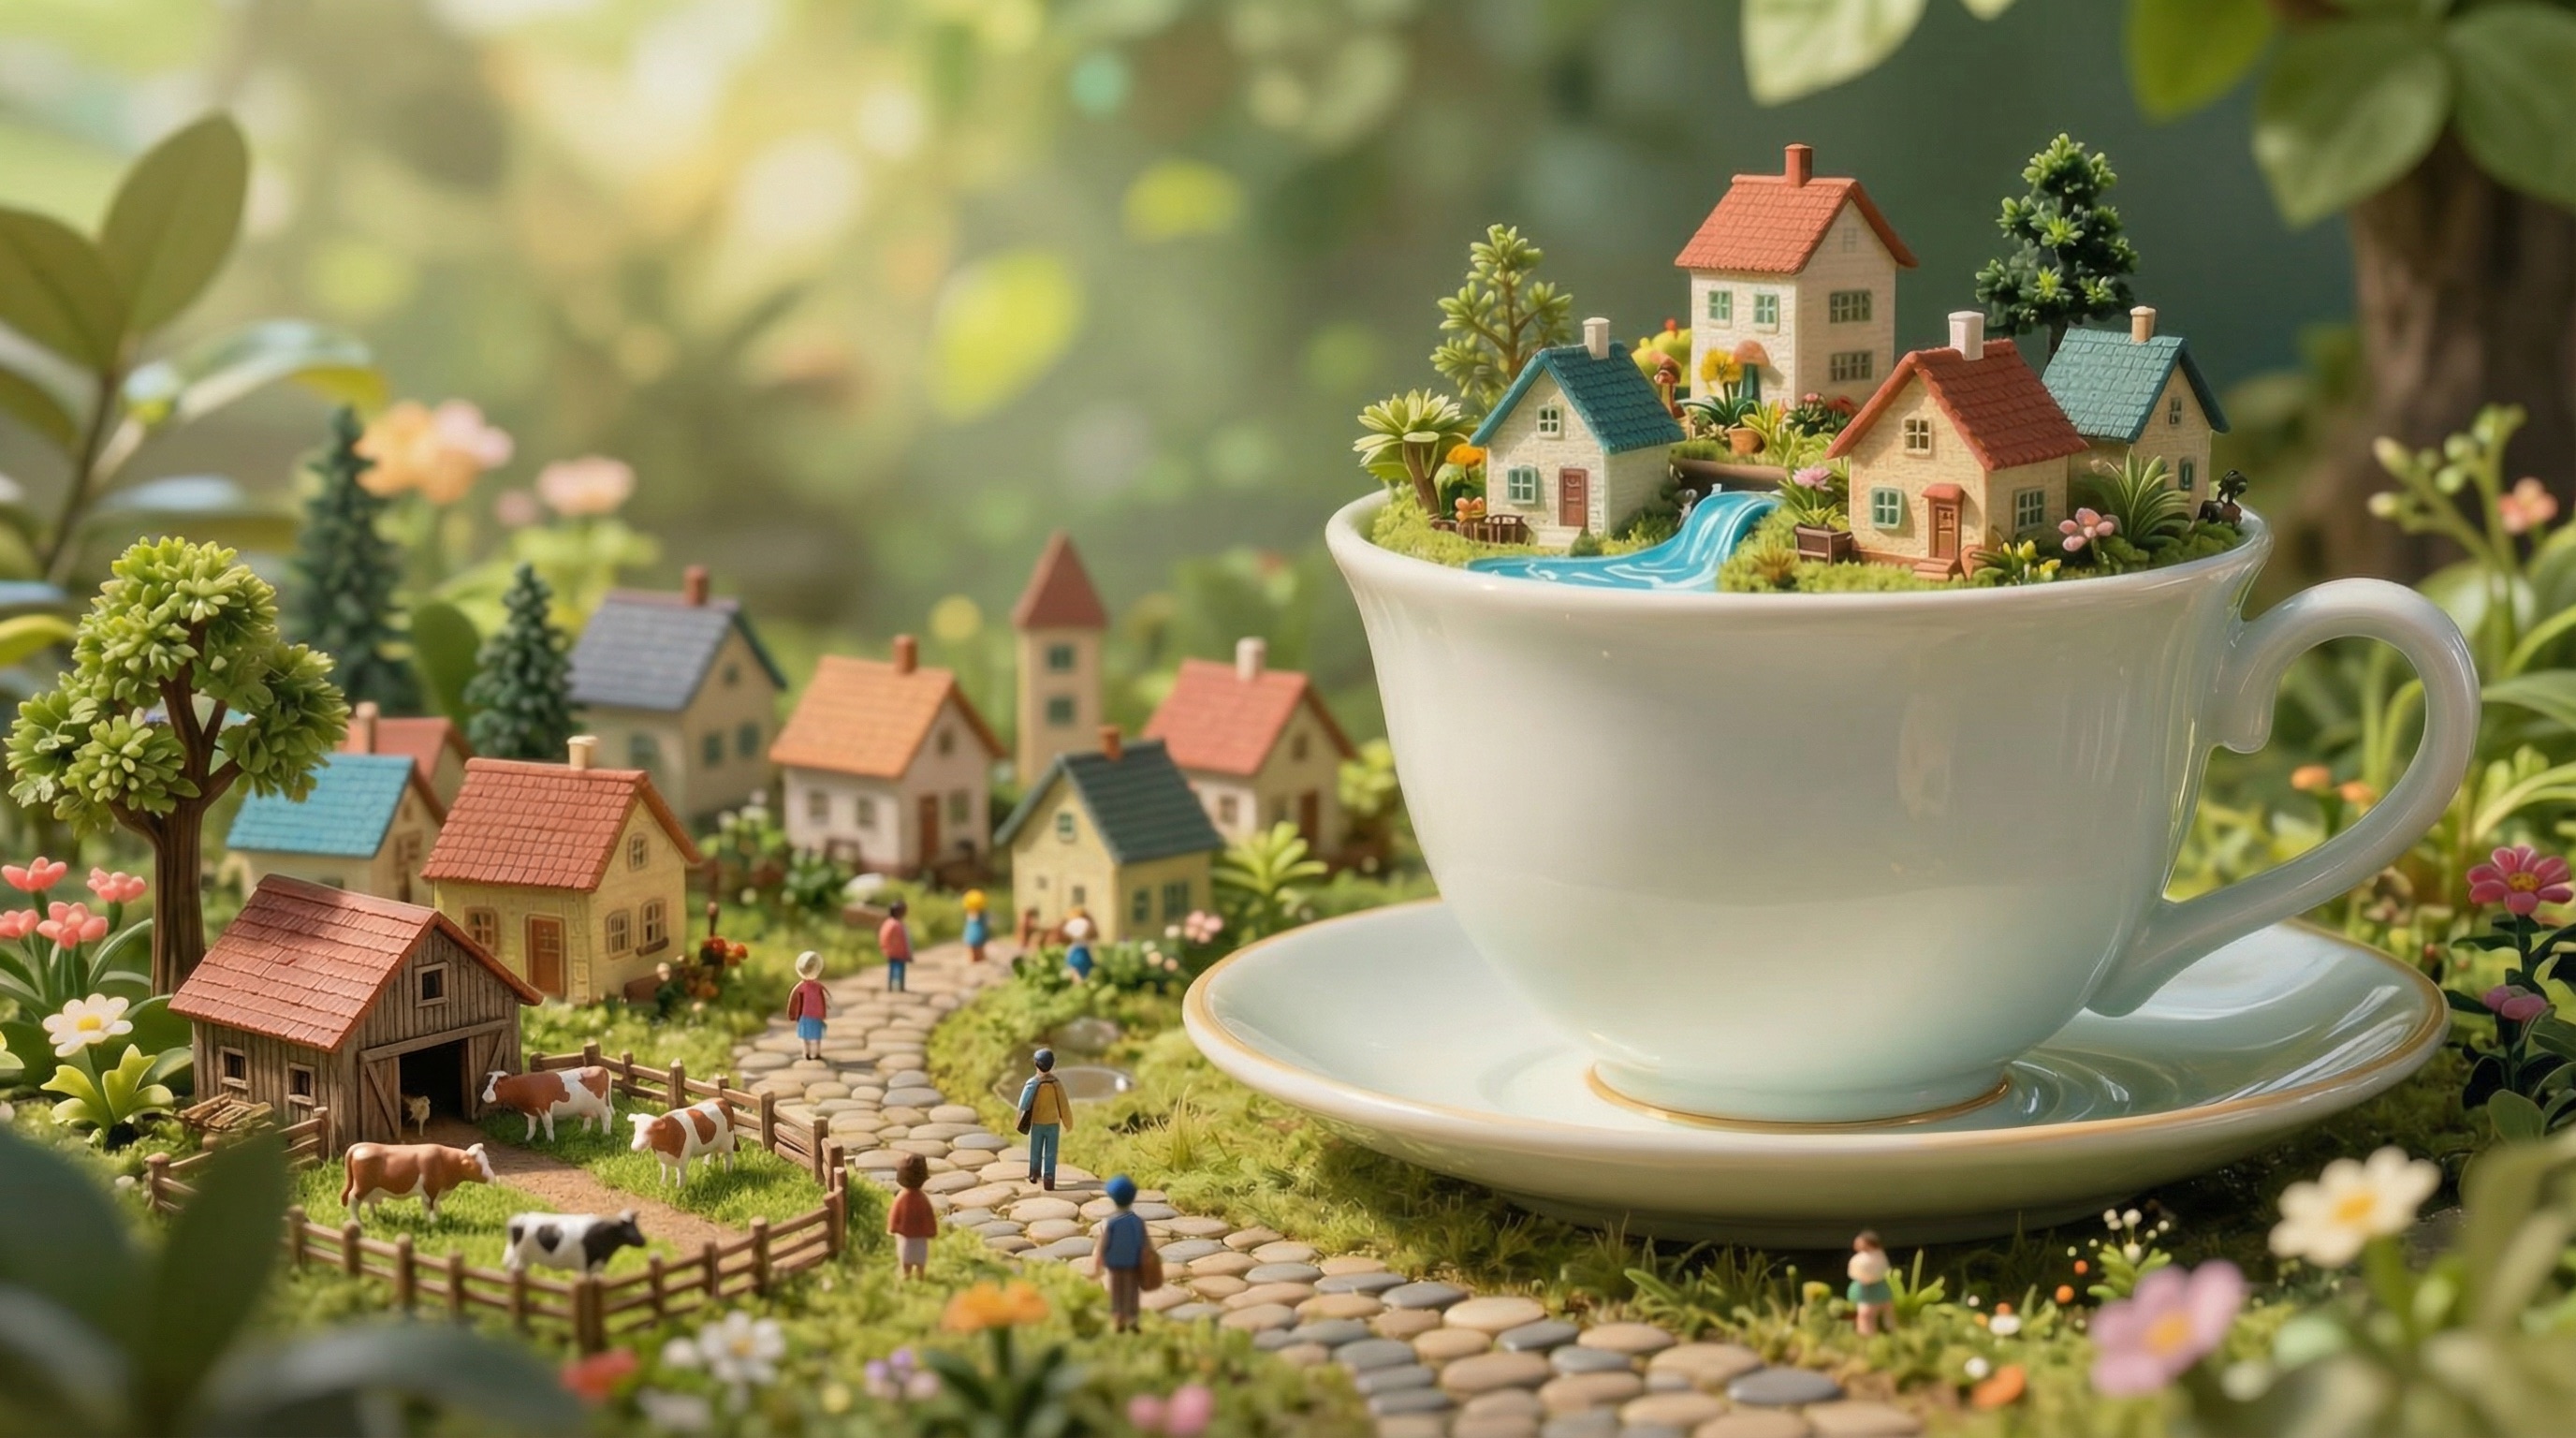
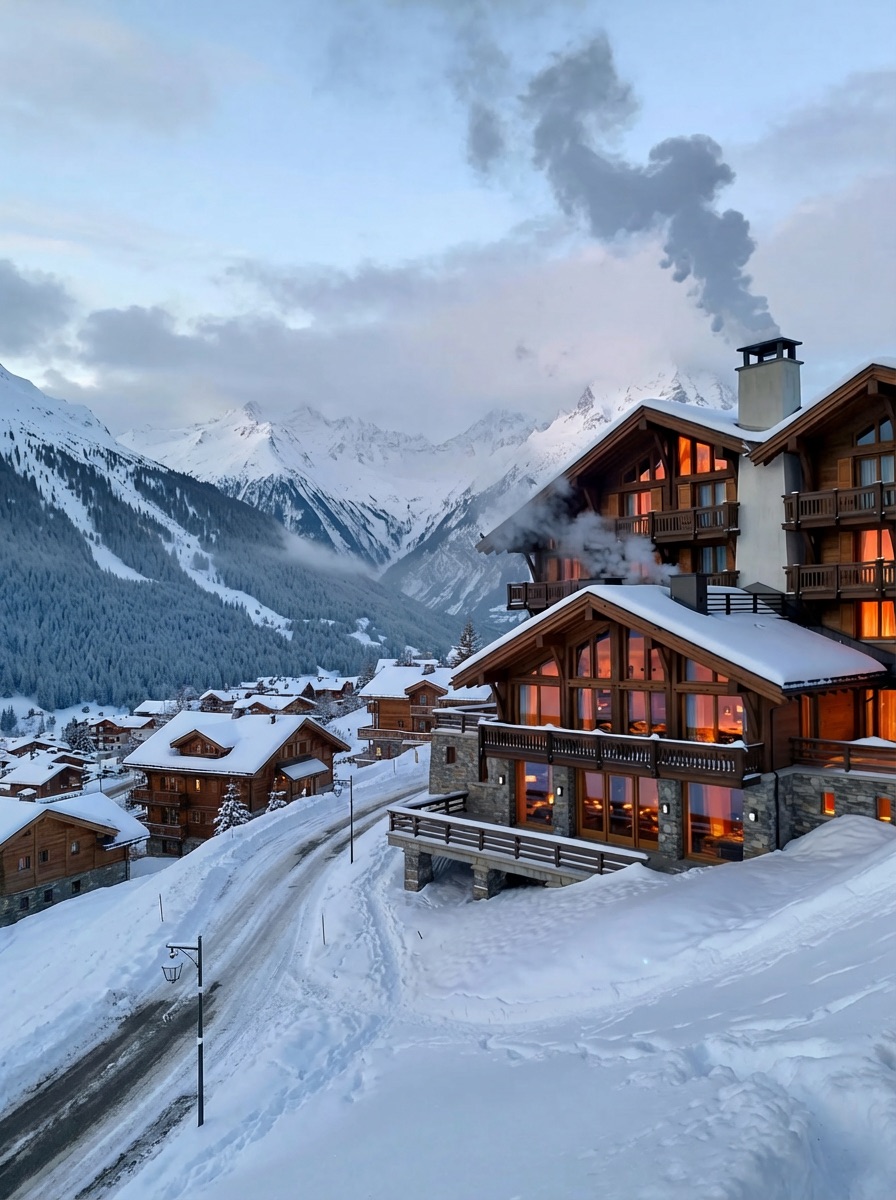
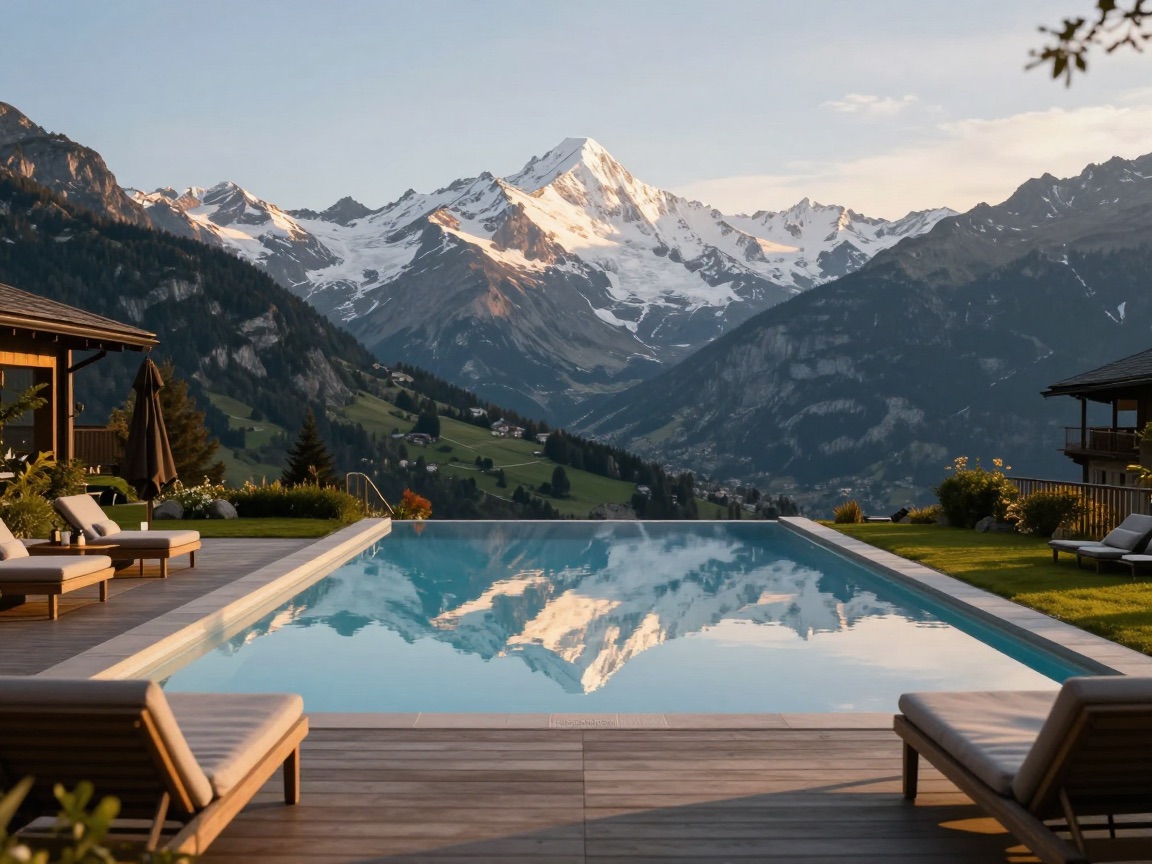
Change part of a scene. Mask a region and describe a different environment. “Cow farm with green fields” to replace a background area, “connecting road with chalets” to extend a mountain village, “ocean with waves” to turn a lake into a coastline.
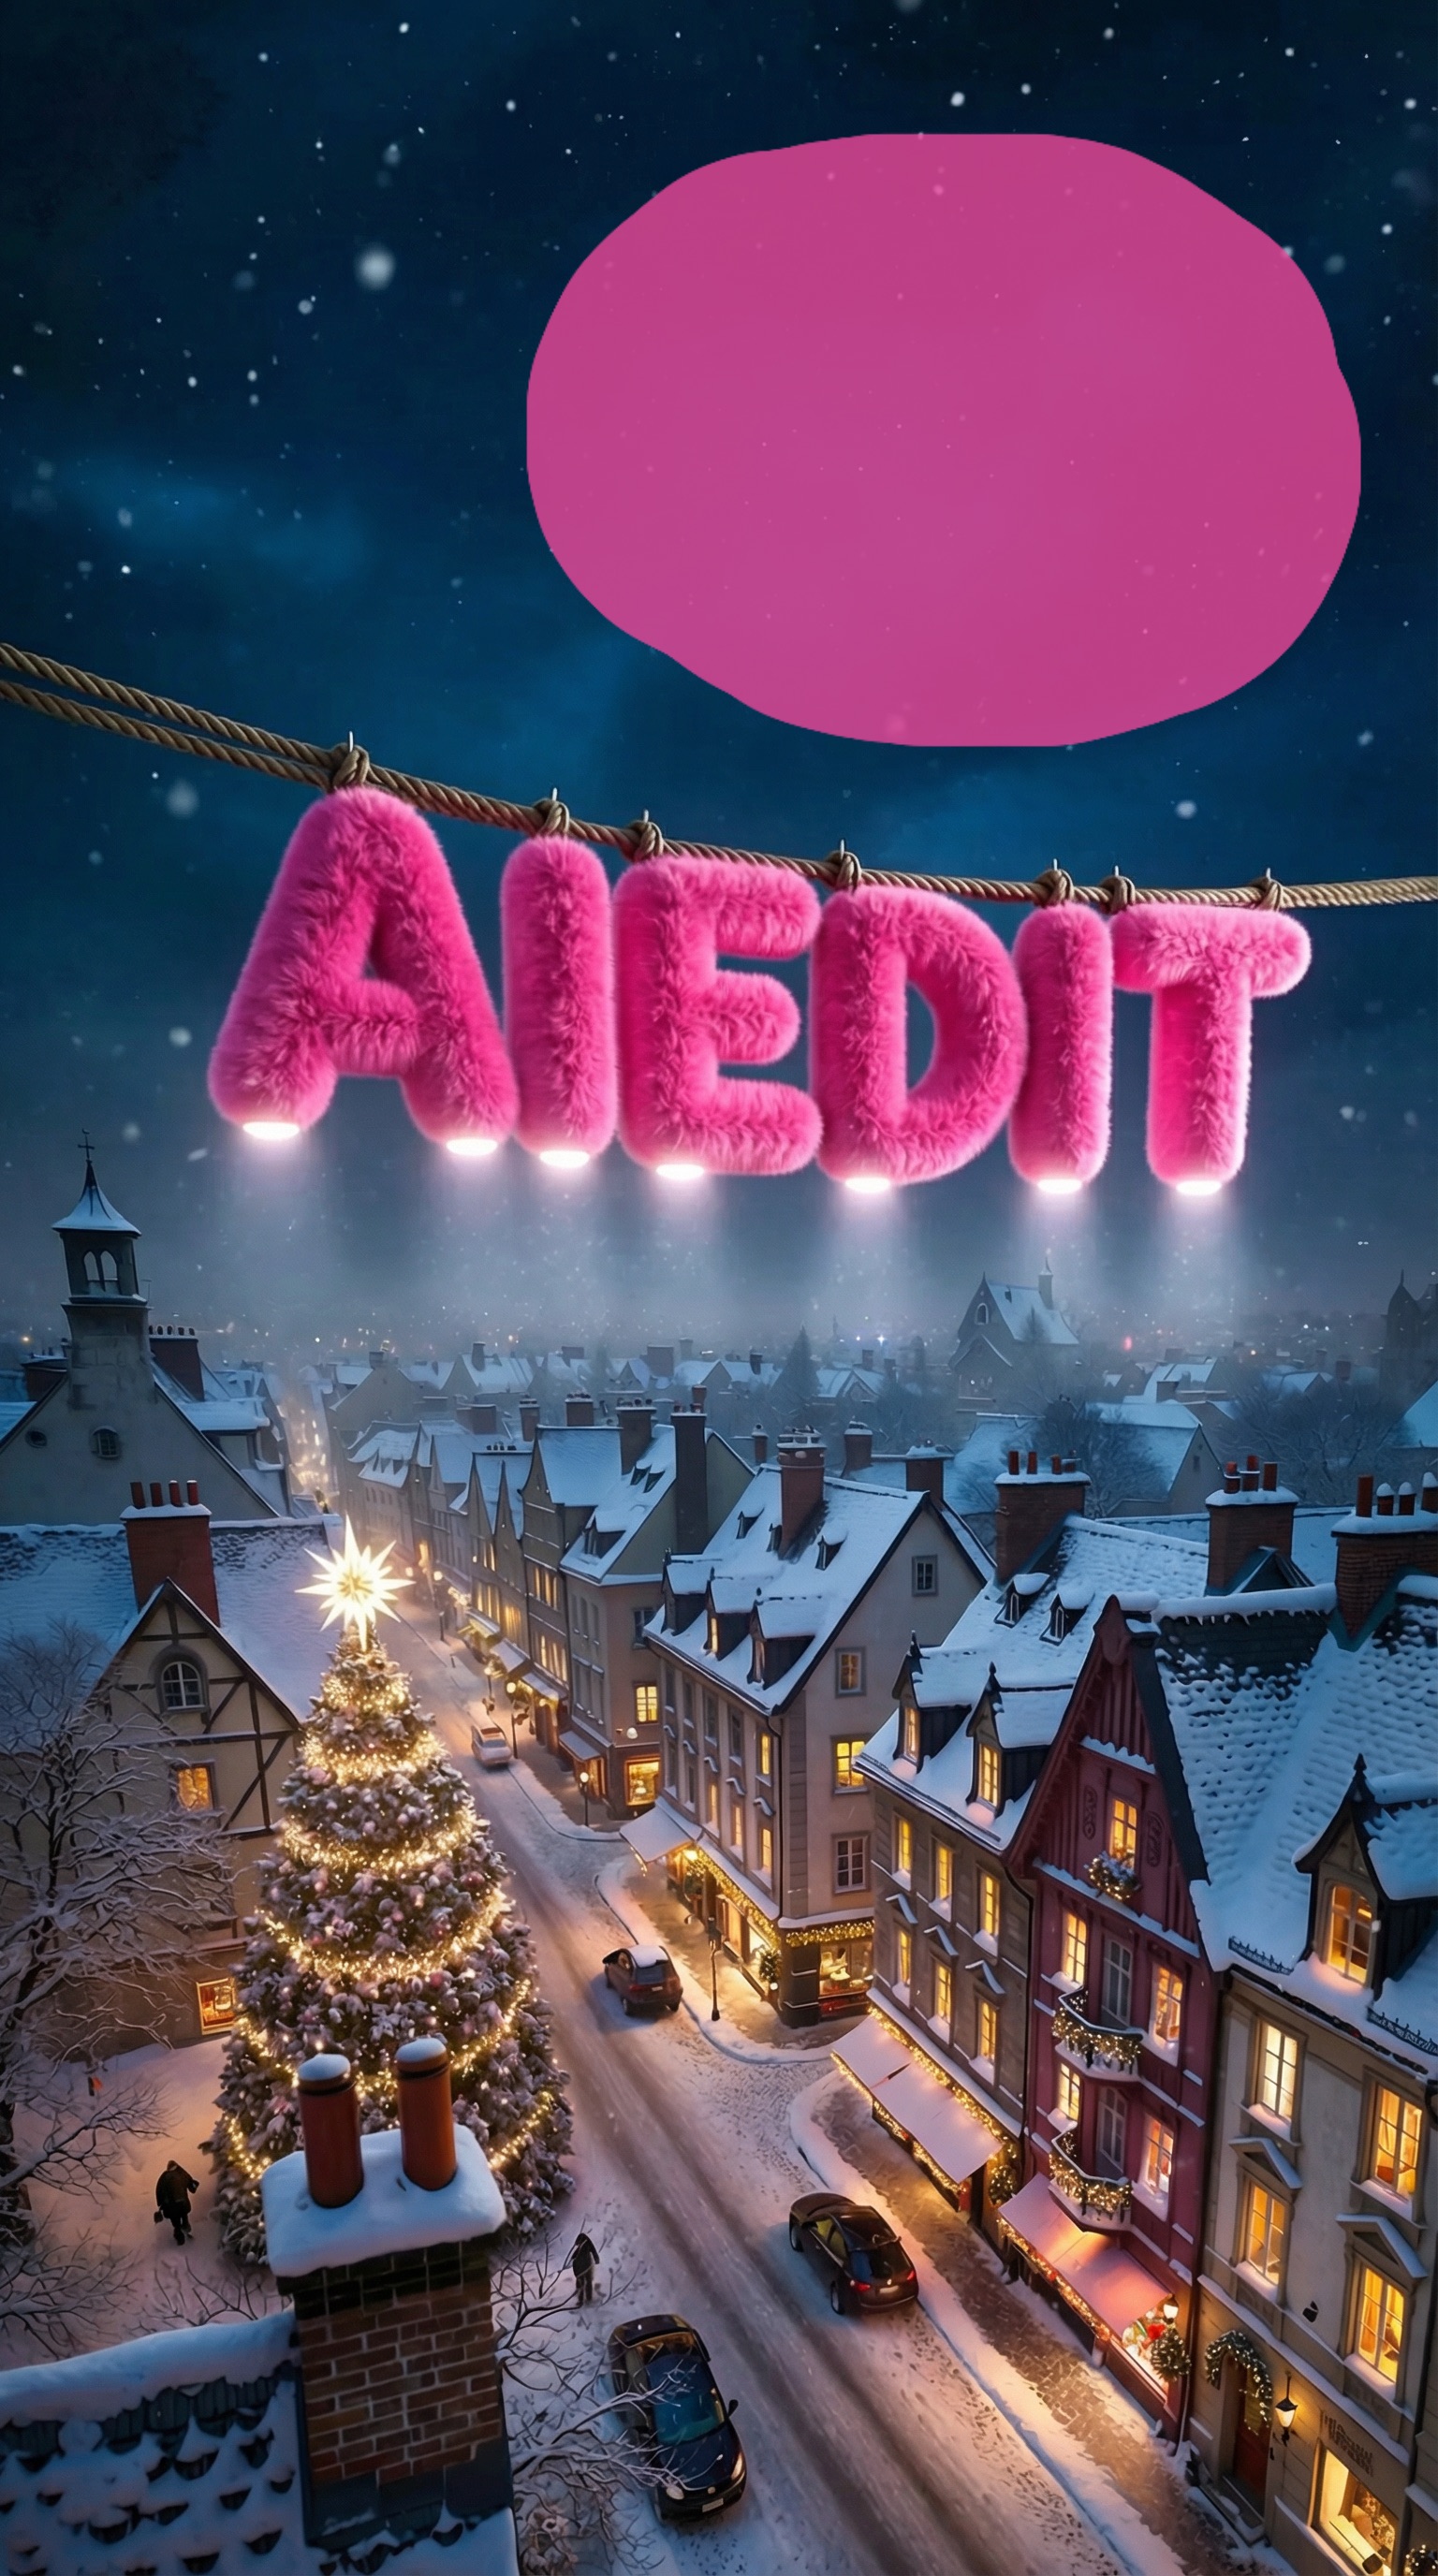
Add characters or creative elements. Mask where you want the character placed. “A stylish woman looking through the window”, “Santa Claus in a sleigh flying against the moon”, “a lemur in Pixar style on stilts”. Works for both realistic and stylized additions.
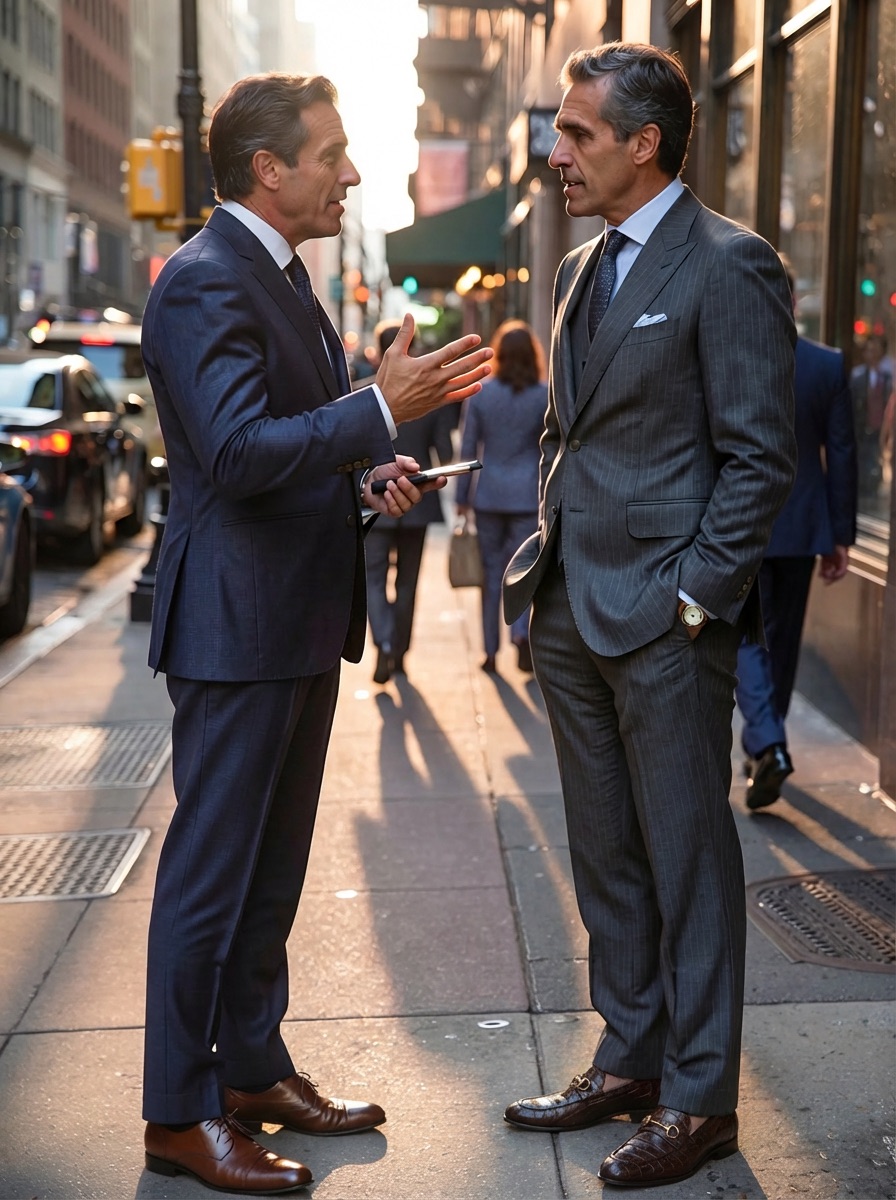
Edit clothing or accessories. Mask the item on a person. “Minimalist silver watch” to add a watch to a wrist, “black leather jacket” to change an outfit, “red baseball cap” to add a hat.
Clean up an area. Mask the unwanted element and prompt with what the clean surface looks like. “Clean wall”, “empty pavement”, “clear blue sky”. Keep it simple — the model infers the surrounding context.
Place a specific image into the scene. Instead of writing a prompt, attach a reference image. Mask the target area, upload the exact product photo, logo, or artwork you want placed there — the AI composites it with proper blending. This is the inpaint-to-area feature covered in the next step.
5. (Optional) Attach a reference image
For inpaint-to-area edits, click the reference image button and upload the image you want placed into the masked area. This is ideal for product photography, logo placement, or any edit where you need a specific object — not just something described in words.
The AI composites the reference into the scene, adjusting scale, lighting, and perspective to match the original photo.
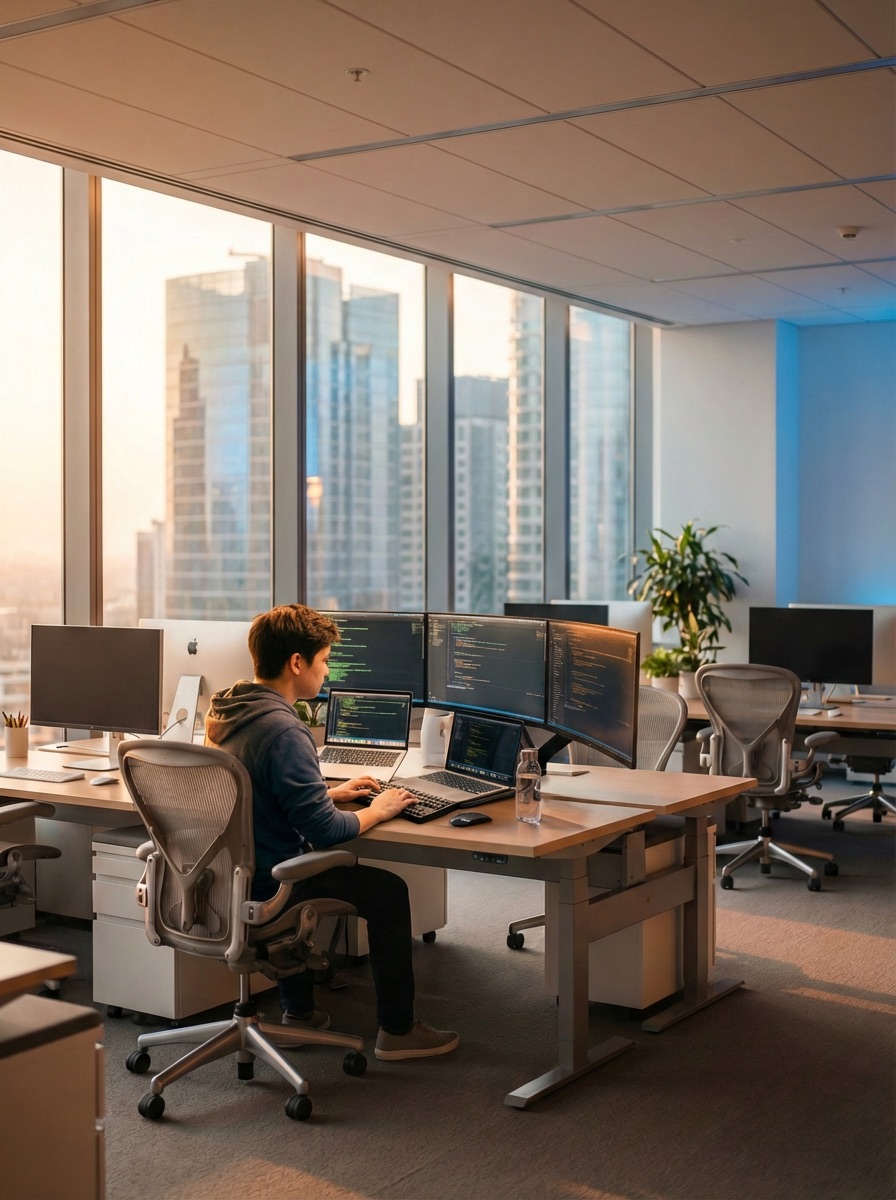
6. Inpaint
Hit the button. Processing takes a few seconds depending on model and resolution. The result appears alongside the original so you can compare them directly.
If the result isn’t right, don’t start from scratch. You can:
- Adjust the mask — make it larger, smaller, or reshape the boundary
- Rephrase the prompt — try different wording, add details about lighting or style
- Switch models — Nano Banana Pro and Nano Banana 2 interpret prompts differently, so the same prompt can produce different results
- Change resolution — bumping from 1K to 2K sometimes fixes blurry or low-detail areas
More Examples
Adding Details and Accessories
Reference-Based Edits

See all inpainting results with prompts in the full gallery.
Tips for Better Inpainting Results
After working with inpainting across thousands of images, here’s what actually makes a difference:
1. Mask slightly larger than the object. Don’t try to trace edges perfectly. Give the model a small buffer zone around the object — 5-10 pixels of extra space. This gives it room to blend the edges naturally.
2. Describe the replacement, not the removal. Instead of “remove the person”, write “empty park bench with green grass behind it”. The model needs to know what to generate, not what to delete.
3. Zoom in for small edits. Use the zoom feature (up to 3x) when you’re working on small areas like removing a blemish or fixing text. A 200px brush at full zoom covers a massive area — drop it to 10-20px for precision work.
4. Use higher resolution for detail-heavy edits. If you’re inpainting faces, text, or textures, bump the output to 2K or 4K. The extra pixels give the model more room to generate sharp details.
5. Iterate. Your first attempt won’t always be perfect. Adjust the mask boundary, try different prompt wording, or switch between Nano Banana Pro and Nano Banana 2. Each model interprets prompts slightly differently.
6. For object removal, keep the prompt simple. “Clean background” or “empty space” often works better than elaborate descriptions. Let the model infer context from the surrounding pixels.
7. To remove text from image files, mask the entire text area generously. Prompt with something like “clean surface” or “plain background matching surroundings”. This also works as a photo stamp remover for date stamps, watermarks, and logos — just mask and describe the clean surface underneath.
8. Match the scene in your prompt. If the photo is a close-up of a face, don’t prompt with “full body shot of a person”. The model generates content that needs to fit the existing composition. Describe what belongs at that scale and distance.
9. Use reference images for product shots. If you’re doing e-commerce photography and need a specific product placed into a scene, the inpaint-to-area feature with a reference image gives far better results than trying to describe the product in words. The AI preserves the exact look of the reference.
10. Don’t mask too much at once. If you need to change multiple separate areas, do them one at a time. Each inpaint pass gives the model full context of the unchanged image. If you mask half the photo in one go, the model has less to work with and results suffer.
11. Pay attention to lighting direction. When adding objects to a scene, mention the lighting in your prompt if it’s distinctive. “A coffee mug on the table, lit from the left” helps the model generate shadows and highlights that match the existing light source.
12. Use the eraser to clean up mask edges. Before hitting inpaint, switch to eraser mode and trim any parts of the mask that bleed into areas you want to keep. A cleaner mask boundary means the AI doesn’t accidentally modify hair, fingers, or other fine details near the edit zone.
Inpainting vs Prompt Image Editing vs Object Removal
AI Edit has three tools that can all change parts of an image — but they work very differently. Picking the wrong one means extra steps or worse results. Here’s how to choose.
| Inpainting | Prompt Image Editing | Object Removal | |
|---|---|---|---|
| How it works | You paint a mask over a specific area, then describe what should replace it | You write a text prompt that transforms the entire image | AI automatically detects and erases unwanted objects |
| What changes | Only the masked pixels — everything else stays identical | The whole image can change — style, colors, composition, perspective | Only the detected objects — background fills in automatically |
| Input required | Image + mask + prompt (+ optional reference image) | Image + text prompt | Image only — no prompt, no mask |
| Precision level | Pixel-level — you decide exactly which area is affected | Image-level — the AI decides how to interpret your prompt globally | Object-level — AI decides what to remove and how to fill |
| Best for | Replacing a specific object, adding elements to a scene, fixing a small area, removing text/watermarks | Changing camera angle, adjusting lighting, style transfer, changing poses, global color grading | Quick cleanup — removing a person from background, erasing power lines, deleting photo bombers |
| Example prompt | ”Replace with a corgi dog” (applied to masked area only) | “Change the lighting to golden hour” (applied to entire photo) | No prompt needed |
| When to use | You know exactly what area needs to change and what should go there | You want to transform the overall look or make changes you can describe but can’t mask precisely | You just want something gone, fast, with zero effort |
When to use Inpainting
Use inpainting when you need surgical precision. You’re not hoping the AI figures out what to change — you’re telling it exactly where to operate and what to put there. This is the only tool that lets you add entirely new objects to a scene (like placing a corgi where a chair used to be) or swap one specific element while keeping every surrounding pixel untouched.
It’s also the only option for reference-based edits — where you attach an actual image of what should go in the masked area, instead of describing it in words.
When to use Prompt Image Editing
Use prompt editing when the change affects the whole image or when you can’t easily draw a mask for it. “Make this photo look like it was taken at sunset” or “zoom out and show more of the scene” — these are global transformations that don’t map to a specific region. The AI re-interprets the entire image through your prompt.
The tradeoff: you have less control over which pixels change. The AI might alter areas you wanted to keep. For targeted edits, inpainting wins.
When to use Object Removal
Use object removal when you just want something gone and don’t care what replaces it. No mask drawing, no prompt writing — upload, click, done. The AI detects the unwanted object, erases it, and fills in the background automatically.
It’s the fastest of the three, but the least flexible. You can’t tell it what to put in place of the removed object — it always fills with a plausible background. If you need a specific replacement, use inpainting instead.
Try It
Open the inpaint tool, upload a photo, paint the mask, write your prompt, and see the result. You can also inpaint inside AI Chat as part of a multi-step editing workflow.
Browse more results in the inpainting gallery.